crwdns2933423:0crwdne2933423:0

Reemplazo de la pantalla del Google Pixel 9a

crwdns2936315:0crwdne2936315:0
crwdns2936331:0crwdne2936331:0
crwdns2931653:020crwdne2931653:0
Google Pixel 9a Screen Replacement, Clean the frame: crwdns2935265:00crwdnd2935265:01crwdnd2935265:02crwdne2935265:0 Google Pixel 9a Screen Replacement, Clean the frame: crwdns2935265:00crwdnd2935265:02crwdnd2935265:02crwdne2935265:0
Clean the frame
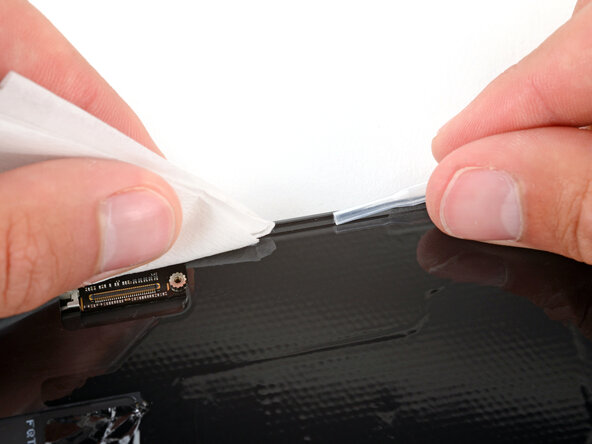
  • Take your time during this step. A clean frame allows replacement adhesive to lay totally flat, ensuring a better bond.

  • Use a spudger and tweezers to scrape up and remove any screen adhesive from the perimeter of the frame.

  • Most of the adhesive should have stayed on the screen during removal, so there may not be any adhesive to remove.

  • Using some high‑concentration (>90%) isopropyl alcohol and a lint‑free cloth (or coffee filter), clean the areas of the frame where the adhesive was.

  • Be careful not to damage the silver foam pads around the perimeter of the phone.

  • Wait for any alcohol to dry completely before continuing.

Tómate tu tiempo durante este paso. Un marco limpio permite que el adhesivo de reemplazo quede totalmente plano, lo que garantiza una mejor unión.

Usa un spudger y unas pinzas para raspar y eliminar cualquier resto de adhesivo de la pantalla del perímetro del marco.

La mayor parte del adhesivo debería haberse quedado en la pantalla durante la extracción, por lo que es posible que no haya ningún adhesivo que eliminar.

Con alcohol isopropílico de alta concentración (>90 %) y un paño sin pelusa (o un filtro de café), limpia las áreas del marco donde estaba el adhesivo.

Ten cuidado de no dañar las almohadillas de espuma plateadas alrededor del perímetro del teléfono.

Espera a que el alcohol se seque completamente antes de continuar.

crwdns2944171:0crwdnd2944171:0crwdnd2944171:0crwdnd2944171:0crwdne2944171:0