crwdns2933423:0crwdne2933423:0

Valve Index - Akkuwechsel am rechten Controller

crwdns2936315:0crwdne2936315:0
crwdns2936319:0crwdne2936319:0
crwdns2931653:04crwdne2931653:0
Valve Index Controller Right Index Controller Battery Replacement, Remove the adhesive, then the battery: crwdns2935265:00crwdnd2935265:01crwdnd2935265:03crwdne2935265:0 Valve Index Controller Right Index Controller Battery Replacement, Remove the adhesive, then the battery: crwdns2935265:00crwdnd2935265:02crwdnd2935265:03crwdne2935265:0 Valve Index Controller Right Index Controller Battery Replacement, Remove the adhesive, then the battery: crwdns2935265:00crwdnd2935265:03crwdnd2935265:03crwdne2935265:0
Remove the adhesive, then the battery
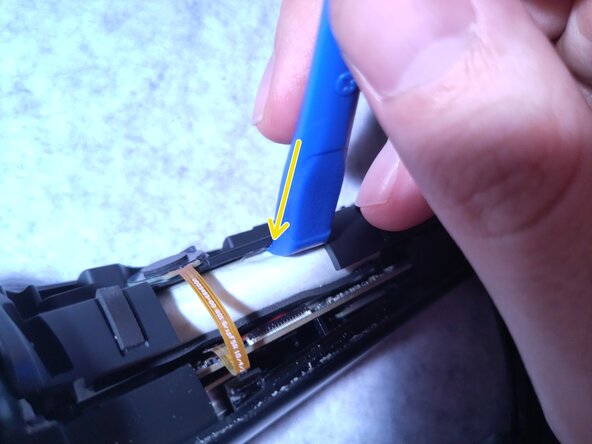
  • The battery is securely adhesed to the housing; use a hairdryer or hot air gun at moderate heat for 10 seconds to loosen the adhesive.

  • Use a plastic guitar pick or spudger to separate the adhesive from the plastic housing. There should be less resistance; if it's still not budging, re-warm the area and try again.

  • Do NOT use a sharp, metal object; this will risk puncturing the battery and causing a fire!

  • This adhesive is very tough, lasting several years. Be patient cutting through.

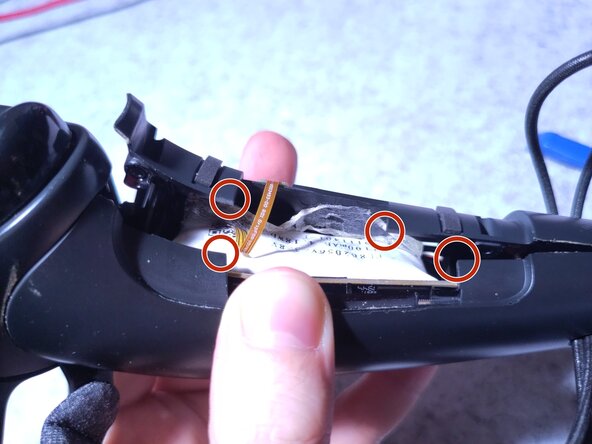
  • Once the adhesive is freed, separate the controller apart more to handle the battery, and remove it from the main handle.

  • The battery is plugged into the printed circuit board via an MX2 connector.

  • Be careful when removing! The inside chamber holding the battery has several sharp corners that could puncture the battery, and cause a fire!

Der Akku ist fest am Gehäuse verklebt. Verwende einen Föhn oder eine Heißluftpistole auf mittlerer Hitze für etwa 10 Sekunden, um den Kleber zu lösen.

Nutze ein Kunststoffplektrum oder einen Spudger, um den Kleber vorsichtig vom Kunststoffgehäuse zu trennen. Es sollte nun weniger Widerstand geben – wenn sich nichts bewegt, erwärme die Stelle erneut und versuche es noch einmal.

Verwende KEIN SCHARFES Metallwerkzeug! Das könnte die Batterie durchstechen und einen Brand verursachen!

Der verwendete Kleber ist sehr stark und kann über viele Jahre halten – sei geduldig beim Lösen.

Sobald der Kleber gelöst ist, öffne den Controller weiter, um den Akku besser greifen zu können, und entferne ihn aus dem Hauptgriff.

Der akkz ist über einen MX2-Stecker mit der Leiterplatte verbunden.

Sei besonders vorsichtig beim Entfernen! Die innere Kammer, in der die Batterie sitzt, hat mehrere scharfe Ecken, die die Batterie beschädigen und einen Brand auslösen könnten!

crwdns2944171:0crwdnd2944171:0crwdnd2944171:0crwdnd2944171:0crwdne2944171:0