crwdns2933423:0crwdne2933423:0

Valve Index - Akkuwechsel am rechten Controller

crwdns2936315:0crwdne2936315:0
crwdns2936319:0crwdne2936319:0
crwdns2931653:03crwdne2931653:0
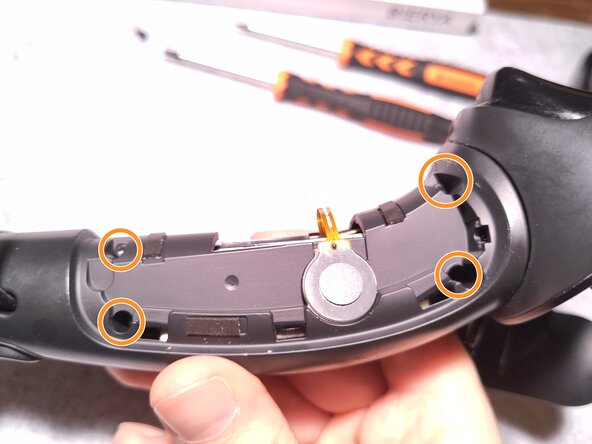
Valve Index Controller Right Index Controller Battery Replacement, Unscrew the housing: crwdns2935265:00crwdnd2935265:01crwdnd2935265:03crwdne2935265:0 Valve Index Controller Right Index Controller Battery Replacement, Unscrew the housing: crwdns2935265:00crwdnd2935265:02crwdnd2935265:03crwdne2935265:0 Valve Index Controller Right Index Controller Battery Replacement, Unscrew the housing: crwdns2935265:00crwdnd2935265:03crwdnd2935265:03crwdne2935265:0
Unscrew the housing
  • Unscrew one (1) Torx T9 screw on the side top.

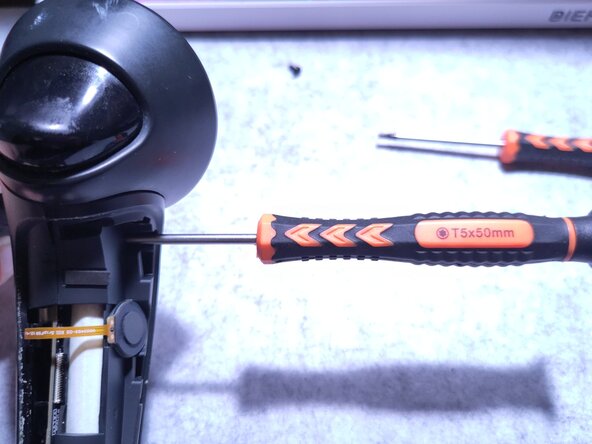
  • Unscrew four (4) Torx T5 screws around the side of the housing.

  • The Torx screwdriver needs a long, narrow extension; the screws are in deep inserts.

  • After all five (5) screws are removed, use a rigid spudger to pry open the battery housing from the controller handle.

Drehe eine (1) Torx-T9-Schraube an der oberen Seitenkante heraus.

Drehe anschließend vier (4) Torx-T5-Schrauben rund um die Seiten des Gehäuses heraus.

Du benötigst einen Torx-Schraubendreher mit einer langen, schmalen Verlängerung, da die Schrauben tief in Einsätzen sitzen.

Sobald alle fünf (5) Schrauben entfernt wurden, verwende einen stabilen Spudger, um das Akkugehäuse vorsichtig vom Griff des Controllers abzuhebeln.

crwdns2944171:0crwdnd2944171:0crwdnd2944171:0crwdnd2944171:0crwdne2944171:0