crwdns2933423:0crwdne2933423:0

Desmontaje de la amoladora angular Bauker PGA115G1.2

crwdns2936315:0crwdne2936315:0
crwdns2936331:0crwdne2936331:0
crwdns2931653:015crwdne2931653:0
Disassembling Bauker PGA115G1.2 Angle grinder, Remove the stator: continued.: crwdns2935265:00crwdnd2935265:01crwdnd2935265:02crwdne2935265:0 Disassembling Bauker PGA115G1.2 Angle grinder, Remove the stator: continued.: crwdns2935265:00crwdnd2935265:02crwdnd2935265:02crwdne2935265:0
Remove the stator: continued.
  • To remove the stator from the case, it will almost certainly be necessary to use some sort of tool. It might be possible to use some sort of hook, but I decided to try to tap it out from the rear.

  • However it is vital only to apply taps/force to the laminations away from the winding. The case has some small slots where the brushes fit, and those are directly above sections of laminations.

  • I improvised a simple tool by cutting a short section of an almost rectangular rod from an old ventian blind mechanism. That rod has just the right cross section. The picture shows it inserted into one of the holes and resting against the laminations.

  • It only needed a few light taps each side to drive out the stator.

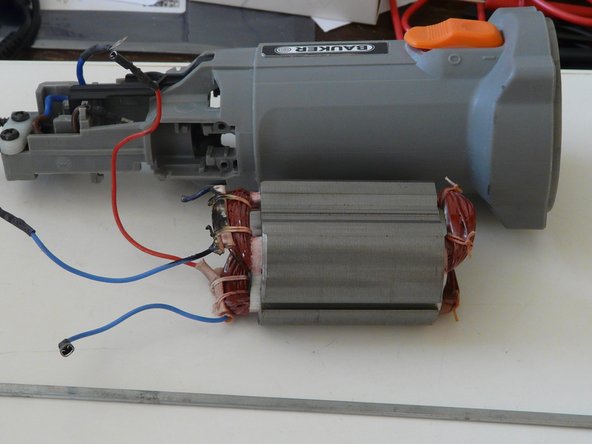
  • The second picture shows the stator removed from the case, and part of the rod in front. The picture has had to be cropped so only a portion is visible.

  • The stator had suffered damage: most obviously the severed lead, but also blackening in the adjacent area and on the other lead. But the coil was intact, and the lead could be repaired

Para quitar el estator de la caja, casi con toda seguridad será necesario utilizar algún tipo de herramienta. Puede ser posible utilizar algún tipo de gancho, pero decidí intentar golpearlo desde atrás.

Sin embargo, es vital aplicar golpes/fuerza sólo a las láminas alejadas del bobinado. La caja tiene algunas ranuras pequeñas donde encajan las escobillas, y están directamente encima de secciones de láminas.

Improvisé una herramienta sencilla cortando una sección corta de una varilla casi rectangular de un antiguo mecanismo de persiana veneciana. Esa varilla tiene la sección transversal justa. La imagen la muestra insertada en uno de los agujeros y apoyada contra las láminas.

Solo se necesitaron unos pocos golpes suaves en cada lado para sacar el estator.

La segunda imagen muestra el estator extraído de la caja y parte de la varilla en el frente. La imagen tuvo que ser recortada para que solo se vea una parte.

El estator había sufrido daños: el más obvio fue el cable cortado, pero también ennegrecimiento en el área adyacente y en el otro cable. Pero la bobina estaba intacta y el cable podía repararse.

crwdns2944171:0crwdnd2944171:0crwdnd2944171:0crwdnd2944171:0crwdne2944171:0