crwdns2931527:0crwdnd2931527:0crwdnd2931527:0crwdnd2931527:0crwdne2931527:0
crwdns2935425:05crwdne2935425:0
crwdns2931653:05crwdne2931653:0

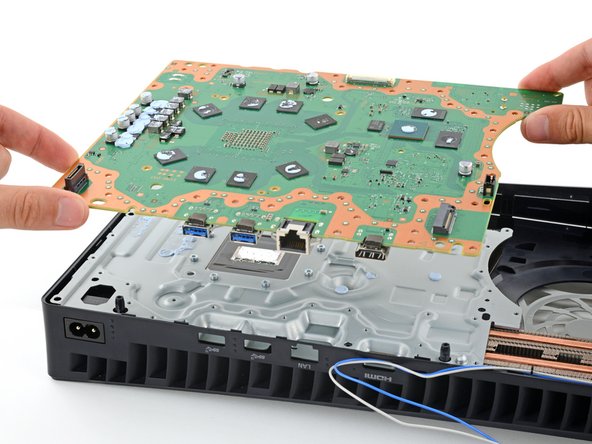


Remove the main board
-
Remove the main board, flip it over, and carefully lay it on a clean work surface, so the APU is facing up.
-
Make sure all cables that connect to the board are out of the way so they don't get trapped underneath.
-
Carefully flip the board over so the APU is on the bottom, making sure no liquid metal spills.
-
Keep the board level and lower it into place.
crwdns2944171:0crwdnd2944171:0crwdnd2944171:0crwdnd2944171:0crwdne2944171:0