crwdns2935425:06crwdne2935425:0
crwdns2931653:06crwdne2931653:0


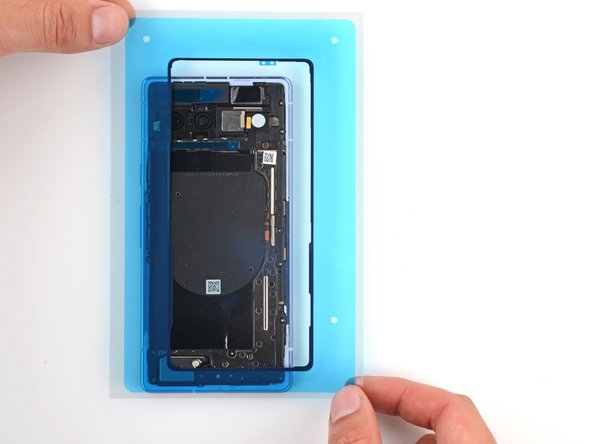


Orient the rear cover perimeter adhesive
-
Orient your replacement adhesive over the frame so that its pull tabs are in the upper right corner.
crwdns2944171:0crwdnd2944171:0crwdnd2944171:0crwdnd2944171:0crwdne2944171:0