crwdns2935425:03crwdne2935425:0
crwdns2931653:03crwdne2931653:0

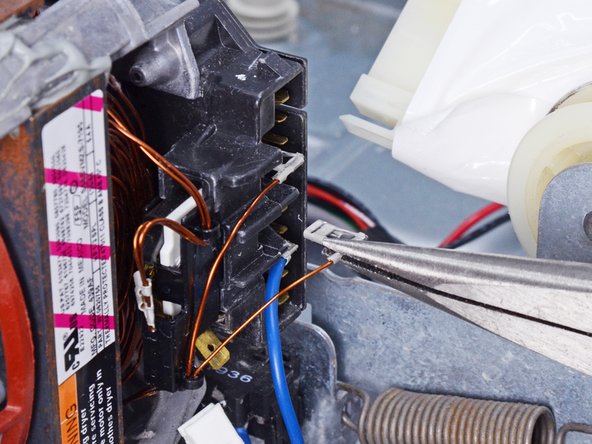


Test the start winding
-
Disconnect the wire that is connected to the start winding that you located on the schematic. On this machine, it is aligned with terminal 3.
-
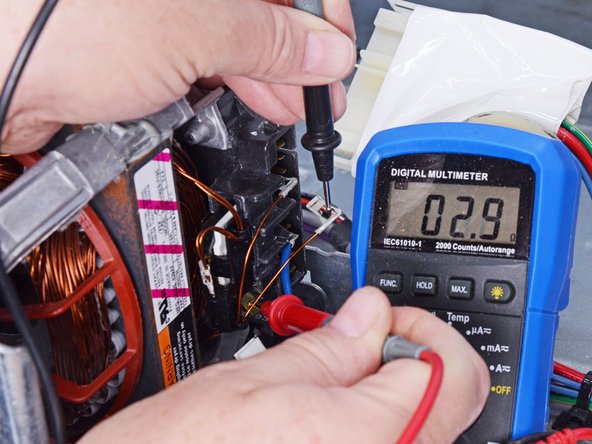
Measure the resistance from the start winding wire to the common terminal shared between the start and run windings. Use the lowest resistance setting (usually Rx1) on your multimeter if you need to set it manually.
crwdns2944171:0crwdnd2944171:0crwdnd2944171:0crwdnd2944171:0crwdne2944171:0