crwdns2933423:0crwdne2933423:0

Google Pixel Buds A-Series Motherboard tauschen

crwdns2936315:0crwdne2936315:0
crwdns2936319:0crwdne2936319:0
crwdns2931653:04crwdne2931653:0
Google Pixel Buds A-Series Mainboard Replacement, Opening the top half: crwdns2935265:00crwdnd2935265:01crwdnd2935265:02crwdne2935265:0 Google Pixel Buds A-Series Mainboard Replacement, Opening the top half: crwdns2935265:00crwdnd2935265:02crwdnd2935265:02crwdne2935265:0
Opening the top half
  • If you're interested in taking apart the top half, I've added some more steps. Otherwise, just replace your main board and put it back together.

  • On my second case, it had an issue preventing it from detecting if the top was opened or closed, presumably causing the battery to drain because it never went to sleep.

  • To get at the top section, remove the two screws on either side of the battery.

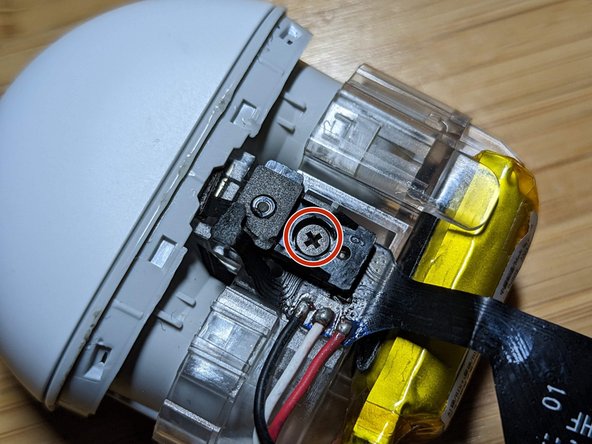
  • Next remove the screw holding cover for the LED and remove the cover. This step is probably optional.

Wenn du auch noch die obere Gehäusehälfte zerlegen möchtest, schaue dir die folgenden Schritte an. Anderenfalls kannst du die Platine austauschen und das Gehäuse wieder zusammenzubauen.

Es stand noch ein zweites Gehäuse zur Verfügung, das aber nicht mehr erkennen konnte, ob das Gehäuse offen oder geschlossen war. Wahrscheinlich lief deswegen der Akku immer wieder sehr schnell leer, der Ruhemodus wurde nie erreicht.

Um an das obere Teil zu gelangen, entferne beide Schrauben seitlich am Akku.

Entferne die Schraube mit der die Abdeckung der LED befestigt ist. Entferne die Abdeckung. Unbedingt notwendig ist dieser Schritt nicht.

crwdns2944171:0crwdnd2944171:0crwdnd2944171:0crwdnd2944171:0crwdne2944171:0