crwdns2933423:0crwdne2933423:0

iPad 9 (2021) Display und Touch-Glas (WiFi & Cellular) tauschen

crwdns2936315:0crwdne2936315:0
crwdns2936319:0crwdne2936319:0
crwdns2931653:05crwdne2931653:0
iPad 9 (2021) Screen and Touch Glass (WiFi & Cellular) Replacement, removing a damaged screen and display - step #3: crwdns2935265:00crwdnd2935265:01crwdnd2935265:03crwdne2935265:0 iPad 9 (2021) Screen and Touch Glass (WiFi & Cellular) Replacement, removing a damaged screen and display - step #3: crwdns2935265:00crwdnd2935265:02crwdnd2935265:03crwdne2935265:0 iPad 9 (2021) Screen and Touch Glass (WiFi & Cellular) Replacement, removing a damaged screen and display - step #3: crwdns2935265:00crwdnd2935265:03crwdnd2935265:03crwdne2935265:0
removing a damaged screen and display - step #3
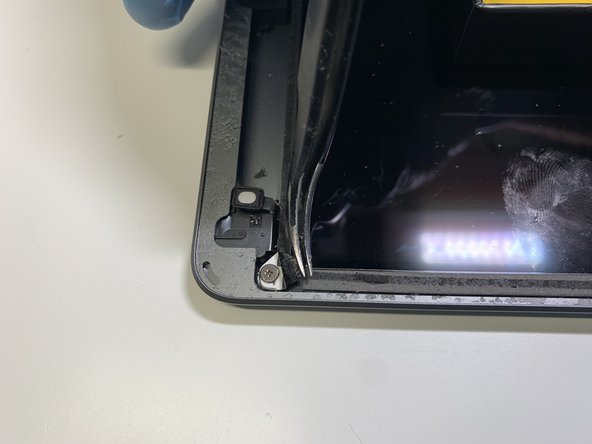
  • the northern screws are covered by isolator tape. Gently peel off (do not tear it - you will need it) until the screw is exposed. South screws may be covered by the black glue, don't worry about it. Just unscrew the screws - the glue will give slightly.

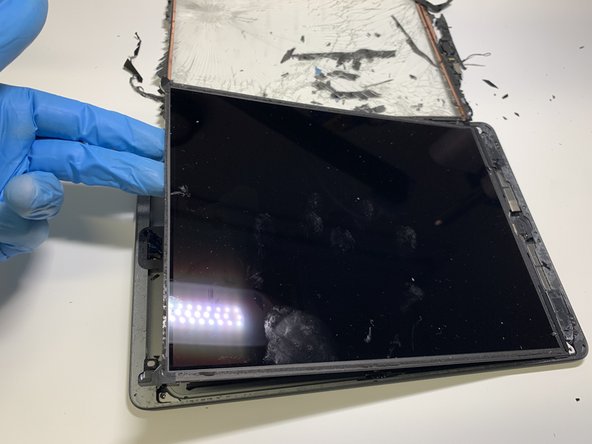
  • unscrewed matrix (4 screws) slightly lift it by the northern edge. Pay attention to the signal tapes connected to the motherboard

Die oberen Schrauben sind mit Isolierband abgedeckt. Zieh es vorsichtig ab (reiße es nicht ab - du brauchst es noch), bis die Schraube freigelegt ist. Die unteren Schrauben können durch den schwarzen Kleber verdeckt sein, mach dir darüber aber keine Gedanken. Drehe die Schrauben einfach heraus - der Kleber wird leicht nachgeben.

Hebe die abgeschraubte Matrix (4 Schrauben) an den oberen Kante etwas an. Achte auf die Datenkabel, die mit der Hauptplatine verbunden sind.

crwdns2944171:0crwdnd2944171:0crwdnd2944171:0crwdnd2944171:0crwdne2944171:0