crwdns2933423:0crwdne2933423:0

Google Pixel 3 スクリーンアセンブリの交換

crwdns2936315:0crwdne2936315:0
crwdns2936323:0crwdne2936323:0
crwdns2931653:011crwdne2931653:0
Google Pixel 3 Screen Assembly Replacement, Loosen the pull tab: crwdns2935265:00crwdnd2935265:01crwdnd2935265:03crwdne2935265:0 Google Pixel 3 Screen Assembly Replacement, Loosen the pull tab: crwdns2935265:00crwdnd2935265:02crwdnd2935265:03crwdne2935265:0 Google Pixel 3 Screen Assembly Replacement, Loosen the pull tab: crwdns2935265:00crwdnd2935265:03crwdnd2935265:03crwdne2935265:0
Loosen the pull tab
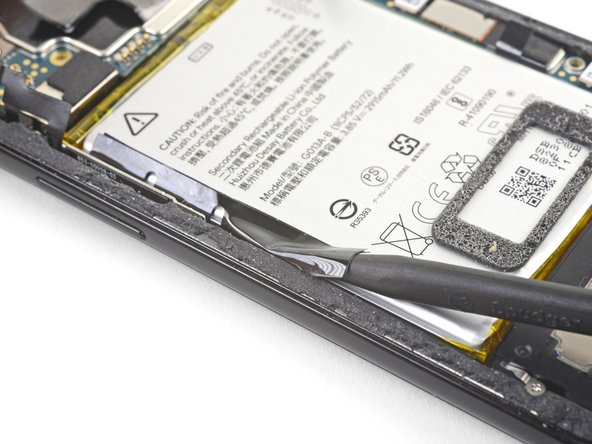
  • Insert the point of a spudger underneath the black battery pull tab on the left edge of the phone.

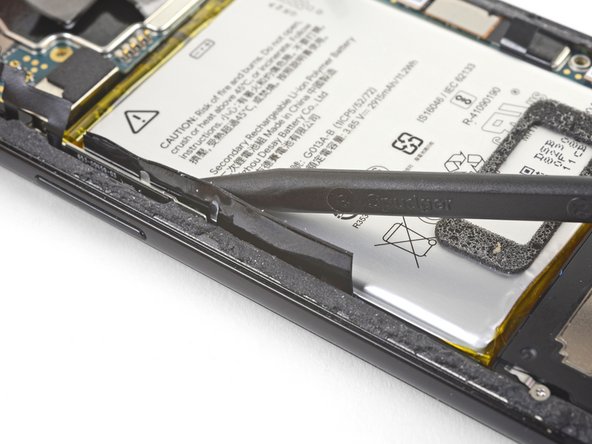
  • Slide the spudger upwards along the edge to loosen the pull tab from the battery.

  • The battery is held in place with three separate stretch adhesive strips, which are connected to a single black pull tab. You can try to pull all three strips out together, but it is easier to cut the black pull tab where it is notched and pull each strip out individually.

デバイスの左端にある黒いバッテリー用プルタブの下にスパッジャーの先を差し込みます。

スパッジャーを端に沿って上方にスライドさせ、バッテリーからプルタブを緩めます。

バッテリーは、3つのストレッチタイプの接着ストリップで固定され、それらは1つの黒いプルタブに繋がっています。3本のストリップを一緒に引き抜くこともできますが、黒いプルタブの切り欠き部分をカットして、それぞれのストリップを個別に引き抜く方が簡単です。

crwdns2944171:0crwdnd2944171:0crwdnd2944171:0crwdnd2944171:0crwdne2944171:0