crwdns2933423:0crwdne2933423:0

Reemplazo de la junta para depósito de calentamiento de Gaggia Cubika

crwdns2936315:0crwdne2936315:0
crwdns2936331:0crwdne2936331:0
crwdns2931653:06crwdne2931653:0
Gaggia Cubika Seal for the heating tank Replacement: crwdns2935265:00crwdnd2935265:01crwdnd2935265:03crwdne2935265:0 Gaggia Cubika Seal for the heating tank Replacement: crwdns2935265:00crwdnd2935265:02crwdnd2935265:03crwdne2935265:0 Gaggia Cubika Seal for the heating tank Replacement: crwdns2935265:00crwdnd2935265:03crwdnd2935265:03crwdne2935265:0
  • Install a new "o" ring (available from e.g. eBay).

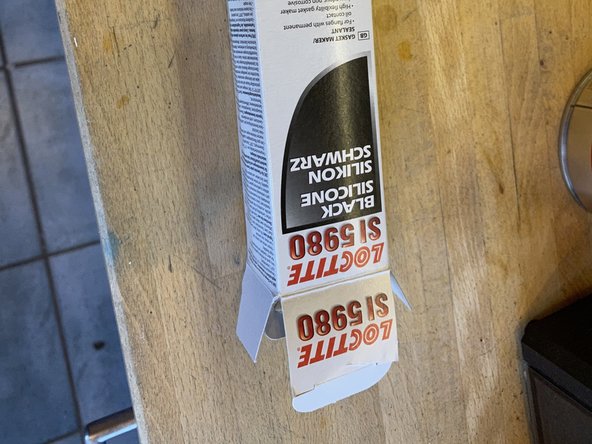
  • I added liquid gasket to make sure the pitting was not going to cause me problems. In my case I used Loctite SI 5980 which is avaialble from motoring shops. See the key photo.

  • Present the top to the bottom of the heater, there are keys so make sure it is the right way around. Gently push together, and adding the coffee press body to the bottom of the heater, put the four bolts back into the heater.

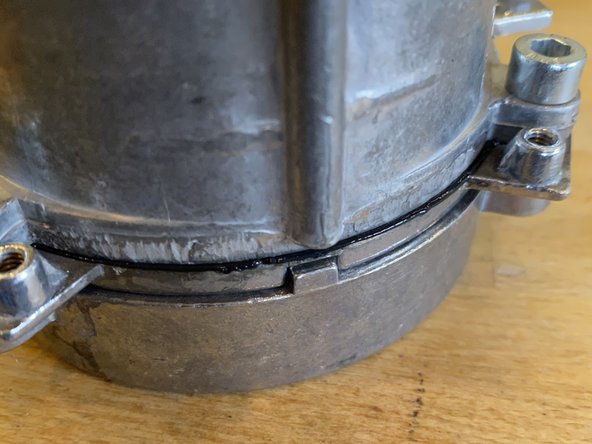
  • Tighten them up on the opposite corners. e.g. there are four bolts, say one is North, one South, East and West. Tighten the North until it grips. Then tighten South until it grips, followed by East and West. Then Tighten them up a little more. You should see a little liquid gasket come out of the joint all the way around. (photo 2)

Instala una nueva junta tórica (disponible, por ejemplo, en eBay).

Agregué una junta líquida para asegurarme de que las picaduras no me causaran problemas. En mi caso, utilicé Loctite SI 5980, que se puede conseguir en los talleres de reparación de automóviles. Mira la foto de la llave.

Coloca la parte superior en la parte inferior del calentador; hay llaves, así que asegúrate de que esté en la posición correcta. Empuja suavemente y, agregando el cuerpo de la prensa de café a la parte inferior del calentador, vuelve a colocar los cuatro pernos en el calentador.

Apriétalos en las esquinas opuestas. Por ejemplo, hay cuatro pernos, digamos que uno es el norte, uno el sur, el este y el oeste. Aprieta el norte hasta que se agarre. Luego, aprieta el sur hasta que se agarre, seguido por el este y el oeste. Luego, apriétalos un poco más.

Deberías ver un poco de junta líquida salir de la unión por todo el perímetro. (Foto 2)

crwdns2944171:0crwdnd2944171:0crwdnd2944171:0crwdnd2944171:0crwdne2944171:0