crwdns2933423:0crwdne2933423:0

Desmontaje del Hyperkin Duke

crwdns2936315:0crwdne2936315:0
crwdns2936331:0crwdne2936331:0
crwdns2931653:05crwdne2931653:0
Hyperkin Duke Teardown: crwdns2935265:00crwdnd2935265:01crwdnd2935265:03crwdne2935265:0 Hyperkin Duke Teardown: crwdns2935265:00crwdnd2935265:02crwdnd2935265:03crwdne2935265:0 Hyperkin Duke Teardown: crwdns2935265:00crwdnd2935265:03crwdnd2935265:03crwdne2935265:0
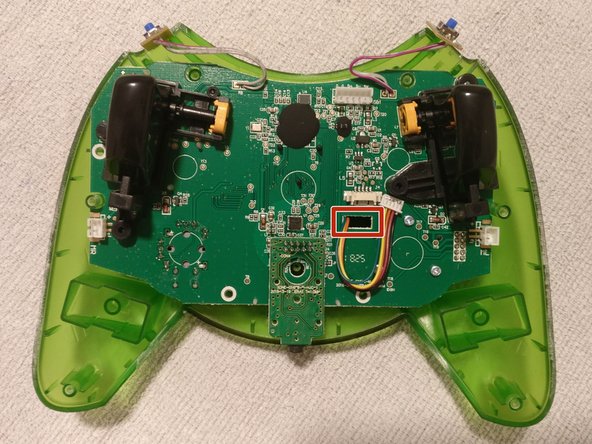
  • The left and right bumper button PCBs can be slid outwards from their holders and placed out of the way as illustrated

  • The connector towards the middle of the main PCB is for the LCD. Detach the cable from this connector.

  • Gently lift the main PCB away from the front half of the controller shell.

  • The LCD cable needs to pass through the rectangular hole in the PCB so that the PCB can be completely freed from the controller shell

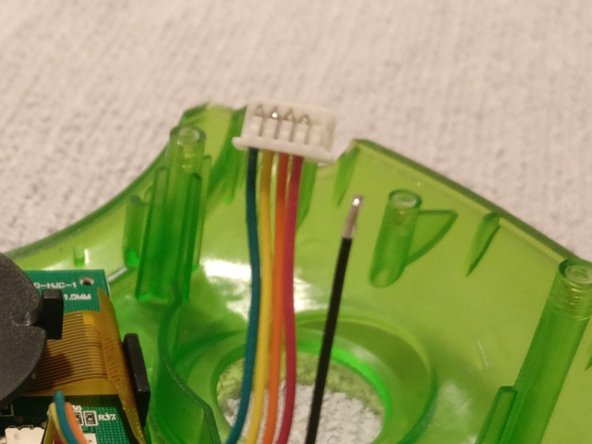
  • As seen in the picture, one of the small wires came free from the LCD connector. Taking a closer look at the pictures, the cable was never secured correctly from production, if you have issues with your Duke LCD, this might be a good place to start fault finding.

  • If this occurs to you, take note of how the other wires are installed into the connector and slide your loose wire back into the connector the same as the other wires. A click/snap should be felt once the wire has been securely placed back into the connector.

Los PCB de los botones del parachoques derecho e izquierdo pueden deslizarse hacia afuera de sus soportes y colocarse fuera del camino, como se muestra en la ilustración.

El conector hacia el medio de la PCB principal es para la pantalla LCD. Desconecta el cable de este conector.

Levanta suavemente la PCB principal para separarla de la mitad frontal de la carcasa del mando.

El cable LCD debe pasar a través del orificio rectangular en la PCB para que la PCB pueda liberarse completamente de la carcasa del mando.

Como se ve en la imagen, uno de los pequeños cables se soltó del conector LCD. Echando un vistazo más de cerca a las imágenes, el cable nunca se aseguró correctamente desde la producción, si tienes problemas contu Duke LCD, este podría ser un buen lugar para comenzar a encontrar fallos.

Si esto te ocurre, toma nota de cómo se instalan los otros cables en el conector y desliza el cable suelto nuevamente dentro del conector al igual que los otros cables. Se debe sentir un clic/chasquido una vez que el cable se haya vuelto a colocar de forma segura en el conector.

crwdns2944171:0crwdnd2944171:0crwdnd2944171:0crwdnd2944171:0crwdne2944171:0