crwdns2933423:0crwdne2933423:0

Desmontaje del Hyperkin Duke

crwdns2936315:0crwdne2936315:0
crwdns2936331:0crwdne2936331:0
crwdns2931653:06crwdne2931653:0
Hyperkin Duke Teardown, LCD assembly removal: crwdns2935265:00crwdnd2935265:01crwdnd2935265:03crwdne2935265:0 Hyperkin Duke Teardown, LCD assembly removal: crwdns2935265:00crwdnd2935265:02crwdnd2935265:03crwdne2935265:0 Hyperkin Duke Teardown, LCD assembly removal: crwdns2935265:00crwdnd2935265:03crwdnd2935265:03crwdne2935265:0
LCD assembly removal
  • The highlighted buttons can be slid out and removed

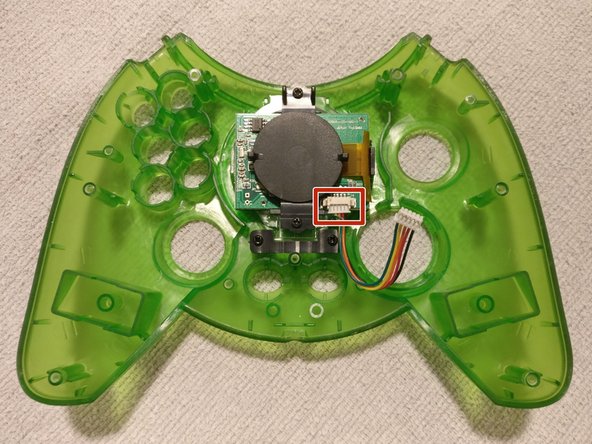
  • Detach the other end of the LCD cable from the LCD PCB connector

  • A small bracket with two screw retains the LCD to the front half of the controller.

  • Remove the two screws and bracket

Los botones resaltados se pueden deslizar y quitar

Desconecta el otro extremo del cable LCD del conector LCD PCB

Un pequeño soporte con dos tornillos retiene la pantalla LCD en la mitad frontal del controlador.

Retira los dos tornillos y el soporte.

crwdns2944171:0crwdnd2944171:0crwdnd2944171:0crwdnd2944171:0crwdne2944171:0