crwdns2933423:0crwdne2933423:0

Raptor 2 / T REX 3 Cable Chain Update

crwdns2936315:0crwdne2936315:0
crwdns2936321:0crwdne2936321:0
crwdns2931653:012crwdne2931653:0
Raptor 2 / T REX 3 Cable Chain Update, Reassembly 1d.: crwdns2935265:00crwdnd2935265:01crwdnd2935265:03crwdne2935265:0 Raptor 2 / T REX 3 Cable Chain Update, Reassembly 1d.: crwdns2935265:00crwdnd2935265:02crwdnd2935265:03crwdne2935265:0 Raptor 2 / T REX 3 Cable Chain Update, Reassembly 1d.: crwdns2935265:00crwdnd2935265:03crwdnd2935265:03crwdne2935265:0
Reassembly 1d.
  • Reinstall thermistor wires

  • A small pair of needle nose pliers may help with this step.

  • Insert thermistor wires and tighten screw terminals. Be sure to gently pull on them to make sure they are secure.

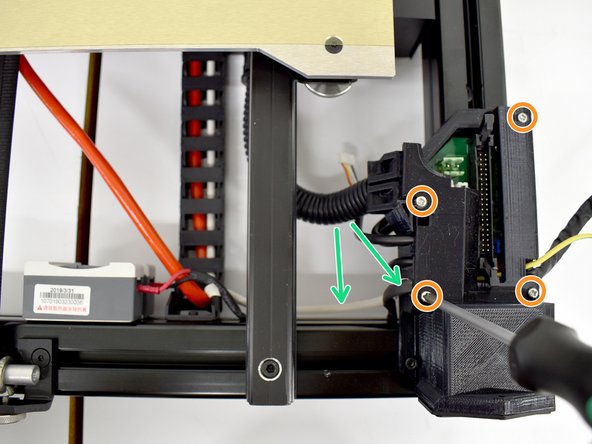
  • Install printed daughterboard cover with 4 screws.

  • Make sure cables are not pinched and push the cables back into the slot in the frame.

  • Reinstall relay connections and hardware

  • Install AC connection cover

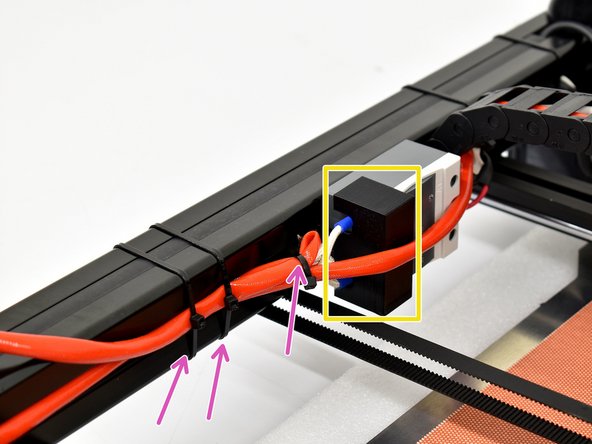
  • Cable tie power wires

crwdns2935429:0crwdne2935429:0

crwdns2935429:0crwdne2935429:0

crwdns2935429:0crwdne2935429:0

crwdns2935429:0crwdne2935429:0

crwdns2935429:0crwdne2935429:0

crwdns2935429:0crwdne2935429:0

crwdns2935429:0crwdne2935429:0

crwdns2935429:0crwdne2935429:0

crwdns2944171:0crwdnd2944171:0crwdnd2944171:0crwdnd2944171:0crwdne2944171:0