crwdns2933423:0crwdne2933423:0

Raptor 2 / T REX 3 Cable Chain Update

crwdns2936315:0crwdne2936315:0
crwdns2936321:0crwdne2936321:0
crwdns2931653:011crwdne2931653:0
Raptor 2 / T REX 3 Cable Chain Update, Reassembly 1c.: crwdns2935265:00crwdnd2935265:01crwdnd2935265:03crwdne2935265:0 Raptor 2 / T REX 3 Cable Chain Update, Reassembly 1c.: crwdns2935265:00crwdnd2935265:02crwdnd2935265:03crwdne2935265:0 Raptor 2 / T REX 3 Cable Chain Update, Reassembly 1c.: crwdns2935265:00crwdnd2935265:03crwdnd2935265:03crwdne2935265:0
Reassembly 1c.
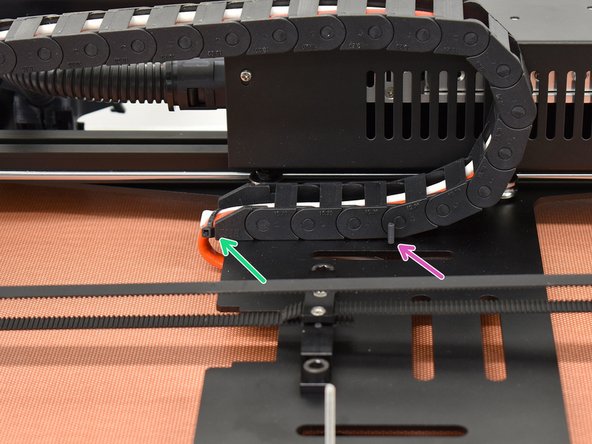
  • Resecure cables to the machine

  • Make sure you secure the cable bundle on each end of the cable chain with a cable tie.

  • Be sure to trim cable tie ends off flush so they are not sharp.

  • Tighten up the frame side chain hold down with a M2.5 hex wrench. This side uses a T Nut and you need to make sure the chain is tight to the frame before proceeding.

  • This screw triggers the end stop. Make sure you position the chain so that it is clear of this screw.

  • If the chain does not clear the screw, you may have an earlier version machine and the screw is in a different location. Go to: http://bit.ly/38haROn for help with this.

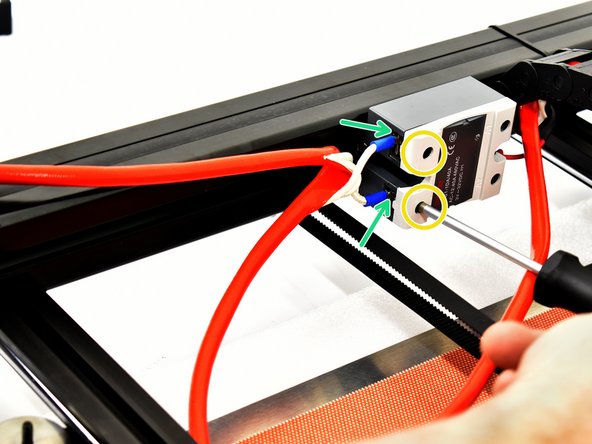
  • Reinstall bed heater connections to the relay. They are not polarity specific (side does not matter).

  • Using a #1 phillips screwdriver, tighten the screw terminals.

crwdns2935429:0crwdne2935429:0

crwdns2935429:0crwdne2935429:0

crwdns2935429:0crwdne2935429:0

crwdns2935429:0crwdne2935429:0

crwdns2935429:0crwdne2935429:0

crwdns2935429:0crwdne2935429:0

crwdns2935429:0crwdne2935429:0

crwdns2935429:0crwdne2935429:0

crwdns2944171:0crwdnd2944171:0crwdnd2944171:0crwdnd2944171:0crwdne2944171:0