crwdns2933423:0crwdne2933423:0

Zanco Tiny T1 Teardown

crwdns2936315:0crwdne2936315:0
crwdns2936319:0crwdne2936319:0
crwdns2931653:04crwdne2931653:0
Zanco Tiny T1 Teardown: crwdns2935265:00crwdnd2935265:01crwdnd2935265:03crwdne2935265:0 Zanco Tiny T1 Teardown: crwdns2935265:00crwdnd2935265:02crwdnd2935265:03crwdne2935265:0 Zanco Tiny T1 Teardown: crwdns2935265:00crwdnd2935265:03crwdnd2935265:03crwdne2935265:0
  • Opening a phone of this scale requires specialty tools. Fortunately, iFixit has got it covered.

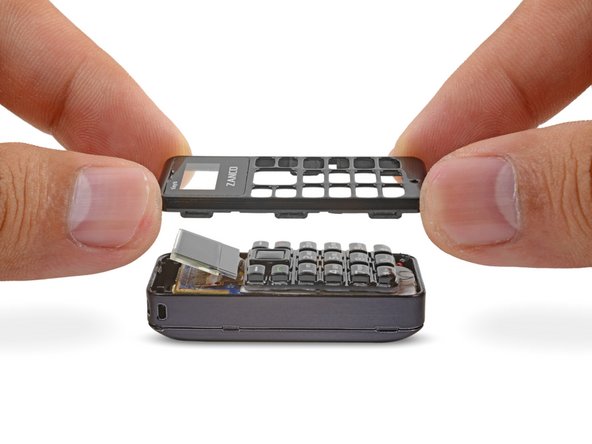
  • Despite its retro aesthetic, this opening procedure is far from obsolete. Some micro spudger action frees up the front clips, and the top plastic plate is free!

  • Unlike with some phones, we encounter no proprietary screws here.

  • We move the keypad aside and find the button pad soldered to the board beneath.

  • To supply backlight to the keypad, two white adhesive pads diffuse light from four surface-mounted LEDs underneath.

Das Öffnen eines Telefons dieser Größenordnung erfordert Spezialwerkzeuge. Glücklicherweise kann iFixit auch das abdecken.

Trotz seiner Retro-Ästhetik brauchen wir doch einen Mikrospudger, um die obere Abdeckung aus Kunststoff abzuhebeln. Sobald die vorderen Clips gelöst sind geht es aber ganz fix!

Im Gegensatz zu einigen anderen Telefonen werden beim Tiny T1 keine proprietären Schrauben verwendet.

Wir heben die Tastatur ab und entdecken die darunter liegenden Knöpfe, die mit der Platine verlötet sind.

Für die Hinerleuchtung der Tastatur sorgen zwei weiße Klebebands, die das Licht von vier LEDs streuen, die darunter montiert sind.

crwdns2944171:0crwdnd2944171:0crwdnd2944171:0crwdnd2944171:0crwdne2944171:0