crwdns2935425:02crwdne2935425:0
crwdns2931653:02crwdne2931653:0


-
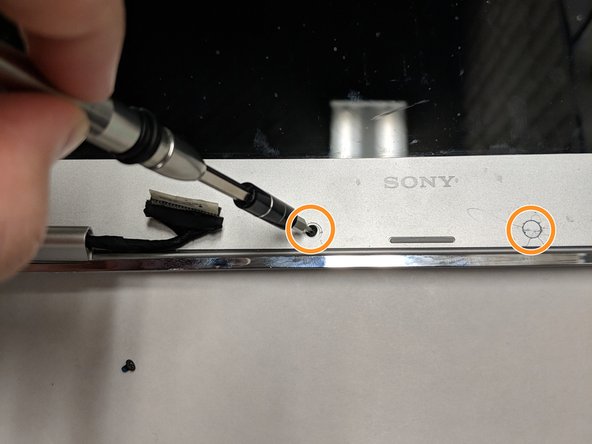
Locate the round plastic covers and pry them off with a thin pry tool or pair of tweezers to reveal two 5mm Phillips heads screws.
-
Unscrew the two 5mm Phillips head screws.
-
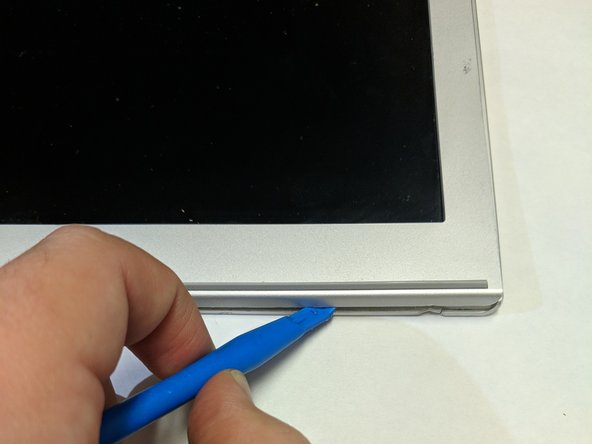
Using a prying tool, pry around the edge of the front screen panel, separating the plastic edges of the panel.
| - | [* red] Locate the round plastic covers and pry them off with a thin pry tool or pair of tweezers to reveal two 5mm Phillips heads screws. |
|---|---|
| + | [* red] Locate the round plastic covers and pry them off with a thin pry tool or pair of [product|IF145-020|tweezers] to reveal two 5mm Phillips heads screws. |
| [* orange] Unscrew the two 5mm Phillips head screws. | |
| [* black] Using a prying tool, pry around the edge of the front screen panel, separating the plastic edges of the panel. | |
| [* icon_caution] Take your time when using the prying tool as there is a possibility of damaging the plastic frame. |
crwdns2944171:0crwdnd2944171:0crwdnd2944171:0crwdnd2944171:0crwdne2944171:0