crwdns2933423:0crwdne2933423:0

Remplacement de l’écran du Sony Vaio SVT131A11L

crwdns2935425:01crwdne2935425:0

crwdns2936315:0crwdne2936315:0
crwdns2936317:0crwdne2936317:0
crwdns2931653:01crwdne2931653:0
Sony Vaio SVT131A11L Display Replacement: crwdns2935265:00crwdnd2935265:01crwdnd2935265:02crwdne2935265:0 Sony Vaio SVT131A11L Display Replacement: crwdns2935265:00crwdnd2935265:02crwdnd2935265:02crwdne2935265:0
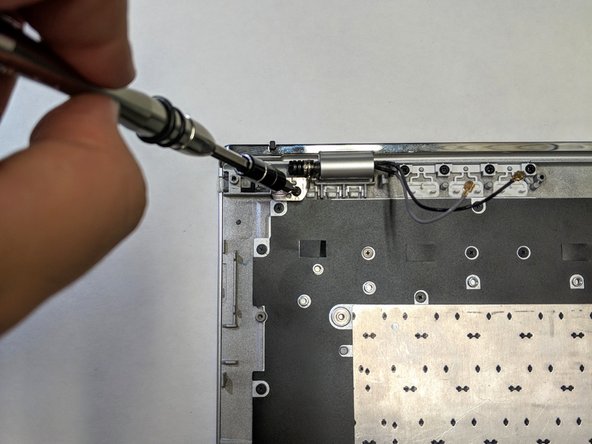
  • Unscrew the two 5mm Phillips head screws that secure the two display hinges to the back panel of the laptop.

  • Carefully lift the metal hinges that secure the top panel to the bottom panel of the laptop.

  • This will take a bit of force if you're lifting the hinges directly. We've found that lifting the bottom panel of the laptop as a whole gives a bit more leverage and makes this step easier.

  • Slowly slide the bottom panel of the laptop out from under the metal hinges. Your display panel will now be separated from the rest of your device.

Dévissez les deux vis à tête cruciformes de 5 mm qui maintiennent les deux charnières de l’écran à la partie inférieure du boîtier de l’ordinateur portable.

Soulevez prudemment les charnières en métal qui maintiennent le haut de l’écran à la partie inférieure du boîtier de l’ordinateur portable.

Cela nécessitera un peu de force si vous soulevez directement les charnières. Nous avons remarqué que soulever la partie inférieure du boîtier de l’ordinateur portable en entier augmentait le bras de levier et rendait cette étape plus facile.

Faites glisser lentement la partie inférieure du boîtier de l'ordinateur portable en l’éloignant des charnières en métal. Votre écran sera maintenant séparé du reste de l’appareil.

crwdns2944171:0crwdnd2944171:0crwdnd2944171:0crwdnd2944171:0crwdne2944171:0