crwdns2915892:0crwdne2915892:0
This is a prerequisite-only guide to replace the battery in an iPhone 8.
This guide instructs you to fully detach the display assembly; this is intended to prevent accidental damage to the display cables. If you feel comfortable removing the battery without putting undue strain on the display cables, you can skip the steps for detaching the display. Additionally, while it’s possible to remove the adhesive strips securing the battery as soon as you open the phone, this guide recommends first removing the Taptic Engine. Doing so reduces the risk of breaking the lower adhesive strips accidentally, either by snagging them on the Taptic Engine, or by pulling the strips at too sharp of an angle.
For optimal performance after completing this guide, calibrate your newly installed battery: Drain it below 10%, then charge it uninterrupted to 100%.
Opening the iPhone 8 will damage the waterproof seals on the display. If you do not replace the adhesive seals, your phone will function normally, but will no longer be water-resistant.
crwdns2942213:0crwdne2942213:0
-
-
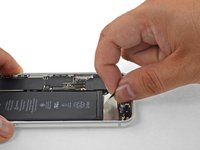
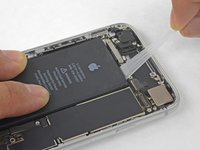
Each piece of adhesive has a black pull-tab at the end, which is lightly adhered to the front surface of the battery.
-
-
crwdns2935267:0crwdne2935267:0Tweezers$4.99
-
Peel back the first battery adhesive tab from the bottom right edge of the battery.
-
-
-
-
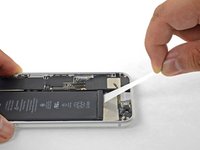
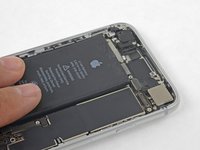
Slowly pull one battery adhesive tab away from the battery, towards the bottom of the iPhone.
-
Pull steadily, maintaining constant tension on the strip until it slips out from between the battery and the rear case. For best results, pull the strip at as low an angle as possible, without snagging it on any of the iPhone's other components.
-
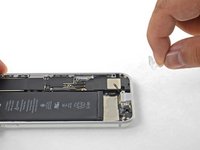
If the battery adhesive tabs break during the removal process, use your fingers or blunt tweezers to retrieve the remaining length of adhesive, and continue pulling.
-
-
-
Repeat the above steps to remove the remaining three adhesive strips.
-
If you removed all of the adhesive strips successfully, skip the next step.
-
-
-
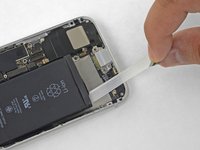
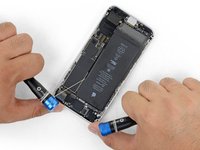
Pull the string from side to side in a sawing motion all along the length of the battery to separate the adhesive. Do not deform or damage the battery.
-
-
-
Remove the battery from the iPhone.
-
Adhere the battery, disconnect it, and continue reassembling your device.
-


To reassemble your device, follow the above steps in reverse order.
Take your e-waste to an R2 or e-Stewards certified recycler.
Repair didn’t go as planned? Check out our Answers community for troubleshooting help.
To reassemble your device, follow the above steps in reverse order.
Take your e-waste to an R2 or e-Stewards certified recycler.
Repair didn’t go as planned? Check out our Answers community for troubleshooting help.
crwdns2935221:0crwdne2935221:0
crwdns2935227:0crwdne2935227:0

