crwdns2933423:0crwdne2933423:0

iPhone 6 Plus Screen Replacement

crwdns2942213:0crwdne2942213:0

crwdns2936621:0crwdne2936621:0

  1. iPhone 6 Plus Screen Replacement, Pentalobe Screws: crwdns2935265:01crwdnd2935265:01crwdnd2935265:01crwdne2935265:0
    • Before disassembling your iPhone, discharge the battery below 25%. A charged lithium-ion battery can catch fire and/or explode if accidentally punctured.

    • Power off your iPhone before beginning disassembly.

    • Remove the two 3.6 mm P2 Pentalobe screws next to the Lightning connector.

    I prefer to remove the SIM card as the very first step since it's safer to do so while the phone is fully assembled.

    estebanfallasf - crwdns2934203:0crwdne2934203:0

    I stripped one of the two screws - at a dead stop.

    Margaret Patterson - crwdns2934203:0crwdne2934203:0

    Before you even start: get the iOpener or hairdryer out. You’ll need it

    GPZ - crwdns2934203:0crwdne2934203:0

    If a lightning connector won’t provide a charge or needs to be wiggled carefully to provide a charge, power off the device, then try using precision tweezers to scrape the innermost wall of the lightning jack in a pinching motion to check for lint buildup. Pocket lint or other debris can accumulate inside the jack, compacting each time a cable is inserted. This can prevent a lightning cable from seating fully. Clearing the lint may restore functionality without replacing the part.

    Andrew Dolan - crwdns2934203:0crwdne2934203:0

    A few hints:

    * heating up the phone works great. I used a heating pad that you put in the microwave to heat sports injuries.

    * also, I made a sheet to help you keep track of the screws as you remove them. Print out the page, then place double sided tape below each color-coded listing of screws, and stick the screws to the tape as you disassemble. This helps prevent losing the screws and keeps track of what screws are what for easier reassembly. https://drive.google.com/file/d/1pLSvKvB...

    Paul Faulstich - crwdns2934203:0crwdne2934203:0

    Additional hints, for anyone who needs them:

    * stick the screws to the tape in the same positions as they are shown in the guide. This will make it easier to identify them during reassembly.

    * if the screws get mixed together, the ‘mm’ (millimetre, millimeter) measurements given in the guide can be used to identify them. Compare the lengths of the threaded shafts to each other to determine which screw is which.

    Friendly Advice -

  2. iPhone 6 Plus Screen Replacement, Taping Over The Display: crwdns2935265:02crwdnd2935265:01crwdnd2935265:03crwdne2935265:0 iPhone 6 Plus Screen Replacement, Taping Over The Display: crwdns2935265:02crwdnd2935265:02crwdnd2935265:03crwdne2935265:0 iPhone 6 Plus Screen Replacement, Taping Over The Display: crwdns2935265:02crwdnd2935265:03crwdnd2935265:03crwdne2935265:0
    • If your display glass is cracked, keep further breakage contained and prevent bodily harm during your repair by taping over the glass.

    • Lay overlapping strips of clear packing tape over the iPhone's display until the whole face is covered.

    • This will keep glass shards contained and provide structural integrity when prying and lifting the display.

    • Wear safety glasses to protect your eyes from any glass shaken free during the repair.

    • If the broken glass makes it difficult to get a suction cup to stick in the next few steps, try folding a strong piece of tape (such as duct tape) into a handle and lifting the display with that instead.

  3. iPhone 6 Plus Screen Replacement, Anti-Clamp instructions: crwdns2935265:03crwdnd2935265:01crwdnd2935265:03crwdne2935265:0 iPhone 6 Plus Screen Replacement, Anti-Clamp instructions: crwdns2935265:03crwdnd2935265:02crwdnd2935265:03crwdne2935265:0 iPhone 6 Plus Screen Replacement, Anti-Clamp instructions: crwdns2935265:03crwdnd2935265:03crwdnd2935265:03crwdne2935265:0
    crwdns2935267:0crwdne2935267:0
    Anti-Clamp
    $24.95
    crwdns2942207:0crwdne2942207:0
    • The next two steps demonstrate the Anti-Clamp, a tool we designed to make the opening procedure easier. If you aren't using the Anti-Clamp, skip down three steps for an alternate method.

    • For complete instructions on how to use the Anti-Clamp, check out this guide.

    • Pull the blue handle backwards to unlock the Anti-Clamp's arms.

    • Slide the arms over either the left or right edge of your iPhone.

    • Position the suction cups near the bottom edge of the iPhone just above the home button—one on the front, and one on the back.

    • Squeeze the cups together to apply suction to the desired area.

    • If you find that the surface of your iPhone is too slippery for the Anti-Clamp to hold onto, you can use tape to create a grippier surface.

  4. iPhone 6 Plus Screen Replacement: crwdns2935265:04crwdnd2935265:01crwdnd2935265:03crwdne2935265:0 iPhone 6 Plus Screen Replacement: crwdns2935265:04crwdnd2935265:02crwdnd2935265:03crwdne2935265:0 iPhone 6 Plus Screen Replacement: crwdns2935265:04crwdnd2935265:03crwdnd2935265:03crwdne2935265:0
    • Pull the blue handle forwards to lock the arms.

    • Turn the handle clockwise 360 degrees or until the cups start to stretch.

    • Make sure the suction cups remain aligned with each other. If they begin to slip out of alignment, loosen the suction cups slightly and realign the arms.

    • Insert an opening pick or tool under the screen when the Anti-Clamp creates a large enough gap.

    • If the Anti-Clamp doesn't create a sufficient gap, rotate the handle a quarter turn.

    • Don't crank more than a quarter turn at a time, and wait a few seconds between turns. Let the Anti-Clamp and time do the work for you.

    • Skip the next three steps.

    Use clear nontextured tape place that over the phone screen. Refer to any guide that addresses replacing a shattered screen

    Abigail Cherry - crwdns2934203:0crwdne2934203:0

    I know it's tough with cracked glass. You just need enough to get in a plstic pry tool or guitar pick. Then you can pry it apart. Just be patient, I cannot stress that enough; the electronics are very, very small and fragile.

    Mike - crwdns2934203:0crwdne2934203:0

  5. iPhone 6 Plus Screen Replacement, Front Panel Assembly: crwdns2935265:05crwdnd2935265:01crwdnd2935265:01crwdne2935265:0
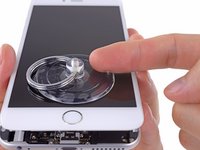
    • Use a single suction cup to lift the front panel:

    • Press a suction cup onto the screen, just above the home button.

    • Be sure the cup is pressed securely onto the screen to get a tight seal.

    • If your display is badly cracked, covering it with a layer of clear packing tape may allow the suction cup to adhere. Alternatively, very strong tape may be used instead of the suction cup. If all else fails, you can superglue the suction cup to the broken screen.

    Avec la ventouse, l’ouverture est brutale, tout s’est déclipsé d’un seul coup. Faire attention.

    Paul Briffaut - crwdns2934203:0crwdne2934203:0

    English Please!

    tom mozeleski -

    With the sucker, the opening is brutal, everything was cleared at once. Pay attention. (Paul’s comment translated by Google)

    Steve Schlotter - crwdns2934203:0crwdne2934203:0

    May need to burp the sticker before it sticks. Need to let the air out. Once Idid that, no problem. Except it was still hard to get the cover to start up.

    Patricia Tucker - crwdns2934203:0crwdne2934203:0

    Don’t waste your time with the suction cup - it doesn’t work! insert the blade of a box cutter just below the lower screen edge below the home button and gently pry just enough to start cracking the seal.

    Stephen Smith - crwdns2934203:0crwdne2934203:0

  6. iPhone 6 Plus Screen Replacement: crwdns2935265:06crwdnd2935265:01crwdnd2935265:01crwdne2935265:0
    • While holding the iPhone down with one hand, pull up on the suction cup to slightly separate the front panel assembly from the rear case.

    • Take your time and apply firm, constant force. The display assembly is a much tighter fit than most devices.

    • Using a plastic opening tool, begin to gently pry the rear case down, away from the display assembly, while continuing to pull up with the suction cup.

    • There are several clips attaching the front panel assembly to the rear case, so you may need to use a combination of the suction cup and plastic opening tool to free the front panel assembly.

    Be extra careful here. If you don’t take your time, your front panel may jerk back on you, causing you to overextend and break the front camera/mic flex cable; happened to me. Slowly peel back the front panel, opening it no more than 90º.

    Thomas - crwdns2934203:0crwdne2934203:0

    watch out for the left side of the phone the adhesive bunches up around the inner clips, i didn’t realize it and the upper left of my screen cracked pretty bad. But this guide is awesome follow every direction to the letter

    Aaron Fitzpatrick - crwdns2934203:0crwdne2934203:0

    Note: this comment is written for the iPhone 6 Plus, but may also apply to other models of iPhone.

    Disassembly:

    The clips in the rear case attach to small slotted shapes under the edges of the display assembly, and these attachment points alternate from one side to the other. Moving from bottom to top, gently pulling the rear case away at these points will help to separate the two halves without using too much force.

    Reassembly:

    Ensure that the plastic clips along the top edge of the front panel (shown in step 8) are fitted properly inside the rear case, then gently press the display assembly into the rear case at these points, moving from top to bottom. There may be a small click sound as the clips in the rear case engage with the slots on the display assembly, and the rear case should fit flush with the edges of the display assembly.

    Friendly Advice - crwdns2934203:0crwdne2934203:0

    This was challenging. For me, the suction cup could only create a tiny bit of motion and at first, no actual gap at all. You might have to pull the suction cup away from the base a few times just to loosen things up a tiny bit. Eventually, I got my fingernail in, and then after a few minutes got the plastic tool in.

    Also, use the plastic tool to gently pry along the sides of the phone once there’s light there. I was afraid of using too much leverage and breaking the screen as per the other comments, but starting at the bottom and then going around the sides slowly worked for me.

    FixingMyiPhone - crwdns2934203:0crwdne2934203:0

  7. iPhone 6 Plus Screen Replacement: crwdns2935265:07crwdnd2935265:01crwdnd2935265:02crwdne2935265:0 iPhone 6 Plus Screen Replacement: crwdns2935265:07crwdnd2935265:02crwdnd2935265:02crwdne2935265:0
    • Pull the plastic nub to release the vacuum seal on the suction cup.

    • Remove the suction cup from the display assembly.

    There is an adhesive strip all along the edge between the top and bottom of the phone. Is that just adhesive or is it wire of some sort?

    Larry Ingerling - crwdns2934203:0crwdne2934203:0

    @lingerling The adhesive strip was introduced on the iPhone 6s and 6s Plus (one model year later than what’s shown on this page). Guides specific to each model can be found here—be sure to use the correct one for your particular phone. And yes, just adhesive, no wires. ;)

    Jeff Suovanen - crwdns2934203:0crwdne2934203:0

  8. iPhone 6 Plus Screen Replacement: crwdns2935265:08crwdnd2935265:01crwdnd2935265:03crwdne2935265:0 iPhone 6 Plus Screen Replacement: crwdns2935265:08crwdnd2935265:02crwdnd2935265:03crwdne2935265:0 iPhone 6 Plus Screen Replacement: crwdns2935265:08crwdnd2935265:03crwdnd2935265:03crwdne2935265:0
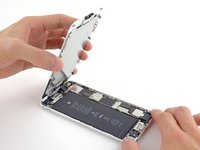
    • Pull the home button end of the front panel assembly away from the rear case, using the top of the phone as a hinge.

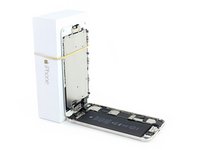
    • Open the display to about a 90º angle, and lean it against something to keep it propped up while you're working on the phone.

    • Add a rubber band to keep the display securely in place while you work. This prevents undue strain on the display cables.

    • In a pinch, you can use an unopened canned beverage to hold the display.

    Be careful If we leave the screen connected and set it to 90 degrees, the speaker / sensor flex may break. With an opening of 60 degrees it is convenient to completely disconnect the screen. The headset's flex is short, and if we put it at 90º, it can break. Guiding me from the images of iFixit, I have broken two cables.

    Español:

    Cuidado. Si dejamos la pantalla conectada y lo ponemos a 90 grados, el flex del altavoz/sensor puede romperse. Con una abertura de 60 grados es conveniente desconectar enteramente la pantalla. El flex del auricular es corto, y si lo ponemos en 90º , se puede romper. Guiándome de las imágenes de iFixit, se me han roto dos cables.

    txaukos - crwdns2934203:0crwdne2934203:0

    At 60º the display will block access to all the screws and the phone would be practically unserviceable, so I’m having trouble making sense of this comment. The cables on a factory original display are pretty tough and designed with enough slack that a 90º angle is no problem. Same with any decent aftermarket display.

    Jeff Suovanen - crwdns2934203:0crwdne2934203:0

    If you look at the enlarged image, you can see how the flex cable from the camera / speaker is in tension. This is my opinion. Sorry for my bad English

    Si usted se fija en la imagen ampliada, puede ver cómo el flex cable de la cámara/altavoz está en tensión. Esta es mi opinión.

    Perdón por mi mal inglés

    txaukos - crwdns2934203:0crwdne2934203:0

    your English isn’t the issue, it’s the proposed 60 degree opening space that doesn’t allow for the removal of the screws of the mounting plate where the connectors connect to the main pcb…

    if can make a recommendation here; it helps if the can is full and not refrigerated, the weight helps in keeping the phone where it should stay without adding additional tension to the ‘flex’ ribbon cable. it’s called flex for a reason people, if your breaking these the phones already been overheated too much, the cables become brittle and should also be replaced. i replaced my battery without disconnecting the screen, at 90 degrees with a rubber band around an empty beer can. pierced the orig. battery and caused sparks. albeit, i wasn’t in a hurry and it took me a good 30+ minutes, removal of the battery and stickers is by far the most challenging, especially when NOT disconnecting the screen…

    it’s not a race, take your time. move slowly but precisely with forethought and persistent force…

    circuitbender 477 - crwdns2934203:0crwdne2934203:0

    Werkt dit ook voor iPhone 7(plus)?

    Christina Pegtel - crwdns2934203:0crwdne2934203:0

    Werkt dit hetzelfde voor iPhone 7 (plus)?

    Christina Pegtel - crwdns2934203:0crwdne2934203:0

  9. iPhone 6 Plus Screen Replacement: crwdns2935265:09crwdnd2935265:01crwdnd2935265:02crwdne2935265:0 iPhone 6 Plus Screen Replacement: crwdns2935265:09crwdnd2935265:02crwdnd2935265:02crwdne2935265:0
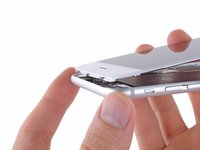
    • Several clips along the top edge of the front panel form a partial hinge, allowing the front panel assembly to swing open like a book.

    • During reassembly, align the clips just below the top edge of the rear case. Then, slide the front panel upward until its top edge is flush with that of the rear case.

    I would recommend protecting the screen once the display is free and the suction cup has been removed. This will help avoid any possibility of accidental scratching of the display crystal while the remaining steps are being performed. I used an inexpensive screen protector then removed it after reassembling and testing are complete.

    anthonyspampinato - crwdns2934203:0crwdne2934203:0

  10. iPhone 6 Plus Screen Replacement: crwdns2935265:010crwdnd2935265:01crwdnd2935265:01crwdne2935265:0
    • Remove the following Phillips screws from the battery connector bracket:

    • One 2.3 mm screw

    • One 3.1 mm screw

    for the iPhone 6 Plus, all screws were Phillips #000

    Michael Adams - crwdns2934203:0crwdne2934203:0

    I had difficulty removing the 3.1mm (iPhone 6 Plus / Phillips #000); had to give it significant downward pressure to get it started.

    Allen Matheson - crwdns2934203:0crwdne2934203:0

    stripped the 2.3mm screw attempting to remove, had to use excessive force to successfully remove

    Matthew Gao - crwdns2934203:0crwdne2934203:0

    The Phillips bits provided in the kit would not engage the Phillips heads enough to loosen them. Luckily I had my own small screwdriver set that worked like a charm.

    David Davis - crwdns2934203:0crwdne2934203:0

    Same issue. Could not remove the screw. Dead in the water.

    Tiffany - crwdns2934203:0crwdne2934203:0

    Agree with above comments regarding the supplied Phillips bit. It is not the correct size.

    Use a Phillips #000.

    bobgottner - crwdns2934203:0crwdne2934203:0

    Phillips #000 is what’s included in the kit. As others mentioned above, firm downward pressure is key. The phone is not that delicate; just press hard and crank it.

    Jeff Suovanen -

    @asianay0129 Yes, disconnecting the battery is necessary. You can sometimes get away with skipping it, at the risk of destroying something important and potentially bricking your phone. Not a wise gamble for the sake of skipping two screws.

    Jeff Suovanen - crwdns2934203:0crwdne2934203:0

  11. iPhone 6 Plus Screen Replacement: crwdns2935265:011crwdnd2935265:01crwdnd2935265:01crwdne2935265:0
    • Remove the metal battery connector bracket from the iPhone.

    Was not able to remove the battery connector bracket as one of the cable connectors was glued/stuck to the underside. Instead moved the bracket out of the way to disconnect the battery. Care should be taken not to over bend/stretch the ribbon cable.

    dwtan - crwdns2934203:0crwdne2934203:0

    That may be just the foam connector adhering to the bracket. If you pull up gently and twist slightly it should separate.

    Evan Noronha -

    It was the foam connector, and it did twist free with a gentle pull

    Al Taylor - crwdns2934203:0crwdne2934203:0

  12. iPhone 6 Plus Screen Replacement: crwdns2935265:012crwdnd2935265:01crwdnd2935265:01crwdne2935265:0
    • Use a clean fingernail or the edge of an opening tool to gently pry the battery connector up from its socket on the logic board.

    • Take care to only pry up on the battery connector, and not the socket on the logic board. If you pry up on the logic board socket, you may break the connector entirely.

    you may consider placing a thin non-conductive item between the connector and the socket like a bit of rubber band to prevent any power flowing during this procedure

    Michael Adams - crwdns2934203:0crwdne2934203:0

    It was too close to other parts to pry up with either end of plastic tool. Finally used 1 tine of tweezer to lift edge. Came free easily

    Al Taylor - crwdns2934203:0crwdne2934203:0

    J’ai pris une loupe pour bien observer l’endroit où placer l’outil.

    Paul Briffaut - crwdns2934203:0crwdne2934203:0

    Magnification is key for many tasks and this is certainly one.

    Kenneth Gilbert - crwdns2934203:0crwdne2934203:0

    I couldn’t use the iFixit blue opening tool to pry that battery connector. I used the top of the black spudger near the hole where the 3.1mm screw was in step 9-10 to easily pry it open!

    Alyssa Sayuki - crwdns2934203:0crwdne2934203:0

    The blue plastic board breaker can easily cause damage here. Professionals would recommend using the human fingernail as the ideal tool for this job.

    Jessa Jones - crwdns2934203:0crwdne2934203:0

  13. iPhone 6 Plus Screen Replacement: crwdns2935265:013crwdnd2935265:01crwdnd2935265:01crwdne2935265:0
    • Remove the following Phillips screws securing the front panel assembly cable bracket:

    • Three 1.2 mm screws

    • One 1.5 mm screw

    • One 2.9 mm screw

    • Do not attempt to insert longer screws into the red marked screw holes. Doing so may result in irreparable damage to the logic board.

    There's an other panel with one screw in the middle.........

    Herbert - crwdns2934203:0crwdne2934203:0

    Sounds like you have an iPhone 6s Plus, rather than a 6 Plus. Be sure to use the correct guide! And make sure you’ve ordered the correct part, as they’re not cross-compatible.

    Jeff Suovanen -

    I _love_ the color coding of screws. I know this is a little OCD, but it would be incredibly useful if there were an 8.5 X 11 you could print with indicated homes for where to drop items from each step of disassembly. That is, in the box for step 9, little colored circles for where to place each screw type. As long as you don't jostle the paper, it would make it a lot easier to know exactly where you are in reassembly.

    cscarlson47shop - crwdns2934203:0crwdne2934203:0

    I have done the exact same thing. Created a sheet where each screw goes.

    Chris Murphy -

    I used the 000 bit from the ifixit 54 piece kit.

    hhandh - crwdns2934203:0crwdne2934203:0

    Actually you don’t need to do steps 12 to 18 if you attach the display panel to the iPhone box as shown in step 7 and handle your iPhone with care during the replacement. I didn’t disconnect the display panel mainly because the more you work on the interior of your phone the higher is the chance you break something.

    Dany Castillo - crwdns2934203:0crwdne2934203:0

    Since this guide is for DISPLAY replacement, I don’t see how you can skip the steps for disconnecting and removing the DISPLAY.

    Jim Bateman -

    That's what I was thinking.

    The Wizard - crwdns2934203:0crwdne2934203:0

    I skipped this series of steps too. I was very careful when removing the battery and never had an issue with the screen leaning back against the box that this battery shipped in. I even broke half of the third strip of adhesive but used a plastic card to slide under the battery and it slowly lifted out without applying heat.

    mark - crwdns2934203:0crwdne2934203:0

    I'm having trouble with one screw not wanting to come out. Any suggestions to keep from stripping the head and getting it?

    Patric - crwdns2934203:0crwdne2934203:0

    which screws are which sizes cause i ordered new ones and cant figure it out

    MONsterHEIT - crwdns2934203:0crwdne2934203:0

    I also did not see the need to remove the display assembly for this repair. However I did place a can of corn against the vertically positioned display and then secured the display to the can with a rubber band.

    whiteshephard - crwdns2934203:0crwdne2934203:0

    I recommend removing the display assembly, I didn’t and somehow damaged the home button cable. At least remove the cover to ease the tension on the cables.

    Steve Schlotter - crwdns2934203:0crwdne2934203:0

    I played around with different screwdrivers to get certain screws out. I made sure I wasn’t applying heavy pressure so I wouldn’t strip the head. Apple is crazy for doing this to us lol.

    Anyways invest in a magnetized mat to organize your screws. It was really difficult to keep things organized and still, especially with these tiny screws…

    Jeffrey Robinos - crwdns2934203:0crwdne2934203:0

    what happens if i forgot to put the ribbon cable shield back on? the phone is now working but i forgot to put the shield back on and i am missing 2 screws. can i leave the shield off?

    Fred ticoman. - crwdns2934203:0crwdne2934203:0

    @ticoman12 It’ll work without the shield, but the connectors may pop out unexpectedly.

    Jeff Suovanen -

    Just be really careful remembering which screw is which. I drew a quick sketch of the bracket, then put the screws in the relevant places. There’s no way I would have been able to figure them out otherwise - my eyes can’t see the difference between a 1.2 and 1.5mm screw!

    Paul Johnson - crwdns2934203:0crwdne2934203:0

    The most fiddly part of the job.

    Much easier if you put the screwdriver head on the screw and then insert it into the opening. The slight magnetism will hold it in place. Don’t fully tighten a screw until all the screws are in place. Much like installing lug nuts on a car.

    GPZ - crwdns2934203:0crwdne2934203:0

    I also skipped steps 12-18 as Danny had suggested. It made this repair quite easy, so thank you and others for suggesting this. I was also very careful to allow the battery to discharge before starting the process.

    Bruce Platt - crwdns2934203:0crwdne2934203:0

    I question whether Steps 12-18 (separating the display from the case) is actually necessary? The battery can be removed/replaced with the display connected (but standing upright, as displayed in Step 7.

    Leaving the display attached obviates the most difficult steps (re-connecting the various control ribbons — 3/4 of ‘em!

    I followed this manual completely and the repair was successful. But if I had this to do over, I’d leave the display connected.

    Dana Smith - crwdns2934203:0crwdne2934203:0

    I skipped the steps 12-18 as well and thank goodness I did so I won’t have to worry about issues with any of the cables.

    my panel is different from what is pictured anyway ‘cause I have one screw in the middle like what Herbert said on the first comment.

    Maria Filamor-Robinson - crwdns2934203:0crwdne2934203:0

    I realized too late just how handy the magnetic mat is that they have in their shop. So I organized the screws with a piece of clear packing tape. On the smooth side, use a sharpie to draw spacious circles with “R” “O” and “Y” inside each circle to represent the color coded screws and then use the sticky side to keep the screws in place. I found that using the tweezers to take them off the screwdriver helps you stick them head first to the tape better.

    Selena Castillo - crwdns2934203:0crwdne2934203:0

  14. iPhone 6 Plus Screen Replacement: crwdns2935265:014crwdnd2935265:01crwdnd2935265:01crwdne2935265:0
    • Remove the front panel assembly cable bracket from the logic board.

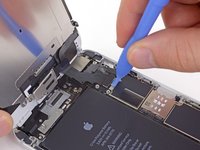
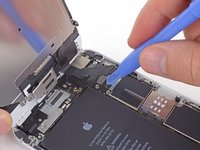
  15. iPhone 6 Plus Screen Replacement: crwdns2935265:015crwdnd2935265:01crwdnd2935265:02crwdne2935265:0 iPhone 6 Plus Screen Replacement: crwdns2935265:015crwdnd2935265:02crwdnd2935265:02crwdne2935265:0
    • In the next four steps, take care to pry up only on the cable connectors, and not on their sockets on the logic board.

    • While still supporting the front panel, use a fingernail or the edge of an opening tool to disconnect the front-facing camera and earpiece speaker connector.

    Why does the screen need to come off?

    Sterling Coffey (N0SSC) - crwdns2934203:0crwdne2934203:0

    Because the cables are delicate, and following steps are easier if phone halves are not flopping around together, especially for amateurs.

    Matthew Goheen - crwdns2934203:0crwdne2934203:0

    I don't know if anyone will see this but here it goes: for the life of me I can't get the front-facing camera and earpiece speaker connector to seat. Everything else went back together fine but this one connector will not go in. Sometimes it seems like it's in even though it doesn't really pop in and it'll kinda sit there for a sec and then it pops out.

    Any insight would be greatly appreciated, thank you

    Droopy Caledonia - crwdns2934203:0crwdne2934203:0

    Try starting at one end instead of in the middle. It's to easy to bend a connector and this way, I can get a safe start and go from there.

    Rongwey - crwdns2934203:0crwdne2934203:0

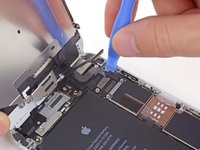
  16. iPhone 6 Plus Screen Replacement: crwdns2935265:016crwdnd2935265:01crwdnd2935265:02crwdne2935265:0 iPhone 6 Plus Screen Replacement: crwdns2935265:016crwdnd2935265:02crwdnd2935265:02crwdne2935265:0
    • Disconnect the home button cable connector.

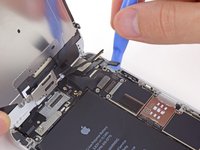
  17. iPhone 6 Plus Screen Replacement: crwdns2935265:017crwdnd2935265:01crwdnd2935265:02crwdne2935265:0 iPhone 6 Plus Screen Replacement: crwdns2935265:017crwdnd2935265:02crwdnd2935265:02crwdne2935265:0
    • Make sure the battery is disconnected before you disconnect or reconnect the cable in this step.

    • Use a plastic opening tool to disconnect the display data cable connector.

    • When reassembling your phone, the display data cable may pop off the connector. This can result in white lines or a blank screen when powering your phone back on. If that happens, simply reconnect the cable and power cycle your phone. The best way to power cycle your phone is to disconnect and reconnect the battery connector.

    The piece of advice about power cycling the phone by disconnecting and reconnecting the battery proved crucial to the success of my repair (camera and lens replacement). At first when charging the phone after closing it, I got a dark, blank screen with an intermittent buzzing noise. After re-opening the phone and making sure all cables had been properly reconnected, I ignored the advice to power cycle the phone. Still all I got was a dark, blank screen (and intermittent buzzing if charging t). Then I opened it a third time (leaving the screen connected and attached at a 90 degree angle) and I only disconnected and reconnected the battery. Voila! When I closed the phone and powered it up, I got the screen to light up!

    Gianni - crwdns2934203:0crwdne2934203:0

    how did you disconnect and reconnect the battery?

    Teresa Trevino - crwdns2934203:0crwdne2934203:0

    If you’ve been following the guide, you already disconnected it in this step. To reconnect it, just line up the connector and press it into place.

    Jeff Suovanen -

    After replacing the battery, the phone seems dead. I thought it just needed recharging so I left it charging all night. Still dead in the morning. Now I think it might be because the display data cable is off, and I should open the phone and check it. But the battery might be on full power in that case, and they don’t advice to open the phone when battery if full. What can I do?

    Ila Awasthi - crwdns2934203:0crwdne2934203:0

    The advice aims at avoiding battery fire. Just be careful.

    Katherine Williams - crwdns2934203:0crwdne2934203:0

  18. iPhone 6 Plus Screen Replacement: crwdns2935265:018crwdnd2935265:01crwdnd2935265:02crwdne2935265:0 iPhone 6 Plus Screen Replacement: crwdns2935265:018crwdnd2935265:02crwdnd2935265:02crwdne2935265:0
    • Finally, disconnect the digitizer cable connector.

    • When reconnecting the digitizer cable, do not press the center of the connector. Press one end of the connector, then press the opposite end. Pressing in the center of the connector can bend the component and cause digitizer damage.

    some images and guidance regarding reassembly would be helpful. You don't need to use the spudger to get them back on: fingers are better because there's a really subtle click you feel when you get them seated properly.

    cscarlson47shop - crwdns2934203:0crwdne2934203:0

    When you're reassembling, a note that this is the step where you should test for proper screen function would be really useful. First time I reassembled, I didn't seat something properly, got all the screws back together and then realized the screen wasn't functioning properly. Had to disassemble back down to step 14 and then re-reassemble.

    cscarlson47shop - crwdns2934203:0crwdne2934203:0

    I am having this issues right now! I have unplugged and plugged in these cables at least 20 times and each time I get white lines. I finally have it to where there are only 4 white lines and I am almost willing to live with it. Any suggestions?

    mattmay002 -

    Clean the screen connectors incase they are not making a clean connection

    Karen Jones - crwdns2934203:0crwdne2934203:0

    I'm having nightmares with the digitizer connector. Simply can't get it to work unless I'm applying some pressure on the connectors. Everything seems almost microscopically clean. Any suggestions friends?

    Henry A -

    could it be the replacement screen? test with your old screen and see if you have the same problem.

    Charles - crwdns2934203:0crwdne2934203:0

    To ++mattmay002++  Did you power cycle the phone? Check out the comments on the previous step for a how to.

    Robert Liles - crwdns2934203:0crwdne2934203:0

    I had issues with it too. When connecting this cable, make sure to rock finger side to side after connecting. It’s a wide connector so try to listen for 2 clicks on this one connector. That’s how I fixed mine

    Albert Einstein - crwdns2934203:0crwdne2934203:0

    Re-attaching this cable is the only tricky part to replacing the battery on my 6+. It had a bow on the middle that I had to flatten out before pressing the connector on with finger first on one edge and then on the other. I had white tire tracks on the screen and no touch screen until I connected it correctly. The front has to rest in just the right place on the back while attaching this thing so the cables aren’t strained the front doesn’t fall down. Small fingers would be a plus at this step.

    richard - crwdns2934203:0crwdne2934203:0

    Reseating these connectors on reassembly is definitely the most difficult part of this repair. It took me several attempts before the lowermost connector would seat properly and I did accidentally bend it slightly in the process. Fortunately I was able to get it straight again and get it to click in. The other three went in fine though and no lasting damage seems to have been done.

    Andy Gibbons - crwdns2934203:0crwdne2934203:0

    Another thing - These cables can become overlapped in the wrong way and make you think they are in a different order than they should be. Eg. it’s easy to mix up the ones from step 15 and 17. You can actually unravel the cables and re-layer them on top of each other in any order, so remember this! They look like they’re one solid mass but they’re not.

    domarius - crwdns2934203:0crwdne2934203:0

    I never removed the last digitizer connctor. I removed the first three connectors, left the screen propped at 90 deg tied to a box and removed the battery, there is minimal movement. In fact when I reattached the connectors, only the first and maybe second connector feels taut, so it’s necessary to only remove the first connector if you can be gentle with it. Less headache. And my guess why so many people had issues is that micro dust gets into the connectors and cause connection loss. You be surprised how little dust can cause havoc.

    darrcc - crwdns2934203:0crwdne2934203:0

    And forgot one thing, keep a can of air duster woth you to remove as must dust as you can see. A camera air blower will also do nice.

    darrcc - crwdns2934203:0crwdne2934203:0

    I haven’t removed my screen in past battery replacements, I found it easier. However, this time I followed the instructions because my old battery was very stuck, and I needed the screen gone to get the battery out…

    When I replaced the screen, at first it wouldn’t even boot/start up. (Yes, I inserted my own testing step, as someone here suggested, before final reassembly).

    The screen would just show a fuzzy image, and the board that all the cables attach to would heat up, then it would turn itself off. I tried reconnecting them carefully 3 times, and even made sure to get a little “click”, all to no avail.

    The final try, I used my fingernail to really press down on the back side of the digitizer cable. I heard more clicking, though I thought I might be tearing the cable too. With nothing left to lose, I continued across the back, and heard several more clicking/tearing sounds.

    This worked, and it booted after that. It still had white lines, but those faded away overnight.

    Morgan Giddings - crwdns2934203:0crwdne2934203:0

    About the digitizer connector: its flat cable is so short that the when I attempted to seat the next connector, its flat cable pressed on the digitizer cable, which can pull on the connector and dislodge it. That happened several times for me before success.

    Robert Bernard 27 Nov 19

    Robert H Bernard - crwdns2934203:0crwdne2934203:0

    Nous n’apercevons pas bien les nappes et l’ordre dans lesquelles elles doivent être replacer

    Patrick AZOULAY - crwdns2934203:0crwdne2934203:0

  19. iPhone 6 Plus Screen Replacement: crwdns2935265:019crwdnd2935265:01crwdnd2935265:01crwdne2935265:0
    • Remove the front panel assembly from the rear case.

    Never remove the screen without disconnecting the battery. It's possible the back light can be blown and that's a even more difficult repair. Always, ALWAYS, disconnect battery before repairing items. (Unless it's not possible.)

    Marvin Ballard - crwdns2934203:0crwdne2934203:0

    How do you disconnect the battery from the screen?

    Shamil Bhatti -

    The Step 11 disconnects the battery :)

    jeffxtechs - crwdns2934203:0crwdne2934203:0

    I think you mean Step 8 :)

    Jeff Suovanen -

    How do you disconnect the battery

    I tried it once and

    Brian - crwdns2934203:0crwdne2934203:0

    And what? I tried it once and here’s a million dollars?

    Oh I get it… they got him! :(

    https://www.youtube.com/watch?v=UlznqpBg...

    domarius -

    When disassembling the iphone at this point note the cables, and there placement/orientation.

    GERARD SZAREK - crwdns2934203:0crwdne2934203:0

    Be really careful with the step after this. Do not commence until you have read all the comments. You need to get a good hold of the plastic strips preferably before they double over on themselves. You have to avoid puncturing the battery at all costs. Slowness and caution here will save you a lot of long term pain.

    Laura Houghton - crwdns2934203:0crwdne2934203:0

  20. iPhone 6 Plus Screen Replacement, Home Button Assembly: crwdns2935265:020crwdnd2935265:01crwdnd2935265:01crwdne2935265:0
    • Remove the two 1.8 mm Phillips screws securing the home button bracket to the front panel.

    This guide is pointless, iPhone 6/6 plus home button is not replaceable, period.

    Tom Chai - crwdns2934203:0crwdne2934203:0

    Yes it is absolutely replaceable. You need to remember it is a encrypted security feature, so you'll need the apple ID or password to regain control again if replaced. That's the whole point to secure your data.

    Mike -

    Yes, the iPhone 6 and 6 Plus home buttons are replaceable. I do several replacements for customers and they work just fine with one exception. The fingerprint reader around the home button does not work after replacing the home button

    BrentTaylorBA - crwdns2934203:0crwdne2934203:0

    Hi Brent, I have a iPhone 6 plus with a shattered screen to repair and the home button is gone. You have said that you've been able to replace the home buttons successfully. I was wondering how you got past the error 53 problem when restoring it? Any suggestions or help would be greatly appreciated.

    arcadian212 -

    Error 53 was resolved by Apple with an iOS update, so fortunately this is no longer an issue! As others have stated, it's perfectly possible to replace the home button, but you will lose fingerprint sensor functionality (the original sensor is paired to your iPhone's logic board at the factory, and only Apple can pair a new one).

    Jeff Suovanen -

    Why does that make it pointless? The guide is geared towards screen replacement, with the intent of using the original home button and a new screen. It clearly states this. What about this guide is pointless? It's actually very helpful.

    abyss478 - crwdns2934203:0crwdne2934203:0

    Warning: The iphone 6 will brick after a restore if the home button is replaced. I agree with the other commenters that it is not a replaceable part because of this issue. If you try to restore the iPhone 6 after replacing the home button it will get stuck in recovery mode and give error 53 when a restore is attempted. I learned this the hard way! Please be careful and don't restore your phone if you do this repair.

    max - crwdns2934203:0crwdne2934203:0

    What did you do after your phone got stuck in recovery mode ?

    Lynn -

    I had an error 53 when trying to restore a iphone 6 plus.

    I bought a new heat shield with flex ribbon attached and installing that allowed me to get a restore complete.

    steve - crwdns2934203:0crwdne2934203:0

    I couldn't get my fingerprint reader to work after following this guide. I ended up taking the phone back apart and replacing the new screens' backing plate and the attached home button cable with the old, original one and now the fingerprint sensor works!

    fsharp320 - crwdns2934203:0crwdne2934203:0

    The little square rubber gaskets that cloak the mounting holes (little square nubs at the bottom of the picture in Step 19) for the Pentalobe Screws in Step 1 above had a tendency to fall off the screen. Further, if replacing the screen, these should also accompany the other items transferred to the new screen. This is just a small oversight I have seen from this repair guide, otherwise, smooth as silk.

    Justin - crwdns2934203:0crwdne2934203:0

    The connector seemed a bit raised after re-assembling, I noticed after pressing the bracket down on in preparation for screwing in. I don’t know if it’s normal for it to have a slightly raised feeling but it was noticeable. Enough to make me wonder if it’s too much pressure on it once it’s screwed together.

    domarius - crwdns2934203:0crwdne2934203:0

  21. iPhone 6 Plus Screen Replacement: crwdns2935265:021crwdnd2935265:01crwdnd2935265:01crwdne2935265:0
    • Remove the home button bracket from the front panel assembly.

    buen día, cuando no me reconoce el touch id pero el boton si hace la función de botón ejemplo si me envía a home pero no reconoce el alcance fácil dos toques no reconoce el lector biométrico

    Yamir Maximino - crwdns2934203:0crwdne2934203:0

  22. iPhone 6 Plus Screen Replacement: crwdns2935265:022crwdnd2935265:01crwdnd2935265:02crwdne2935265:0 iPhone 6 Plus Screen Replacement: crwdns2935265:022crwdnd2935265:02crwdnd2935265:02crwdne2935265:0
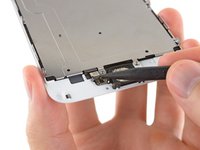
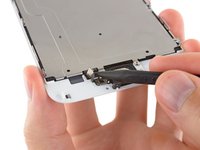
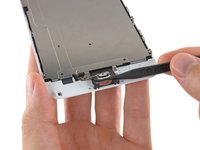
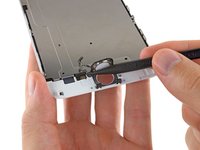
    • Use the tip of a spudger to disconnect the home button connector from its socket on the home button cable.

    Will disabling and removing fingerprint passcode thru settings software wise prior to repair or starting the replacement, will this feature with a new replacement home button resolve the error 53 or the repairer need to use the original home button sensor with the correct fingerprint stored in the tiny small chip ? I have replaced a gsm iPhone 6S not plus screen making sure that not to tear off the sensor chip successfully repaired. -Joan

    JOAN E. VERGARA - crwdns2934203:0crwdne2934203:0

    Hi Joan! If I am understanding your question correctly, disabling the fingerprint passcode prior to repair WILL NOT result in Touch ID working after the repair. You should look at Jeff Suovanen's comment at the bottom, as he explains the two ways to keep Touch ID working. In order to keep Touch ID working, you will need to find a logic board that is paired with the home button and replace both of those components.

    Scott Havard -

    When reassembling this display connector, you must fold the new connector down into and against the plastic base in order to line up the sockets. The original connector cable is adhered to the screen, the replacement sticks straight out.

    Bret Hoffman - crwdns2934203:0crwdne2934203:0

  23. iPhone 6 Plus Screen Replacement: crwdns2935265:023crwdnd2935265:01crwdnd2935265:01crwdne2935265:0
    crwdns2935267:0crwdne2935267:0
    iOpener
    $12.99
    crwdns2942207:0crwdne2942207:0
    • Carefully wedge the tip of a spudger underneath the home button connector cable.

    • Gently move the spudger across to separate the home button connector cable from the adhesive securing it to the front panel assembly.

    • If the cable doesn't separate easily, apply heat using an iOpener or hair dryer to soften the adhesive, and try again. Be careful not to damage the cable.

    Es necesario calentar para que se desprenda de una forma comoda

    Yamir Maximino - crwdns2934203:0crwdne2934203:0

    i found using a needle works well too, as the fine point of the needle will be able to get under the adhesive and i can gently separate it.

    Charles - crwdns2934203:0crwdne2934203:0

    heat thoroughly with a hair dryer. (away from your work area so you don't blast your parts all over the place!) pops right off.

    edwardlyman - crwdns2934203:0crwdne2934203:0

  24. iPhone 6 Plus Screen Replacement: crwdns2935265:024crwdnd2935265:01crwdnd2935265:02crwdne2935265:0 iPhone 6 Plus Screen Replacement: crwdns2935265:024crwdnd2935265:02crwdnd2935265:02crwdne2935265:0
    crwdns2935267:0crwdne2935267:0
    iOpener
    $19.99
    crwdns2942207:0crwdne2942207:0
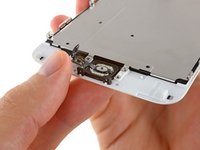
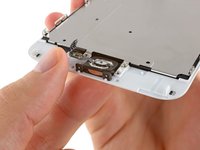
    • The rubber gasket surrounding the home button is very thin and tears easily.

    • Apply mild heat (with an iOpener, heat gun, or hair dryer) to soften the adhesive securing the home button gasket.

    • Using your fingertip, gently press up on the home button from the front side of the display assembly. Use firm, constant pressure to slowly separate the home button's rubber gasket from the front panel.

  25. iPhone 6 Plus Screen Replacement: crwdns2935265:025crwdnd2935265:01crwdnd2935265:02crwdne2935265:0 iPhone 6 Plus Screen Replacement: crwdns2935265:025crwdnd2935265:02crwdnd2935265:02crwdne2935265:0
    • Carefully use the tip of a spudger to finish separating the home button from the front panel.

    The little rubber gasket seems to be a moisture seal. It isn’t glued down but over time it seals itself to the display. Pushing the spudger around underneath simply breaks the bond between the two surfaces. Be sure to do it carefully so as not to tear it.

    bichmgnt - crwdns2934203:0crwdne2934203:0

  26. iPhone 6 Plus Screen Replacement: crwdns2935265:026crwdnd2935265:01crwdnd2935265:01crwdne2935265:0
    • Lift and remove the home button assembly off the front panel assembly.

    So this fix is hardware only? Do I need to disable the touch ID feature before removal and wWhat do I do next to get the touch ID feature to function?

    Dasteufelhund - crwdns2934203:0crwdne2934203:0

    After removing the home button, remove the two black rubber bumpers from the ‘Pentalobe Screw’ mount brackets and transfer them to the new screen, this helps secure the home button in place and screw tension.

    James_P - crwdns2934203:0crwdne2934203:0

  27. iPhone 6 Plus Screen Replacement, Screen: crwdns2935265:027crwdnd2935265:01crwdnd2935265:01crwdne2935265:0
    • The screen remains.

    • Compare your new replacement part to the original part. You may need to transfer remaining components (such as the two rubber grommets at the bottom of the screen) before installing.

    • The Touch ID function will ONLY work with your phone's original home button assembly, so you'll need to transfer the home button assembly from your old screen to your new screen to retain Touch ID.

    • Your replacement part may come with an extra Phillips screw already installed left of the Home Button. Remove the unnecessary screw so that you can reinstall the home button bracket.

    • After reassembly, clean the touchscreen surface with an alcohol wipe prior to turning the iPhone back on. The alcohol helps dissipate any lingering static electricity, which can cause problems with the display.

    • After reassembly, connect the iPhone to an AC power source before turning it on for the first time. Once the iPhone has booted up successfully, you can disconnect the AC power.

    "clean the touchscreen surface..." I don't understand why this should be done. Never heard an alcohol wipe dissipates static. Why do it now and not each time you turn on the iPhone?

    Antonio MS - crwdns2934203:0crwdne2934203:0

    What is the reason for the recommended practice of plugging it into a power source on first boot after reassembly?

    Lars - crwdns2934203:0crwdne2934203:0

    I would also like to know the answer to this.

    Chuck Beck -

    After this step depending on the spare part you are using, you may need to remove the metal back and the home button touch sensor cable and socket. this is the socket that the fingerprint reader attaches to, and that you unclipped from in step 21. The cable is stuck to the back of the metal screen and the socket is attached to the plastic base so be careful when removing the back that you don't rip the cable off. the socket is glued to the plastic and comes off with some careful spudging. I did not have to heat it but that would probably help too. once its off you can easily attach it to the new spare part. Hope that helps, cheers Brad

    LidsterIT - crwdns2934203:0crwdne2934203:0

    this point was very important. Thank you.

    Yun Cha -

    You may also have to remove the front facing camera from the old front panel and install it on the replacement front panel, which requires peeling some adhesive and careful positioning of ribbon cables.

    anonymous 596 - crwdns2934203:0crwdne2934203:0

    Correct, and for that situation we've got you covered with a separate guide that includes the extra steps. ;)

    Jeff Suovanen -

    Crap. I got done with the 26 steps, and now, to use the LCD screen & Digitizer I purchased, from iFixIt, I've got to do 36 MORE steps?!

    talovadavis -

    Actually it's just 10 additional steps—all 26 steps in this guide are part of the longer, 36-step guide. Just skip over the parts you've already done. If 10 extra steps seems like too much hassle, you can always go for the pre-assembled display option.

    Jeff Suovanen -

    I purchased kit with shield too (also cam and home button), after swapping out my original home button, touch ID did not work, however after confirming my home button reattached to the new screen assembly correctly (reverse step 22) did a hard reset (off button and home button together) and works perfectly. Thank you ifixit very much for all your guides.

    USGamer1 - crwdns2934203:0crwdne2934203:0

    I purchased kit with shield too (also cam and home button), after swapping out my original home button, touch ID did not work, however after confirming the home button reattached correctly (reverse step 22) did a hard reset (off button and home button together) and works perfectly. Thank you ifixit very much for all your guides.

    USGamer1 - crwdns2934203:0crwdne2934203:0

    There are two rubber grommets that wrap around the threaded posts at the very bottom of the phone front panel (where the pentalobe are inserted). They should be transferred from the old front panel to the replacement one. The thinner flatter side should be on the bottom edge of the phone.

    Peter Knight - crwdns2934203:0crwdne2934203:0

    Thank you! I would have missed this.

    Walter Mahoski -

    It would have been better to highlight the comment about the two rubber grommets “that wrap around the threaded posts at the very bottom of the phone front panel. . .” in re-assembly instructions, rather than being buried in the comments. I had to re-open the case to switch the grommets from the old screen to the new.

    Richard Reese 9/9/20

    Richard Reese - crwdns2934203:0crwdne2934203:0

    Thanks for your suggestion! I’ve amended the step to hopefully point this out.

    Arthur Shi -

crwdns2915888:0crwdne2915888:0

To reassemble your device, follow these instructions in reverse order.

crwdns2935229:0746crwdne2935229:0

Walter Galan

693,685 crwdns2915208:0crwdne2915208:0

crwdns2935297:01,203crwdne2935297:0

crwdns2944067:096crwdne2944067:0

I have original home screen button, but the panel and home button cable was part of what was damaged on the phone. With that in mind will it still work with original home screen button, but replacement panel?

Pot Kerwin - crwdns2934203:0crwdne2934203:0

This is a tough one. I do not know that you'll be able to salvage the Touch ID functionality of the home button with the connector being damaged. You may need to purchase iPhone 6 and 6 Plus Home Button Assembly and iPhone 6 and 6 Plus Home Button Gasket. This will no longer retain the Touch ID functionality though.

Jeffrey Carpenter -

I will be testing this out myself as soon a I get a new touchID cable/along with the LCD Panel. I did a screen replacement, all went well and works great, however I punctured the TouchID cable when prying it off of the old display.

I ordered a new cable with the panel, as I understand it as long as you have the ORIGINAL TouchID assembly which I do, after replacing the cable it should work!

Cody Crosby - crwdns2934203:0crwdne2934203:0

Instructions are incomplete ! You also have to remove the aluminum plate and the rear camera/speaker assembly.

Also, my touch ID does not work anymore :/ nothing was damaged and plug is connected. Resetting the phone made no difference.

Why would it not work if I used the same Home Button and logic board?

michael8nuts - crwdns2934203:0crwdne2934203:0

hey having the same problem with my touch id.. did you ever find a solution?

bRIZZZZZZZZ -

did you make sure to put the metal bracket back on to the home button if forgotten to be put on it would cause the button to not make a clicking sound

isaac escobedo -

I have the same problem. I replace the screen and reuse the original home bottom but the click don’t work the touch id yes

JUAN OCASIO -

You have probably damaged the connector during disassembly or reassembly.

Kyle Webb -

help please

I just replaced my lcd screen. it has been off for about a year now. when I plug it into the charger it just vibrates every 5 seconds. I've tried hard reset and it just stops vibrating but doesn't power up. I've unplugged and plugged the lcd ribbon cables a couple times and still get nothing.

jordan b - crwdns2934203:0crwdne2934203:0

hello jordan b ,

I wanted to know if you managed to solve the problem .

I just replaced my lcd screen. when I plug it into the charger it just vibrates every 5 seconds. I've tried hard reset and it just stops vibrating but doesn't power up. I've unplugged and plugged the lcd ribbon cables a couple times and still get nothing.

How can I fix the problem?

lucatrotto -

Hello,

My iPhone 6+ LCD is broken, and I want to replace it. I did some replacements on iPhones 3&4. But I just read that after changing the display assembly on the iPhone 6 (+), many peaple got an error after update/restore the phone. Is that for all replacements?

Best regards

facebook - crwdns2934203:0crwdne2934203:0

I know this is a old guide but i have a question. My iphone was screen broken and i change it with a original complete iphone screen, the home button works fine but the touch id dont work. I change the home button to the one that i have in the broken screen and still the touch id dont work. What can i do to fix the touch id?

Juanjo Checo - crwdns2934203:0crwdne2934203:0

I replaced my screen and things were good but a few hours later screen became unresponsive at times. It's now been a week and screen is still the same. Wondering if it's the screen I received, which is defective, or I need to reconnect the cables. Has anyone experienced this problem?

Kesha Smith - crwdns2934203:0crwdne2934203:0

Hi Kesha.

Have you find a solution for unresponsive touch screen? Mine has this problem since replacement.

James Kazutoshi Wada -

I replaced the screen and the entire thing is UNRESPONSIVE when I try to turn it on, AND when I plug it into the power!!! WHATS HAPPENING!?!?

Roland Bachoura -

Hey! can someone help me please! i have already change the display assembly and works fine, touch screen, touch id, but i have troubles with the horn when im on a call, the sound is like a busted horn, i have to put the call on speaker... Will there be any cable that is not connected ? Anyone else has happened to this?

Alejandro de Luna - crwdns2934203:0crwdne2934203:0

Very simple. Did it in 10 mins.

asthomas - crwdns2934203:0crwdne2934203:0

Replaced everything like instructed, touch portion doesn't work. Anybody else have this issue?

Joseph Bundy - crwdns2934203:0crwdne2934203:0

I just replaced the screen and all I have are lines when I power it up. could I have a bad screen??

Karl - crwdns2934203:0crwdne2934203:0

I just purchased a iphone 6 plus off of someone. It has a cracked screen and it looks like the screen has been replacement already. I think the home button is a replacement as well. If I purchase a new screen with the home button and sensor will it give me the error 53 when I go to update it. It is on IOS 9.3.2. Thanks

JOhn Scott - crwdns2934203:0crwdne2934203:0

No it won't. Error 53 has been fixed, so as long as you're running the latest version of iOS you shouldn't have any trouble. Note that if you are using a non-original home button you will not be able to use Touch ID (but that's the worst you could expect).

Evan Noronha -

Hello,

It happened to me my phone screen cracked so I following this guide to replace it.

One thing I noticed straight away the screws are a bit different on the S version.

But still if you have an engineering background and a bit of common sense you can still use this guide perfectly.

With this guide it took me about 45 minutes to transfer 1 good screen from a broken phone to my own phone with just a broken screen.

I didn't have the Islack but I would advice to get it even if you do this once the first part if a pain without it.

But now everything works fine, transfered the home button finger print works good to :)

Thanks alot!

rpruim - crwdns2934203:0crwdne2934203:0

Sorry you struggled with the screws—we have a separate guide for the iPhone 6s right here. Congrats on a successful repair!

Jeff Suovanen -

I dropped my iPhone 6plus and it busted the top right corner. My screen had a line down the middle and then went black. I could call using Siri but now I can't get it to power on. Does anyone know if replacing this will fix the problem?

Pam - crwdns2934203:0crwdne2934203:0

Pam, it sounds like your LCD is also damaged, not just the screen. This replaces the whole display, glass and LCD, so it should fix your issue as you have described it. Hope this helps.

John Smith -

I connected my lcd to my device. I changed the home button. I started up my iphone 6. But my screen went red.

Does anybody know how to fix this

Thank you

Emre - crwdns2934203:0crwdne2934203:0

I have found a guide on how to fix iPhone 5s red screens. Hope to help you:

http://www.hcqs.us/blog/fix-iphone-5s-re...

Jennychan -

Worked like a charm on the first try. I guess I was lucky. Reconnecting was much more difficult and took double the time of disconnecting. My only advice is to make sure it clicks in and feels solid. The boot time seems forever so heads up. Otherwise this is totally doable. Good luck!

Crispy - crwdns2934203:0crwdne2934203:0

Great instructions all working well. Only thing I noticed was the screen sits a little higher then the original, just a bit of a raised edge all the way around but everything is still solid and secure in place so no big problem.

Craig Constable - crwdns2934203:0crwdne2934203:0

Yes, I noticed this too. I cannot even "snap" my screen all the way around. Comparing the new screen assembly with the original, the new assembly is slightly thicker. I was told these were factory OEM parts.

Edward Lebert -

A good guide. Got the assembly from iFixit, and the guide walks you through this pretty easily. When I finished, the phone was stuck on the logo screen and flashing red. Some research and a forum answer pointed to the flex cable/front camera unit. I swapped out the newer unit for the one from the old phone and it booted right up. Except for that little hang up, all went well.

Larry Herrmann - crwdns2934203:0crwdne2934203:0

Hello everyone, I have a problem with the touch of my id iphone 6 plus. I had to disassemble the display several times because I got bad. The last time it happened that the home button works, but does not operate the touch id, it is as if it were not recognized. At startup the message "You can not turn Touch ID on the iPhone", going to the Settings-touch id code and exits "Error Can not complete the configuration of the Touch ID"

Could someone help me understand what is the problem?

I thought it might be the flat defective connecting home button and the motherboard which is located under the metal part of the display, but if so it should not work even the right home button?

Thanks in advance to everyone.

Domenico - crwdns2934203:0crwdne2934203:0

How am I supposed to identify which screw is what if it does not come in a manual????????? There is no type of guide or chart that shows that which screw belong to its correct spot.

David Dang - crwdns2934203:0crwdne2934203:0

Hi David, when ever I replace a screen pretty much what I do is keep everything 100% organized with either the magnetic parts mat from ifixit or if I don't have mine I just place the screws next to the part where ever I took it out. So If I take the screw out of the top right of the display I put it on the top top right.

contirepair -

replaced the screen and moved the home button over. On power up I get the Apple logo for several seconds and then nothing ...shows a blank screen with some segment of it a different colour...then goes dark and then tries all over again again. what can i try?

Martin Picard - crwdns2934203:0crwdne2934203:0

Hello Martin,

Or anyone else reading this. I just replaced a shattered screen on iPhone 6+ and encountered the same issue. After some head banging I figured out that I had tightened the LCD ribbon plate too tight. After I adjusted all 5 screws to just barely snug, the phone powered on and functions with ought issue!

James_P -

I purchased iphone 6 plus full assembly and the camera on the front is not working will i need to transfer my old camera over as i was hoping the new camera that came with the display would work. More because i don't want to mess around with the camera if i don't need too. But everything else is working perfect.

mick - crwdns2934203:0crwdne2934203:0

Mick, the camera you got with your new screen should work. But since obviously it's not I'd suggest to transfer the old one. Very simple and won't take too long!

Eyob Grainge -

The Camera? What about the camera?

Tim - crwdns2934203:0crwdne2934203:0

Replaced my cracked/shattered screen on iPhone 6 Plus. Bought LCD screen and digitizer full assembly. Followed the instructions in repair guide, including moving my home button over. Perfect; phone/home button recognizes my touch and screen looks like new again. 35 minutes total replacement time with very careful removal of screws and cables. Tested all functions (front camera, ear speaker, etc) all good! Thanks for the guide and fast delivery of parts!

runfarandfast - crwdns2934203:0crwdne2934203:0

I replaced my screen and it still does not turn on. It powers on for a second fully then goes blank, it still lights up but it lights up blank. Can you help me figure out why the screen does not stay on fully?

Juwell Williams - crwdns2934203:0crwdne2934203:0

I replaced the screen display and used the same Home button assembly but my touch id isn't working. Also one of the screws is broken to the bracket that holds the cables down for the screen, but I reassembled it and it still works fine. You think that would cause future problems?

Juan Leon - crwdns2934203:0crwdne2934203:0

The touch recognition does not work on my home button now, but I didn't use the feature before so I'm not all that put out.

Eric Knudtson -

Hi I have a cracked display not original which started to be unresponsive at the bottom part of the screen. So I bought the LCD from IfixIt and changed it. But now it loops the start up Apple logo and nothing else. The old screen works as before. Can it be because of the replaced home button?

Eivindsolberg - crwdns2934203:0crwdne2934203:0

I have the same problem. Cracked screen - so I ordered a screen assembly from iFixit. Got it in place but when powered up it never boots more than to the apple logo and then turns off. It keeps trying a few times. I've tried to restore the phone but putting it in recovery mode, but then I get an error message code 4013. Old (cracked) screen works fine when a put that on the phone instead. Have you been able to fix your problem?

tallnhandsome -

You guys may want to try swapping out the front-facing camera and sensor cable in case that's the culprit. Here's a thread full of folks who had similar issues. If you bought your parts from iFixit, you can also get in touch with us directly via our help line.

Jeff Suovanen -

hi please tell me how to upgrade my iphone 16 to 128 gb

punkden74 - crwdns2934203:0crwdne2934203:0

Although the guide is really not complete (missing important parts, like removal of camera, speaker, metal plate covering the touch sensor, etc), it did a good job till it was written. The touch sensor works this way, if not broken otherwise.

Bulcsu Varay - crwdns2934203:0crwdne2934203:0

"This guide does not include the removal of the front-facing camera and sensor cable, or the earpiece speaker. If your part does not have these components, follow the more in-depth front panel guide." Check out the more complete guide for better detail about additional parts removal.

Sam Goldheart -

Just replaced the panel. Phone is as good as new!!! The only thing is the home button "rattles" because the glue/adhesive apund the edge is not really doing anything? That s is the 3rd time I've had an iPhone 6 open, so the repair process was familiar

Eric Knudtson - crwdns2934203:0crwdne2934203:0

do i need to back up data before screen repalcement?

sonhien nguyen - crwdns2934203:0crwdne2934203:0

do i have to backup data before screen replacement?

sonhien nguyen - crwdns2934203:0crwdne2934203:0

It is always a good idea to do a backup of the device's data (just in case). Total time to swap screen (including transferring home button to replacement screen) was about 1 hr time for me. As a heads up, before reassembling everything back together, triple check each connection from the screen to the main board individually. That way you shouldn't miss not having a connector seated properly. I had that happen and the touch functionality wasn't working. Did a second disassembly, disconnected and reconnected each connector and triple checked before assembling the second time. Another trick that I did was to connect the battery and power up the phone once the connectors to the screen were connected and tested touch capability (should have did this when assembling the first time and avoided the touch not working.

John Robinson - crwdns2934203:0crwdne2934203:0

guide was great. the part was substandard. I see a couple bright spots on the screen when viewing a white page so it seems this part was a reject and resold thru fixit?

Gary Failano - crwdns2934203:0crwdne2934203:0

Hi there, Gary! I'm sorry to hear that! I'm Kadan with iFixit Customer Support and I'd like to make sure you're 100% satisfied with our displays. I'll be sending you an email shortly so we can help get you all squared-away.

Kadan Sharpe -

EXELENTES tutoriales muy entendibles gracias por compartir este conocimiento es de mucha ayuda sigan adelante y muchas bendiciones

Xavier Santos - crwdns2934203:0crwdne2934203:0

I did this last night, and managed to get it semi working. On boot the phone works totally fine but as soon as I lock it and unlock it - I get a totally non responsive phone for about 4-5 minutes, not even the side buttons work. The only way for me to safely unlock the phone now is by swiping right into the "widget" screen and entering my password that way. Then it's totally fine - Anyone else experienced this/fixed this weird bug?

I also cocked up the facetime camera and speaker for phonecalls but, I'm gonna worry about that in the next comment

Thanks in advance, Tim

Tim Hughes - crwdns2934203:0crwdne2934203:0

This guide was very good and I was able to replace the screen successfully.

For the parts where they suggest heating, I used a couple of those reusable hand heaters.

I replaced just the screen so had to remove the home button, front-facing camera, etc., which is part of a different guide. The most difficult part about the reassembly was getting the mic and light sensor to seat in the housings. I suggest using LOTS of light and working from the top of the phone with the home button furthest away. Seat the mic/light sensor pieces and hold them in place with the spudger. Carefully slide in the speaker, then pop the front-facing camera back into its housing. Try to hold each piece down as you go. While fighting this part I was seriously questioning why I didn't spend the extra $49 for the full assembly but eventually things popped into place and I was back in business.

For the four connectors from the screen to the body, just push them in with your fingers. You will feel them click into place.

Good luck!

dan - crwdns2934203:0crwdne2934203:0

Does this assembly come with a new speaker, or do you need to purchase one separately?

Tyler Bradshaw - crwdns2934203:0crwdne2934203:0

I was just wondering.. Does anyone know what the little peg like things, that come with the tools in Screen Replacement Kits are for? I can't figure out what they're used for because I have never had to use them & I've repaired A LOT of phones, iPad's & Tablets..

Btw… Great post! It will DEFINITELY help people who don't have as much or any at all experience with fixing their iPhone. You did a GREAT job breaking it down

T Rosa - crwdns2934203:0crwdne2934203:0

why is there black vertical lines on my iphone 6 running ios 11 it appears only on a black background the frames seems to be moving as seen in the video and screenshot at the left and side edges i'm thinking this is a software issue as it appears on the screenshot and screen recording https://m.imgur.com/a/TrHtF

bash - crwdns2934203:0crwdne2934203:0

Is this the screen part to make it come on?

Hunter Rowland - crwdns2934203:0crwdne2934203:0

Display replacement went flawlessly, just like last fall’s battery replacement.

Only constructive criticism would be right up front recommending magnification, screws and connectors are tiny! I used a pair of jewelers glasses, made a world of difference.

satcommguy - crwdns2934203:0crwdne2934203:0

Replaced battery and display, will not reboot. Apple comes up and then shuts down then starts up and shuts down. Only ever see the apple logo. What could be the problem?

Julie - crwdns2934203:0crwdne2934203:0

UPDATE: After lots of research and testing, I found out that the camera connection was the answer to my ERROR (9) problem. Luckily I was able to return the display to iFixit and get a replacement no problem. Plugged the new one in today and it works great. This repair, except for the hiccup, was not very hard as long as you take your time!

Julie -

ok i have a problem, i have purchased screen from ebay and made a mistake i purchased display assembly for 6s plus but instead i have 6 plus and after installation display is only responsive for few seconds then stops for 5 min and i also purchased front ribbon cable for 6s plus

Before i spend more money on this, if i purchase proper assembly and ribbon cable will it work, is it the reason its not working a wrong assembly and front camera ribbon??? Thanks

Dzenan Mahmtovic - crwdns2934203:0crwdne2934203:0

Thanks for the instructions! Made the screen replacement easy :)

My son doesn’t use the touchID so didn’t even have to mess with that.

Nora Bashy - crwdns2934203:0crwdne2934203:0

I’ve repaired screens on almost every model of iPhone and the 6 plus was, in my opinion, the easiest. Case screws, battery disconnect, and 4 ribbons. It took me about ten minutes, although I did not replace the home button, which would require another 5 minutes. As always, ifixit comes in very handy with good guides and quality images. Forget that Iclack though. What a joke! A suction cup or tape works great.

Michael Fruncillo - crwdns2934203:0crwdne2934203:0

To hold the screen while undo the cables I recommend you to use your device’s box with an elastic. Put the box straight up and attach the screen to it :).

Mathis Péau - crwdns2934203:0crwdne2934203:0

Hi….

I salute your explanation and rationale. On demand to me is another major advantage of [|Mobile screen repairing]. It is an exciting field that is truly emerging and I really like when people are expressing their opinion and thought. So I like the way you are writing.

super ekart - crwdns2934203:0crwdne2934203:0

Great tutorial. I’m newer to tech repair industry, but am very comfortable taking things apart and reassembling them. This step-by-step guide is really good and very accurate. Thank you for investing the time to put it all together. This makes repairs very easy and very manageable. The right tools also make the world of difference.

Americo Garcia Jr - crwdns2934203:0crwdne2934203:0

So I recently replaced my screen for the 6+ however, the screen remained black without the apple logo when I turned it on forcing me to return the screen. I did restart the device multiple times and rechecked the connections, it was all good. Replaced the cracked screen and everything was fine. Weeks later, I read that the batter must be disconnected in order for the new screen to work. Is the true or anyone else?

Saheed - crwdns2934203:0crwdne2934203:0

Well, the battery should be disconnected before replacing the screen, due to there being circuits that may short if even if there’s a slightly bad connection to any ports…

Lynn Norris -

I just resently replaced my cracked screen on my iPhone 6+ along with my original home button. According to the comment above ( “The Touch ID function will ONLY work with your phone's original home button assembly, so you'll need to transfer the home button assembly from your old display assembly to your new display assembly to retain Touch ID.”) I should have Touch ID functionality, but I do not . When I try to use the Touch ID it doesn’t seem to work. I also went to Touch ID & Passcode under the settings menu to turn it on and got the following message “Failed Unable to complete Touch ID setup. Please go back and try again.” Any ideas? Everything else seems to work fine.

Jared

jaredmuegge - crwdns2934203:0crwdne2934203:0

Make sure the home button cable flex is plugged in correctly—reseat the connector and make sure there’s no dust or debris in the socket. Do the same for where it connects to the logic board. Make sure the cables themselves aren’t damaged. If necessary, try it with a different screen (the Touch ID signal is routed through a cable in the display assembly, so a defect in that cable can prevent Touch ID from working). Good luck!

Jeff Suovanen -

Thank you very much. I had some trouble with the home button (not reassembled properly), but on the second trial, it worked as described.

Not related to the tutorial, but to the phone itself: I did have problems with the Pentalobe screws at the bottom of the phone (step 1) - I was not able to unscrew one of them, I had to “force” the screen out of the case with one of the screw still in place. It worked.

Jean Wallemacq - crwdns2934203:0crwdne2934203:0

After replacing the screen, my device won’t power on. I reverted back to the old screen and same problem. Any recommendation for where the problem may be?

AMSDVM - crwdns2934203:0crwdne2934203:0

Did anyone come across the vibrator button switch not functioning after replacing the LCD screen? It was working for a second, and after a few more tries, it stopped. It doesn’t even register that the switch is functioning either (you don’t get the quick image on the screen).

(iPhone 6 Plus)

CHARLES ALMERO - crwdns2934203:0crwdne2934203:0

After display replacement everything seems to work fine. Randomly the iPhone 6 Plus gets a block line / stripe on the top op the screen and the touch doesnt work anymore.

I’ve seen this issue like 20 times already and I am unable to figure out what’s causing this problem.

Anyone has any useful suggestions?

John den Braber - crwdns2934203:0crwdne2934203:0

Muito show essa matéria, super elucidativa! super útil! Parabéns!

Very, Very good! Congratulations

Alves - crwdns2934203:0crwdne2934203:0

i did everything after the insructions but my touch id does not work

Florian Disterhoft - crwdns2934203:0crwdne2934203:0

I have replaced the screen on my Iphone 6plus for the second time. Everything works perfect , including the camera in the ‘normal’position. However when using the ‘selfie’ position, also used for facetime calls, it turns black only. Could this be the front-facing camera conector?

Ed Kniestedt - crwdns2934203:0crwdne2934203:0

Hi Ed,

I would definitely check the front-facing connector first. Disconnect and re-seat the connector. Check and clear any debris in the socket.

Arthur Shi -

This guide needs steps on doing the speaker and cameras

Beau Redmond - crwdns2934203:0crwdne2934203:0

Hello everyone

The guide is so easy and understandable for everyone i want to mention that i have no experience with iphone fixing .

it took me for 1 and half hour and the tools was so great and easy to use .

Altin Vangjeli - crwdns2934203:0crwdne2934203:0

I just completed the screen swap out took about 30 min. Used the Ifixit pro tool kit, magnetic project mat and the isclack. Went just as it did in the video repair guide could not be happier. Kind of excited for something else to need repair.

David Childers - crwdns2934203:0crwdne2934203:0

You guys are awesome! After 20 years of owning my own tech company and having multiple techs replace screens but never having done one myself I followed your instructions and replaced my iPhone 6+ screen all by myself with your guide. Sold the business back in October but had several screens left from inventory so it was a relief when I dropped my phone this evening and the screen shattered I was able to get one out and pull up your instructions. Very easy to follow. Back in business baby!!

mary - crwdns2934203:0crwdne2934203:0

Took me about 15 minutes to replace the screen on my iPhone 6 Plus with this kit. The directions were spot on. Amazingly easy. When I was done, I was literally looking over the directions thinking I missed something. :)

Edward Degagne - crwdns2934203:0crwdne2934203:0

I was able to successfully swap a damaged (water) screen on my old iPhone 6 plus with this guide. Just an observation that may help others in the future. I moved the TouchID button from the original screen onto the new one. Once I fired up the phone after re-assembly, I got an “Unable to activate TouchID” message, but the home button still functioned for all other tasks like exiting an app and going to home screen, double pressing for app cards which showed what apps were still open and running. Only thing it didn’t do was accept fingerprints for security or purchases. I tried restoring phone, rebooting phone, reinstalling iOS. Nothing worked. Finally read about swapping out the original TouchID ribbon cable from the original screen. Removed the TouchID ribbon cable from the new screen I purchased from iFixIt and used the original TouchID cable and voila! TouchID functionality restored. So……probably a bad TouchID ribbon cable on the new screen, but an easy enough fix.

Edwin Roman - crwdns2934203:0crwdne2934203:0

Great guide! Thanks ifixit! I don’t know if this is helpful… I print out the guide instructions and with clear tape I tape the screws to the corresponding steps- very close to the image showing the screws. This helps me keep track of the screws.

Stacey Morris - crwdns2934203:0crwdne2934203:0

i don’t know where ifixit got the replacement screens but the touch id ribbon cables might be defective in some batch.

i experienced the same issue. after doing every steps correctly, the touch id DID NOT work

I had to uninstall the original ribbon cable from my broken screen and used it to replace the faulty cable on the replacement screen.

then my touch id worked

Qian Li - crwdns2934203:0crwdne2934203:0

With a lot of time and patience, I was able to repair my phone myself. Thank you for this detailed guide.

Walter Xavier - crwdns2934203:0crwdne2934203:0

Hello, I changed screen after sweating 2 hours. But… iphone opens and when I “close“ screen with power button and I click it again does not open. Not even with home button. Also wondering why the metallic shield has a cable, what is does? if its only a heat shield.

Konstantinos - crwdns2934203:0crwdne2934203:0

I bought a iPhone 6 Plus replacement Screen I didn’t do anything but just put it in place the glass break so easy

Minh Nguyen - crwdns2934203:0crwdne2934203:0

crwdns2917038:0crwdne2917038:0

crwdns2936625:0crwdne2936625:0:

crwdns2936751:024crwdne2936751:0 19

crwdns2936753:07crwdne2936753:0 137

crwdns2936753:030crwdne2936753:0 588

crwdns2942667:0crwdne2942667:0 728,541