crwdns2915892:0crwdne2915892:0
Use this guide to replace the home button assembly.
Please note that only the phone's original home button assembly will be capable of using the Touch ID functionality. Installing a new home button will only restore ordinary home button functions, not the Touch ID features.
You can also use this guide to replace the following parts:
crwdns2942213:0crwdne2942213:0
crwdns2936621:0crwdne2936621:0
-
-
Power off your iPhone before beginning disassembly.
-
Remove the two 3.6 mm P2 Pentalobe screws next to the Lightning connector.
-
-
crwdns2935267:0crwdne2935267:0Clampy - Anti-Clamp$24.95
-
Pull the blue handle backwards to unlock the Anti-Clamp's arms.
-
Slide the arms over either the left or right edge of your iPhone.
-
Position the suction cups near the bottom edge of the iPhone just above the home button—one on the front, and one on the back.
-
Squeeze the cups together to apply suction to the desired area.
-
-
-
Pull the blue handle forwards to lock the arms.
-
Turn the handle clockwise 360 degrees or until the cups start to stretch.
-
Insert an opening pick or tool under the screen when the Anti-Clamp creates a large enough gap.
-
Skip the next three steps.
-
-
-
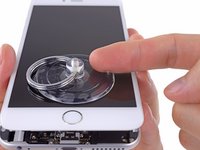
Use a single suction cup to lift the front panel:
-
Press a suction cup onto the screen, just above the home button.
-
-
-
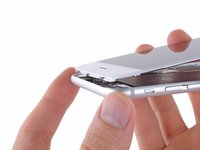
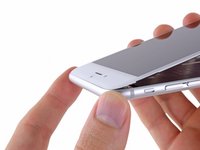
While holding the iPhone down with one hand, pull up on the suction cup to slightly separate the front panel assembly from the rear case.
-
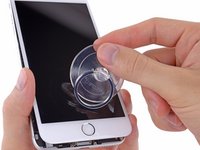
Using a plastic opening tool, begin to gently pry the rear case down, away from the display assembly, while continuing to pull up with the suction cup.
-
-
-
Pull the plastic nub to release the vacuum seal on the suction cup.
-
Remove the suction cup from the display assembly.
-
-
-
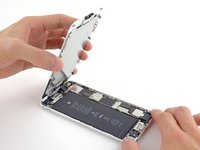
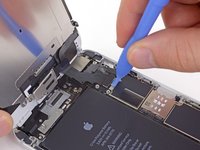
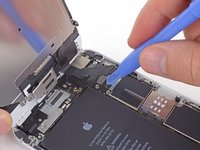
Pull the home button end of the front panel assembly away from the rear case, using the top of the phone as a hinge.
-
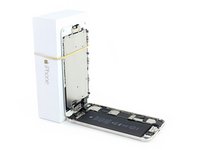
Open the display to about a 90º angle, and lean it against something to keep it propped up while you're working on the phone.
-
Add a rubber band to keep the display securely in place while you work. This prevents undue strain on the display cables.
-
-
-
Remove the following Phillips screws from the battery connector bracket:
-
One 2.3 mm screw
-
One 3.1 mm screw
-
-
-
-
Remove the metal battery connector bracket from the iPhone.
-
-
-
Use a clean fingernail or the edge of an opening tool to gently pry the battery connector up from its socket on the logic board.
-
-
-
Remove the following Phillips screws securing the front panel assembly cable bracket:
-
Three 1.2 mm screws
-
One 1.5 mm screw
-
One 2.9 mm screw
-
-
-
Remove the front panel assembly cable bracket from the logic board.
-
-
-
While still supporting the front panel, use a fingernail or the edge of an opening tool to disconnect the front-facing camera and earpiece speaker connector.
-
-
-
Disconnect the home button cable connector.
-
-
-
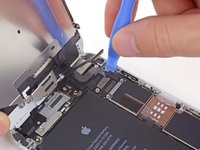
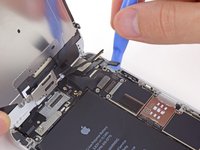
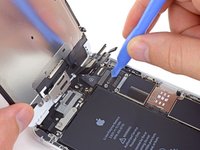
Use a plastic opening tool to disconnect the display data cable connector.
-
-
-
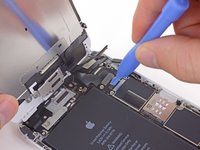
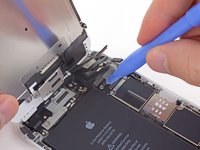
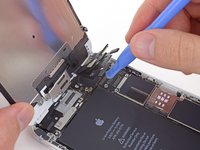
Finally, disconnect the digitizer cable connector.
-
-
-
Remove the front panel assembly from the rear case.
-
-
-
Remove the two 1.8 mm Phillips screws securing the home button bracket to the front panel.
-
-
-
Remove the home button bracket from the front panel assembly.
-
-
-
Use the tip of a spudger to disconnect the home button connector from its socket on the home button cable.
-
-
crwdns2935267:0crwdne2935267:0iOpener$14.99
-
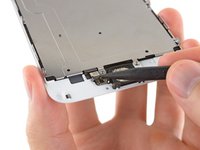
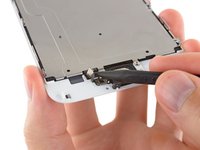
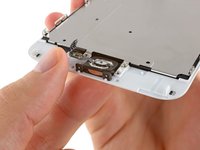
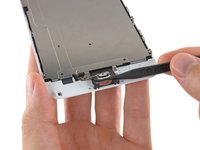
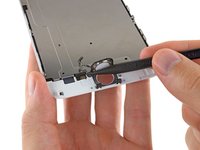
Carefully wedge the tip of a spudger underneath the home button connector cable.
-
Gently move the spudger across to separate the home button connector cable from the adhesive securing it to the front panel assembly.
-
-
crwdns2935267:0crwdne2935267:0iOpener$24.99
-
Apply mild heat (with an iOpener, heat gun, or hair dryer) to soften the adhesive securing the home button gasket.
-
Using your fingertip, gently press up on the home button from the front side of the display assembly. Use firm, constant pressure to slowly separate the home button's rubber gasket from the front panel.
-
-
-
Carefully use the tip of a spudger to finish separating the home button from the front panel.
-
-
-
Lift and remove the home button assembly off the front panel assembly.
-


To reassemble your device, follow these instructions in reverse order.
crwdns2935221:0crwdne2935221:0
crwdns2935229:0123crwdne2935229:0

crwdns2947412:024crwdne2947412:0
My iphone was screen broken and i change it with a original complete iphone screen, the home button works fine but the touch id dont work. I change the home button to the one that i have in the broken screen and still the touch id dont work. What can i do to fix the touch id?
replace the flex cable which connects touch ID cable with mother board
Hi guys, I replaced my front assembly and I'm having the opposite issue with my home button: The TouchID is working fine, but the home button being pressed is not working. I've tried re-seating the cable a few times. I'm normally pretty good at these kinds of things but I'm assuming I may have somehow crimped one of the ribbon cables.
My question: If something is damaged, is it more likely the cable on the back of the heat-sink that is damaged, or the home button ribbon cable itself? I realize that I will lose TouchID if its the latter, I just want to know what my options are. I'm having trouble searching the issue because everyone else has the issue where the TouchID doesn't work (for obvious reasons) but mine is working just fine.
Thanks for any advice.
Hi everyone, I replaced the home button on my cell phone iphone 6+, the home button functionality works just fine, however the biometrics fingerprint reader does not work anymore. Any suggestions? Thank you
Unfortunately, as stated in the introduction to this guide, that outcome is normal. For security reasons, the fingerprint sensor is coded to your phone's logic board at the factory. If you replace the button, you'll lose the fingerprint sensor function. Only Apple has the capability to pair new Touch ID sensors to existing phones. As far as I know, there are only two ways around this: (1) replace both your home button and logic board with a factory-paired home button and logic board harvested from another phone, or (2) pay Apple for an out-of-warranty repair (meaning you ship your phone to them and they give you a refurb in return).