crwdns2915892:0crwdne2915892:0
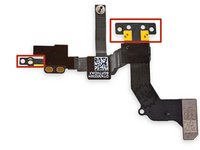
The front-facing camera and rear-facing microphone are on a single cable, and must be replaced together. Use this guide to remove this assembly.
You can also use this guide to replace the front facing camera bracket.
crwdns2942213:0crwdne2942213:0
-
-
Lay overlapping strips of clear packing tape over the iPhone's display until the whole face is covered.
-
-
-
Power off your iPhone before beginning disassembly.
-
Remove the two 3.6 mm Pentalobe screws next to the Lightning connector.
-
-
-
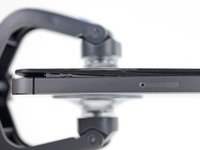
Regardless of the tool you use, you need to be sure you pull up the entire display.
-
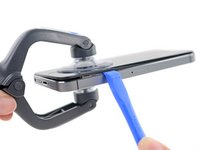
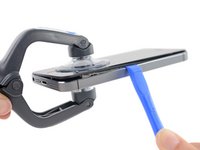
If the glass begins to separate from the plastic, as shown in the first image, slide a plastic opening tool between the plastic frame and the metal phone body to pry the metal clips out of the case.
-
-
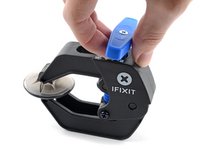
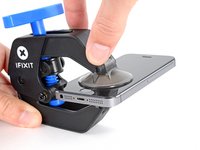
crwdns2935267:0crwdne2935267:0Clampy - Anti-Clamp$24.95
-
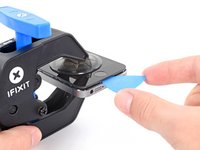
Pull the blue handle backwards to unlock the Anti-Clamp's arms.
-
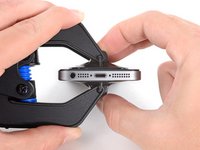
Slide the arms over either the left or right edge of your iPhone.
-
Position the suction cups near the bottom edge of the iPhone just above the home button—one on the front, and one on the back.
-
Squeeze the cups together to apply suction to the desired area.
-
-
-
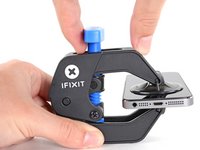
Pull the blue handle forwards to lock the arms.
-
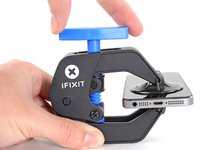
Turn the handle clockwise 360 degrees or until the cups start to stretch.
-
Insert an opening pick under the screen when the Anti-Clamp creates a large enough gap.
-
Skip the next two steps.
-
-
-
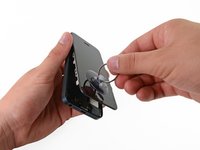
Press a suction cup onto the screen, just above the home button.
-
-
-
While holding the iPhone down with one hand, pull up on the suction cup to slightly separate the front panel assembly from the rear case.
-
With a plastic opening tool, begin to gently pry the rear case down, away from the screen, while you pull up with the suction cup.
-
-
-
Continue to pry up around the sides of the front panel assembly, detaching the clips along the left and right side.
-
-
-
-
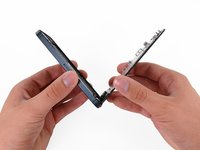
Once the clips have been released on the bottom and sides of the front panel assembly, pull the bottom of the assembly away from the rear case.
-
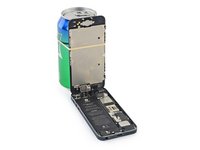
Open the display to about a 90º angle, and lean it against something to keep it propped up while you're working on the phone.
-
Add a rubber band to keep the display securely in place while you work. This prevents undue strain on the display cables.
-
-
-
Remove the following two screws securing the metal battery connector bracket to the logic board:
-
One 1.8 mm Phillips screw
-
One 1.6 mm Phillips screw
-
-
-
Remove the metal battery connector bracket from the iPhone.
-
-
-
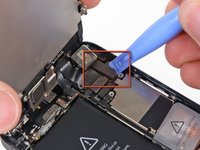
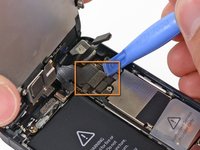
Use a plastic opening tool to gently pry the battery connector up from its socket on the logic board.
-
-
-
Remove the following screws securing the front panel assembly cable bracket to the logic board:
-
Two 1.2 mm Phillips screws
-
One 1.6 mm Phillips screw
-
-
-
Lift the display cable bracket toward the battery to unhook it, and remove it from the iPhone.
-
-
-
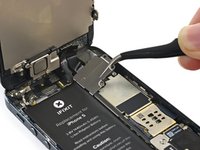
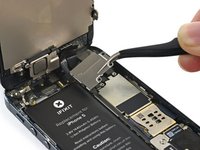
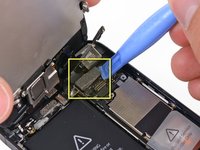
Use a plastic opening tool or a fingernail to disconnect the three front panel assembly cables:
-
Front-facing camera and sensor cable
-
LCD cable
-
Digitizer cable
-
-
-
Remove the front panel assembly from the rear case.
-
-
-
Remove two screws securing the front-facing camera bracket to the display assembly.
-
One 4.1 mm Phillips screw
-
One 2.2 mm Phillips screw
-
-
-
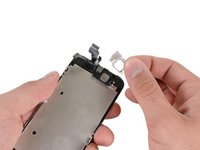
Remove the earpiece speaker bracket from the display assembly.
-
-
-
Remove the earpiece speaker from the iPhone.
-
-
-
There is a small, black plastic spacer underneath the metal bracket at the upper screw. The upper screw goes through the metal bracket then through this plastic spacer.
-
-
-
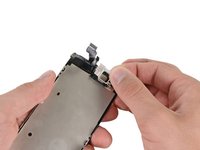
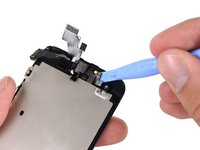
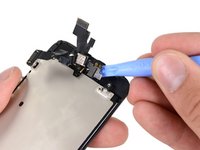
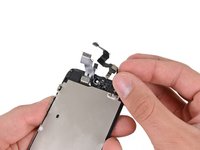
Starting under the earpiece speaker contacts, use a plastic opening tool or the tip of a spudger to pry the front facing camera cable out of the display assembly.
-
-
-
Remove the front-facing camera and rear microphone assembly.
-
To reassemble your device, follow these instructions in reverse order.
To reassemble your device, follow these instructions in reverse order.
crwdns2935221:0crwdne2935221:0
crwdns2935229:0207crwdne2935229:0
crwdns2947412:011crwdne2947412:0
Image #1
EditStep 14
There is a small, black plastic spacer underneath the metal bracket at the upper screw. The upper screw goes I need buy where I get this item lost
Hi, I have replaced the cable two times with no luck (camera and auto brightness work fine but not the proximity sensor. I ended up changing the complete screen assembly and still the same (camera and autobrightess, but no proximity sensor). Also, it's not software related, I have tried everything: Hard reset, recovery, configuration as new phone, etc.
This looks like there's something wrong in the main board?
did you find any solution?
I did this repair with a new cable bought from ifixit. I had previously replaced my earpiece speaker but didn't get my sound back. After replacing the cable though I have sound! But it appears that the dimming sensor might be faulty on the new cable, and I don't know if the internal screws could handle another opening.
A litte disappointed that I paid $25 to fix one thing but have another break.
Anyone else have this issue and any ideas?
Well at least I can hear through my earpiece again.
I replaced my battery and ever since then my front facing camera does not work and after a while my back camera is not working nethier does the microphone where I hear people talk on the phone why is this please help


