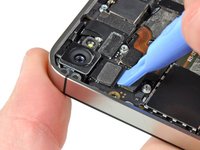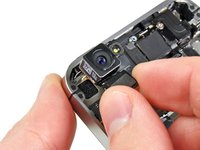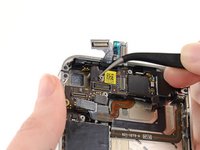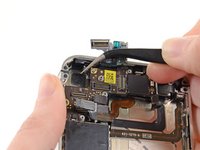
iPhone 4 Verizon Home Button Replacement
crwdns2915892:0crwdne2915892:0
crwdns2942287:0crwdne2942287:0Use this guide to replace a broken home button.
crwdns2942213:0crwdne2942213:0
crwdns2943213:0crwdne2943213:0
crwdns2943215:0crwdne2943215:0
crwdns2944105:0crwdne2944105:0
-
-
Power off your iPhone before beginning disassembly.
-
Your phone's rear cover may have two #000 Phillips screws or Apple's 5-Point "Pentalobe" screws. Check which screws you have, and ensure you also have the correct screwdriver in order to remove them.
-
Remove the two 3.6 mm Pentalobe or Phillips #000 screws next to the dock connector.
-
-
-
Push the rear panel toward the top edge of the iPhone.
-
-
-
Pinch the rear panel with your fingers, and lift it away from the iPhone. Alternatively, use a Small Suction Cup .
-
-
-
Remove the single 1.5 mm Phillips screw securing the battery connector to the logic board (if present).
-
-
-
Use the edge of a plastic opening tool to gently pry the battery connector up from its socket on the logic board.
-
Remove the metal clip covering the antenna connector.
-
-
-
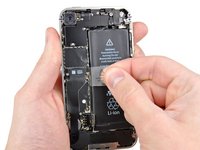
Pull up on the exposed clear plastic tab to peel the battery off the adhesive securing it to the iPhone.
-
If there's any alcohol solution remaining in the phone, carefully wipe it off or allow it to air dry before installing your new battery.
-
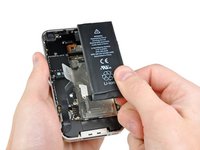
Remove the battery.
-
Before reassembly, clean metal-to-metal contact points with a de-greaser such as windex. The oils from your fingers have the potential to cause wireless interference issues.
-
Perform a hard reset after reassembly. This can prevent several issues and simplify troubleshooting.
-
-
-
Remove the two 1.8 mm Phillips screws securing the dock connector cable to the logic board.
-
Remove the thin metal dock connector cable cover.
-
-
-
Use the edge of a plastic opening tool to pry the dock cable up from its socket on the logic board.
-
-
-
Peel the dock connector cable off the adhesive securing it to the logic board and the side of the speaker enclosure.
-
-
-
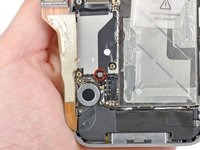
Remove the 1.6 mm Phillips screw securing the pressure contact to the logic board near the vibrator.
-
Remove the pressure contact.
-
-
-
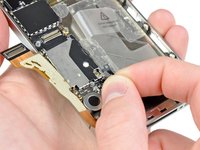
Use the edge of a plastic opening tool to pry the cellular antenna cable up from its socket on the logic board.
-
De-route the cellular antenna cable out from under the metal fingers attached to the logic board.
-
-
-
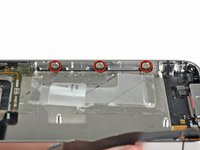
Remove the following five screws:
-
Three 1.3 mm Phillips screws
-
One 1.5 mm Phillips screw
-
One 2.4 mm Phillips screw
-
-
-
Lift the cable cover from its edge nearest the top of the iPhone.
-
Pull the cable cover tabs out of their slots cut into the EMI shield on the logic board and remove it from the iPhone.
-
-
-
Use the edge of a plastic opening tool to pry the rear camera connector up from its socket on the logic board.
-
Remove the rear camera from the iPhone.
-
-
-
Disconnect the five cables near the top of the logic board in the following order:
-
Headphone jack/volume button cable
-
Power button cable
-
Front facing camera cable
-
Digitizer cable
-
Display data cable
-
To disconnect the cables, use the edge of a plastic opening tool to gently lift their connectors up and out of the sockets on the logic board.
-
-
-
Remove the 1.5 mm Phillips #000 screw near the headphone jack.
-
-
-
Lift the small grounding clip up off the logic board and remove it from the iPhone.
-
-
-
Use the edge of a plastic opening tool to disconnect the Wi-Fi antenna cable connector from the logic board.
-
-
crwdns2935267:0crwdne2935267:0Standoff Screwdriver for iPhones$5.49
-
Remove the 2.5 mm Phillips #000 screw securing the logic board near the power button.
-
Remove the 4.8 mm standoff screw near the headphone jack.
-
-
-
Remove the 3.4 mm Phillips screw near the vibrator motor.
-
Remove the two 3.6 mm standoff screws along the side of the logic board nearest the battery opening.
-
-
-
Carefully lift the logic board from the end closest to the speaker enclosure and slide it away from the top edge of the iPhone.
-
Remove the logic board.
-
-
-
Use the edge of a plastic opening tool to pry the vibrator off the adhesive securing it to the frame of the iPhone.
-
Remove the vibrator.
-
-
-
Remove the two 2.4 mm Phillips screws from the sides of the speaker enclosure assembly.
-
-
-
Remove the small plastic bracket that was installed under the screw closest to the dock connector cable.
-
-
-
Remove the speaker enclosure assembly from the iPhone.
-
-
-
Remove the small pieces of black tape covering the display mounting tabs.
-
-
-
Remove the 1.6 mm Phillips screw securing the display assembly near the power button.
-
-
-
Remove the 1.6 mm Phillips screw near the headphone jack.
-
-
-
Remove the 1.6 mm Phillips screw near the lower microphone.
-
-
-
Remove the 1.6 mm Phillips screw near the dock connector cable.
-
-
-
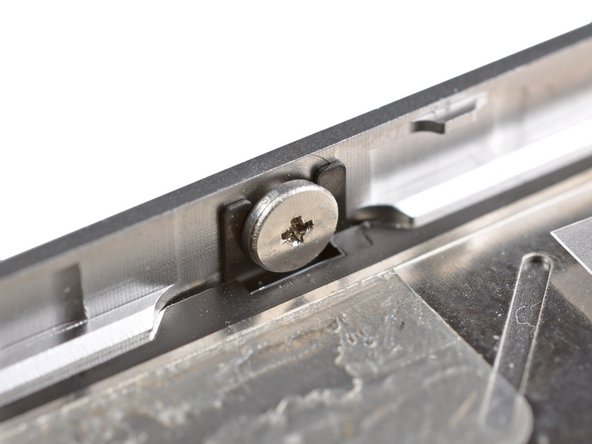
Loosen the three large-headed Phillips screws along the volume button side of the iPhone about one half turn.
-
-
-
Loosen the three large-headed Phillips screws along the other side of the iPhone about one half turn.
-
-
-
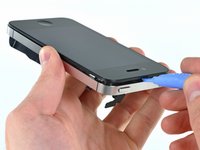
Use the edge of a plastic opening tool to gently pry up the display assembly around its perimeter.
-
De-route the digitizer and LCD cables through the steel inner frame.
-
When the front panel has been correctly installed, both the LCD and digitizer cables should be immediately next to one another and should be the same length, as shown in the second photo.
-
During reassembly, do not touch the metallic area at the base of the LCD data cable, as this can cause problems with the LCD. If you do touch it accidentally, clean it gently with an alcohol wipe before continuing.
Remember to take the earpiece screen off the old lcd and put it on the new screen. Most replacements do not include this mesh screen.
DEFINITELY REMEMBER THE ABOVE ADVICE TO TRANSFER THE METAL MESH SCREEN FROM THE OLD SCREEN TO THE NEW ONE.
I've done this twice now, and it really, really stinks because you don't usually see it until the phone is all back together. That would mean doing the whole process again. Slapped myself in the forehead the second time.
Thank you so much for this easy to follow guide, but it's so good I don't usually look at the comments. Maybe this last little thing could be added.
Either way, Thanks Again.
took me about 2 hours to succesfully complete the entirety of this replacement. Although the hardest part is putting the screws back into their respective holes. And it does help to read the comments after reviewing the guide as well. It wasn't until I had the customer's phone completely back together that I realized that earpiece grill wasn't there on the new screen.. nevertheless.. Thank You to my favorite repair website for the easy to follow guides.
There is also a small plastic ring around the front-facing camera that may come away with the broken screen. Make sure to recover it and re-attached to the camera before reassembly.
Well I got about 1/2 way back through the re-assembly and found that the digitizer cable was too short. I disassembled back to here and this time started snapping the new display surface back into place beginning at the end where the digitizer cable feeds through. Then I did a "dry-run" with the logic board to ensure the cable reaches and it looks good.
Instruction here refers to routing the digitizer/LCD cables through the
"outer case". Just for the sake of clarity,
isn't the part through which the ribbons are
being routed the FRAME? If it really IS the outer case, where is the "inner case"?
To Mark and the small plastic ring, I remembered to salvage it an save it, but then forgot to reinstall it... Oops... Humm.. Wonder if the phone really needs it? .......
ive gotten everything apart and all of the screws out.. but cannot seem to pry the screen off. suggestions?
The digitizer/LCD cable warning is VERY important! I thought I had it right, but had to go back and disassemble again when I realized the digitizer connection wouldn't meet - it had folded under the frame (which I might have noticed if I'd compared it to the photo in Step 23 - that clearly shows that the 2 cables should be about the same length).
It's a great manual, and a satisfying repair - this iPhone had been run over, the front glass totally shattered, and now it's operational!
Got my phone back together and cut it on and the screen is white with a couple pixels in upper left hand corner that are black. I could very faintly make out the screen after it booted up and was able to power it down. Any recommendations on how to proceed. I plan to disassemble and check all the connections.
Same problem as Rachael. I've removed all the screws but the front glass isn't budging despite my spudging. Any tricks for resolving this? I don't want to break it at this point.
Use the guitar pick or a fingernail file to pry up one of the corners (the plastic goes with the glass away from the metal frame). Then carefully pull up the whole screen. There are plastic "feet" that are holding the screen on, you'll have to pry up an edge to get them to let go.
rafesmom -
I had a lot of broken glass stuck to the adhesive after removing the screen. Be sure you use tweezers and a scraper (be careful) to remove all the old debris prior to installing the new part. I got my part from ifixit so it had the mesh and the ring for the camera on the new part.
During the whole replacement of everything process, I ripped off the cable for the digitizer from the main cable, is there any way to repair this or should I just order a new screen?
Reassembly Warning: Be careful routing the cables through the frame. The digitizer cable tears easily. The LCD cable has the square shield. So, the digitizer cable is the cable without the shield. On the digitizer cable there is a section where the cable is wide then it gets more narrow. Where it tapers down (gets narrow) the cable can tear at this point. If the digitizer cable is torn the touch screen feature will not work.
There's adhesive top and bottom which gave me a large struggle spooning off the screen. My LCD cable was short due to it folding take it apart again uggg
The warning regarding tearing of the cable cannot be overemphasized. I tore a brand new cable on installation and had to hang my head in shame after having to reinstall a broken screen until I got another new part.
It’s best to put the plastic ring around the lens before assembly. The assembly I got from ifixit had the ring oriented wrong and interfered with the glass laying flush. I removed it with a drop of alcohol and rotated it around the lens until it slid in flush.
Take out the 6 side screws/washers. Put the four corner screws in loose and then thread in the 6 screws/washers. Once all are threaded in then tighten. It’ll save you a lot of grief.
-
-
-
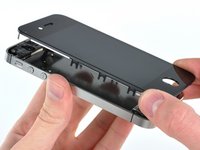
Remove the display assembly from the iPhone.
-
You may have to reuse the earpiece grille and the clear plastic ring around the front facing camera from the old/damaged assembly. This will depend on where you buy the replacement part.
-
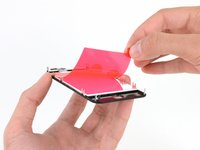
Your replacement display may come with colored plastic film on the back of the LCD. If so, use the pull tab near the home button to peel the plastic film from the LCD before installing the new display in your iPhone.
-
After reassembly, note the following:
-
Clean the touchscreen surface with an alcohol wipe prior to turning the iPhone back on. The alcohol helps dissipate any lingering static electricity, which can cause problems with the display.
-
-
-
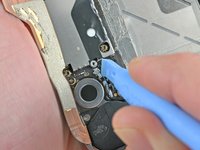
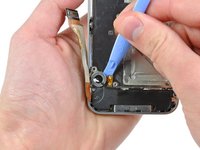
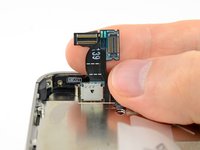
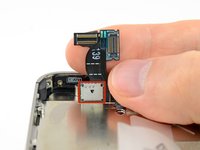
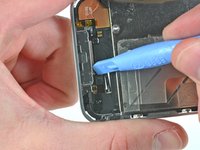
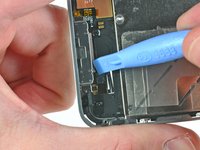
Use a clean fingernail or the edge of a plastic opening tool to flip up the retaining flap on the home button ribbon cable.
-
-
crwdns2935267:0crwdne2935267:0Tweezers$4.99
-
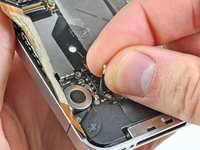
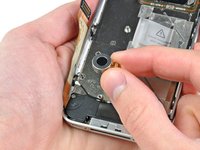
Use a pair of tweezers to pull the home button cable out of its socket.
-
-
-
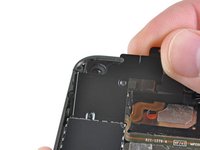
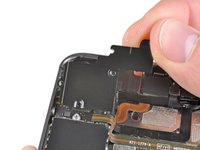
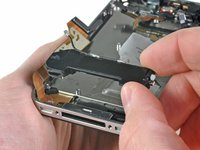
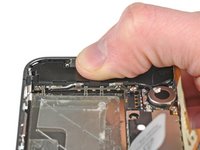
Carefully de-route the home button cable through its slot in the outer case and remove it from the iPhone.
-
To reassemble your device, follow these instructions in reverse order.
To reassemble your device, follow these instructions in reverse order.
crwdns2935221:0crwdne2935221:0
crwdns2935229:0129crwdne2935229:0
crwdns2947821:0crwdne2947821:0
crwdns2947823:0crwdne2947823:0crwdns2947412:03crwdne2947412:0
How can a company that prides itself on simplicity and elegance make something so needlessly unserviceable? I don't mind the small screws, even if I wonder how many of them really need to be there... but the fragile cables, little black spacers, the pentalobe screws and the glue - oh the inhumanity of the glue! The only thing that makes me happy is, now that Tim Cook's decided that they're going to service these things in-store, the thought of Apple employees sending an earful of expletives up the management chain.
Small and fragile = lite weight. And all of those spacers and glue is to keep everything in place and prevent those small and fragile parts from breaking as you use the phone. If you want a tiny, lite phone there are compromises. And Apple's mantra has never been serviceability. It's about getting you to upgrade to the new cool thing every 1-2 years, way before the phone would normally need servicing. And the Apple store really only services new batteries and screens. For pretty much everything else they just give you a new phone.
J V -
is there a way to remove the button without replacing the cable?


