crwdns2933423:0crwdne2933423:0

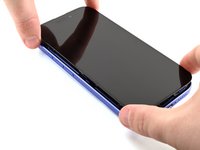
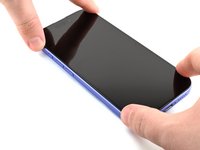
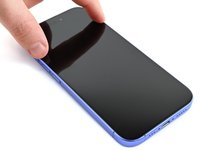
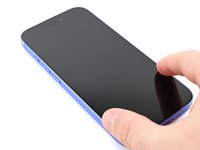
iPhone 16 Screen Installation

crwdns2862623:0crwdne2862623:0
crwdns2942641:0crwdne2942641:0

crwdns2942213:0crwdne2942213:0

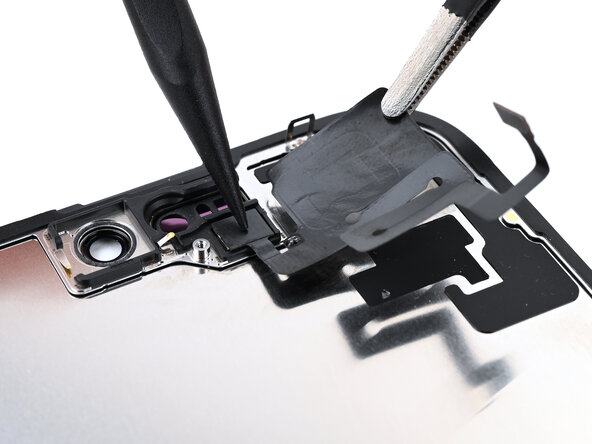
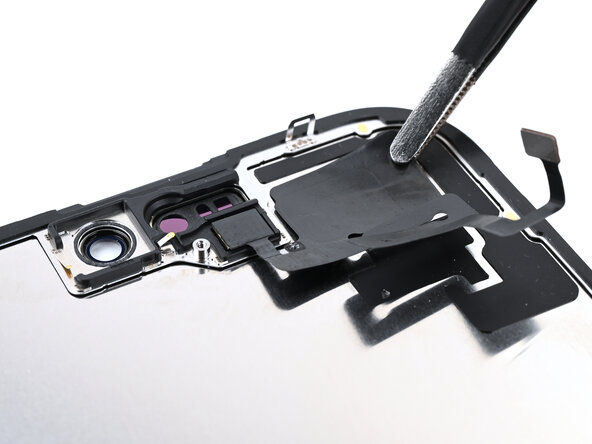
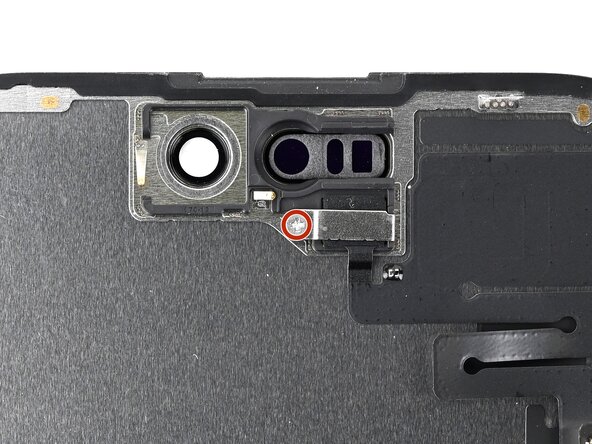
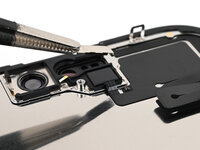
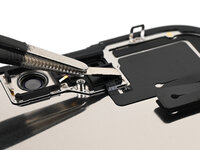
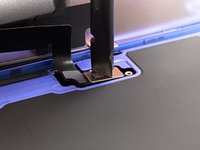
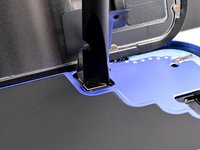
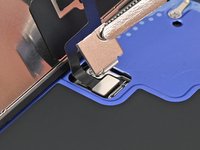
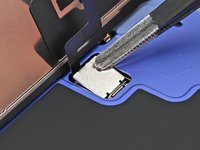
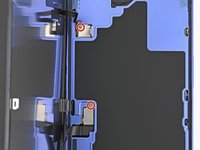
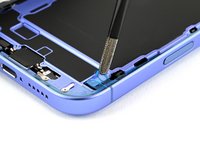
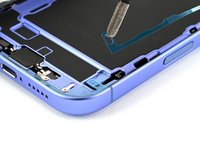
  1. iPhone 16 Screen Installation, Place the ambient light sensor: crwdns2935265:01crwdnd2935265:01crwdnd2935265:03crwdne2935265:0 iPhone 16 Screen Installation, Place the ambient light sensor: crwdns2935265:01crwdnd2935265:02crwdnd2935265:03crwdne2935265:0 iPhone 16 Screen Installation, Place the ambient light sensor: crwdns2935265:01crwdnd2935265:03crwdnd2935265:03crwdne2935265:0
    crwdns2935267:0crwdne2935267:0
    Tesa 61395 Tape
    $2.99
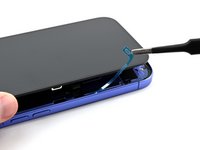
    • Without letting the ambient light sensor adhesive touch the screen, use a pair of tweezers to hold the sensor above the back of the new screen.

    • Align the ambient light sensor with its recess in the back of the screen.

    • Use a spudger or your finger to press the ambient light sensor into its recess.

    • Lay the ambient light sensor cable down on the back of the screen.

    • If the ambient light sensor cable isn't sticking, apply a few small pieces of double‑sided tape, like Tesa tape, to the back of the sensor cable.

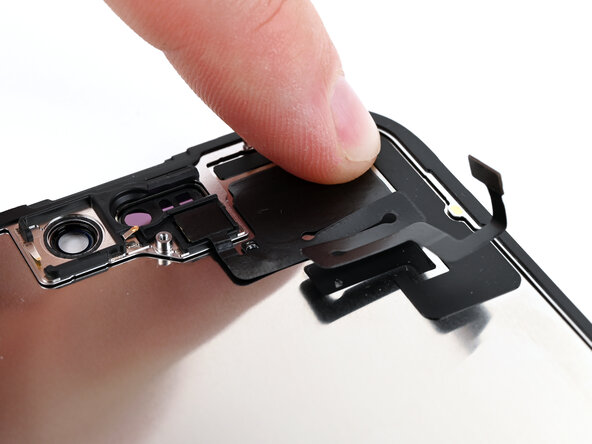
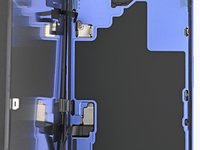
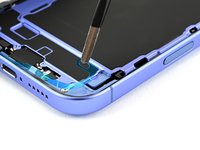
  2. iPhone 16 Screen Installation, Press the ambient light sensor: crwdns2935265:02crwdnd2935265:01crwdnd2935265:03crwdne2935265:0 iPhone 16 Screen Installation, Press the ambient light sensor: crwdns2935265:02crwdnd2935265:02crwdnd2935265:03crwdne2935265:0 iPhone 16 Screen Installation, Press the ambient light sensor: crwdns2935265:02crwdnd2935265:03crwdnd2935265:03crwdne2935265:0
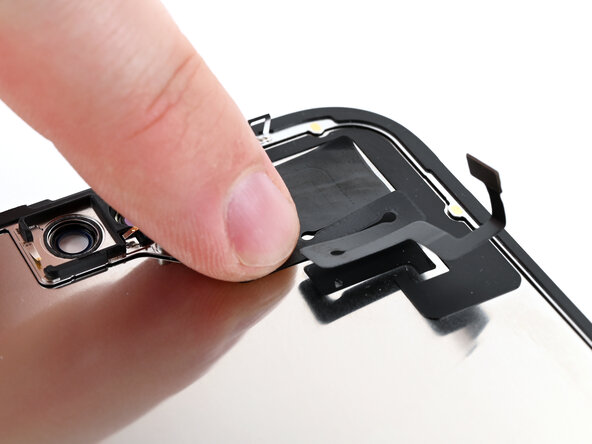
    • Use your finger to press down the ambient light sensor cable.

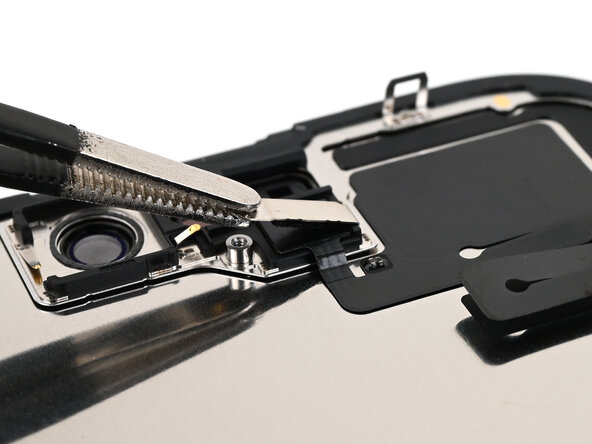
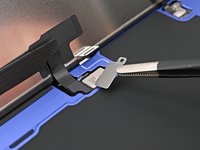
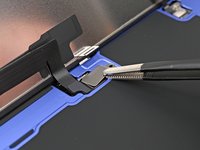
  3. iPhone 16 Screen Installation, Install the ambient light sensor bracket: crwdns2935265:03crwdnd2935265:01crwdnd2935265:03crwdne2935265:0 iPhone 16 Screen Installation, Install the ambient light sensor bracket: crwdns2935265:03crwdnd2935265:02crwdnd2935265:03crwdne2935265:0 iPhone 16 Screen Installation, Install the ambient light sensor bracket: crwdns2935265:03crwdnd2935265:03crwdnd2935265:03crwdne2935265:0
    • Use tweezers or your fingers to place the ambient light sensor bracket over the back of the sensor.

    • Use a Phillips screwdriver to install the 1.3 mm‑long screw securing the ambient light sensor bracket.

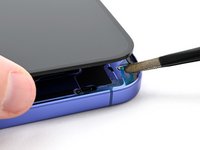
  4. iPhone 16 Screen Installation, Remove the screen adhesive: crwdns2935265:04crwdnd2935265:01crwdnd2935265:03crwdne2935265:0 iPhone 16 Screen Installation, Remove the screen adhesive: crwdns2935265:04crwdnd2935265:02crwdnd2935265:03crwdne2935265:0 iPhone 16 Screen Installation, Remove the screen adhesive: crwdns2935265:04crwdnd2935265:03crwdnd2935265:03crwdne2935265:0
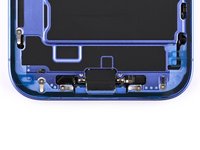
    • Be careful not to damage any of the spring contacts as you clean the frame.

    • This is a good point to test your repair before sealing up your phone. Connect the screen, power on your phone, and make sure it works as expected. Power it back down, disconnect the battery and back glass, and continue reassembly.

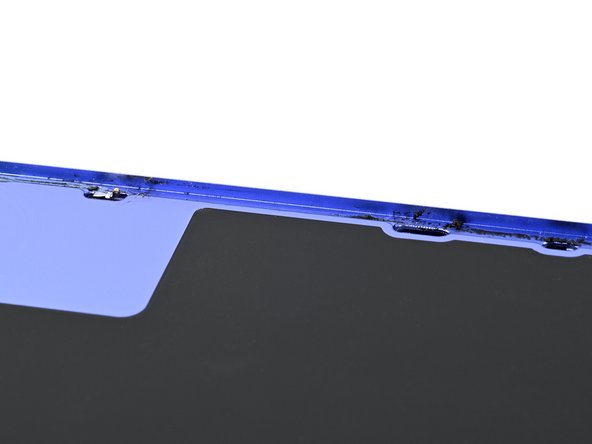
    • The adhesive remaining on your phone is difficult to remove and leaves residue. If you have trouble removing the adhesive, apply some heat using a hair dryer or heat gun.

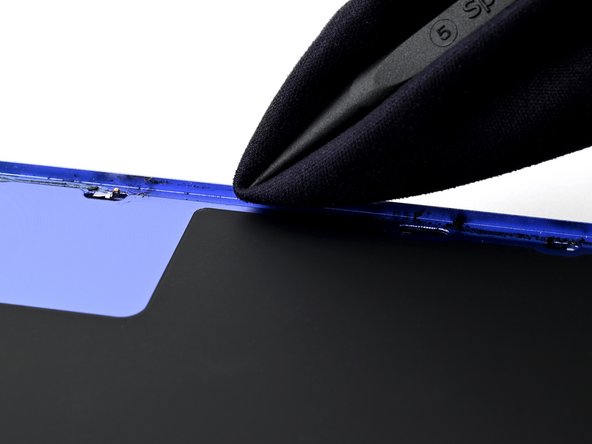
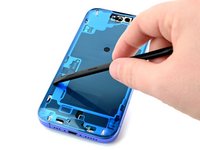
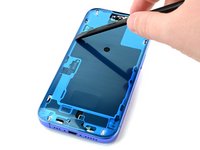
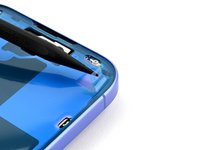
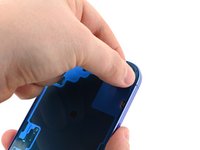
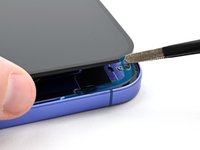
    • Use a spudger to push the screen adhesive up until you can grab it with a pair of tweezers.

    • Use a pair of tweezers to remove the adhesive around the entire perimeter of the iPhone.

  5. iPhone 16 Screen Installation: crwdns2935265:05crwdnd2935265:01crwdnd2935265:03crwdne2935265:0 iPhone 16 Screen Installation: crwdns2935265:05crwdnd2935265:02crwdnd2935265:03crwdne2935265:0 iPhone 16 Screen Installation: crwdns2935265:05crwdnd2935265:03crwdnd2935265:03crwdne2935265:0
    • Any leftover residue will compromise your iPhone's seal. Be sure to clean the frame thoroughly.

    • Wrap a microfiber or lint-free cloth around the pointed end of a spudger and apply a few drops of high-concentration (greater than 90%) isopropyl alcohol to the cloth.

    • Wipe in one direction along the perimeter of the frame to clean the adhesive residue.

    • Wait a few minutes before proceeding to make sure any excess alcohol has evaporated.

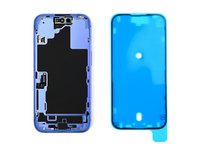
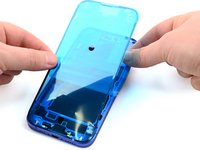
  6. iPhone 16 Screen Installation, Orient the adhesive: crwdns2935265:06crwdnd2935265:01crwdnd2935265:02crwdne2935265:0 iPhone 16 Screen Installation, Orient the adhesive: crwdns2935265:06crwdnd2935265:02crwdnd2935265:02crwdne2935265:0
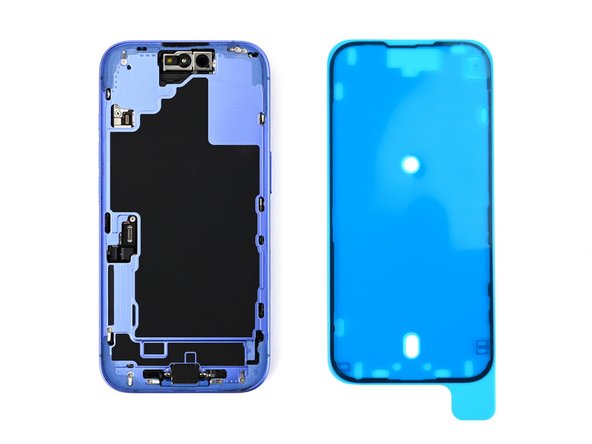
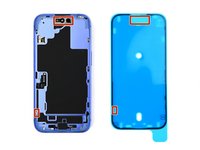
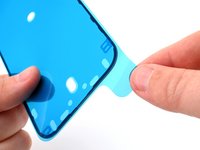
    • Lay the adhesive next to the phone and use features like cutouts for spring contacts and the front‑facing camera to make sure the adhesive is oriented correctly.

    • Your adhesive may look slightly different.

  7. iPhone 16 Screen Installation, Expose the bottom edge of the adhesive: crwdns2935265:07crwdnd2935265:01crwdnd2935265:02crwdne2935265:0 iPhone 16 Screen Installation, Expose the bottom edge of the adhesive: crwdns2935265:07crwdnd2935265:02crwdnd2935265:02crwdne2935265:0
    • Use the pull tab to begin peeling the back liner off of the adhesive starting from the bottom, but do not remove the liner all the way.

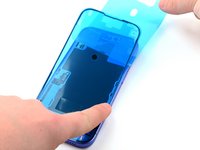
  8. iPhone 16 Screen Installation, Apply the adhesive: crwdns2935265:08crwdnd2935265:01crwdnd2935265:03crwdne2935265:0 iPhone 16 Screen Installation, Apply the adhesive: crwdns2935265:08crwdnd2935265:02crwdnd2935265:03crwdne2935265:0 iPhone 16 Screen Installation, Apply the adhesive: crwdns2935265:08crwdnd2935265:03crwdnd2935265:03crwdne2935265:0
    • Once the adhesive is pressed into place, you can't reposition it—you'll have to remove it and start over with new adhesive.

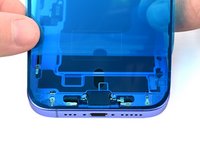
    • While holding the back liner out of the way, carefully align the exposed edge of the adhesive to the bottom edge of the iPhone's frame.

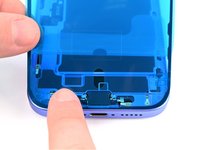
    • When the adhesive is aligned, use your finger to press it down firmly along the bottom edge.

  9. iPhone 16 Screen Installation: crwdns2935265:09crwdnd2935265:01crwdnd2935265:03crwdne2935265:0 iPhone 16 Screen Installation: crwdns2935265:09crwdnd2935265:02crwdnd2935265:03crwdne2935265:0 iPhone 16 Screen Installation: crwdns2935265:09crwdnd2935265:03crwdnd2935265:03crwdne2935265:0
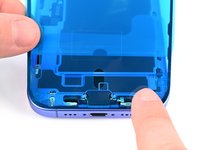
    • Continue peeling the back liner off of the adhesive while pressing the adhesive into place along the edges of the iPhone's frame.

    • If you correctly aligned the lower edge of the adhesive, the side and top edges will fall perfectly into place. If the adhesive is misaligned, remove it and start over with new adhesive.

    • If your adhesive is misaligned and you don't have another set handy, it's okay to temporarily put your iPhone back together and use it normally without any adhesive, but keep in mind that your iPhone's water resistance will be compromised until you install new adhesive.

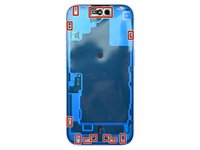
  10. iPhone 16 Screen Installation, Press the adhesive into place: crwdns2935265:010crwdnd2935265:01crwdnd2935265:03crwdne2935265:0 iPhone 16 Screen Installation, Press the adhesive into place: crwdns2935265:010crwdnd2935265:02crwdnd2935265:03crwdne2935265:0 iPhone 16 Screen Installation, Press the adhesive into place: crwdns2935265:010crwdnd2935265:03crwdnd2935265:03crwdne2935265:0
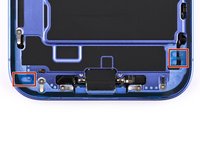
    • Make sure the liner is aligned properly by checking that all spring contacts and the front-facing camera are in their cutouts. If they aren't, remove the adhesive and start over with a new sheet.

    • Use the flat end of a spudger to press the adhesive firmly into place all around the iPhone.

    • Be careful not to press on the camera, spring contacts, or other internal components.

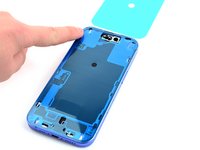
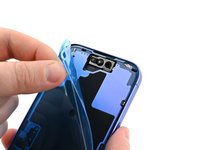
  11. iPhone 16 Screen Installation, Remove the top liner: crwdns2935265:011crwdnd2935265:01crwdnd2935265:03crwdne2935265:0 iPhone 16 Screen Installation, Remove the top liner: crwdns2935265:011crwdnd2935265:02crwdnd2935265:03crwdne2935265:0 iPhone 16 Screen Installation, Remove the top liner: crwdns2935265:011crwdnd2935265:03crwdnd2935265:03crwdne2935265:0
    • Use the point of a spudger to lift the pull tab in the top‑right corner of the frame until you can grab it with your fingers.

    • Your pull tab may be in a different location. Make sure you're pulling the full-size top liner, not the thin liners under it.

    • Peel back the top liner and remove it.

  12. iPhone 16 Screen Installation: crwdns2935265:012crwdnd2935265:01crwdnd2935265:02crwdne2935265:0 iPhone 16 Screen Installation: crwdns2935265:012crwdnd2935265:02crwdnd2935265:02crwdne2935265:0
    • Once the top liner is removed, there should be three narrow liners on top of the adhesive with pull tabs near the bottom edge.

    • Your pull tabs may be in different positions.

    • If you don't see these pull tabs, you may have accidentally removed the thin liners in the previous step. If the adhesive is clean and properly aligned, you may proceed, just be careful not to touch anything to the exposed adhesive until you are ready to install the screen.

  13. iPhone 16 Screen Installation, Prop up the screen: crwdns2935265:013crwdnd2935265:01crwdnd2935265:01crwdne2935265:0
    • Prop the screen up along the left edge of the iPhone frame, using a box or similar sturdy object to support the screen.

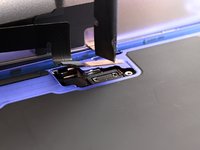
  14. iPhone 16 Screen Installation, Connect the screen and front sensor: crwdns2935265:014crwdnd2935265:01crwdnd2935265:03crwdne2935265:0 iPhone 16 Screen Installation, Connect the screen and front sensor: crwdns2935265:014crwdnd2935265:02crwdnd2935265:03crwdne2935265:0 iPhone 16 Screen Installation, Connect the screen and front sensor: crwdns2935265:014crwdnd2935265:03crwdnd2935265:03crwdne2935265:0
    • Use the flat end of a spudger or your finger to connect the screen and front sensor press connectors.

  15. iPhone 16 Screen Installation, Cover the connectors: crwdns2935265:015crwdnd2935265:01crwdnd2935265:02crwdne2935265:0 iPhone 16 Screen Installation, Cover the connectors: crwdns2935265:015crwdnd2935265:02crwdnd2935265:02crwdne2935265:0
    • Use a pair of tweezers or your fingers to place the screen connector cover over the screen connector by inserting it at a slight downward angle to engage the hook, then laying the cover flat over the connector.

  16. iPhone 16 Screen Installation: crwdns2935265:016crwdnd2935265:01crwdnd2935265:02crwdne2935265:0 iPhone 16 Screen Installation: crwdns2935265:016crwdnd2935265:02crwdnd2935265:02crwdne2935265:0
    • Use a pair of tweezers or your fingers to place the front sensor connector cover over the front sensor connector by inserting it at a 90‑degree angle to engage the hook, then laying the cover flat over the connector.

  17. iPhone 16 Screen Installation, Install the cover screws: crwdns2935265:017crwdnd2935265:01crwdnd2935265:02crwdne2935265:0 iPhone 16 Screen Installation, Install the cover screws: crwdns2935265:017crwdnd2935265:02crwdnd2935265:02crwdne2935265:0
    • Use a tri-point Y000 driver to install the two 0.9 mm‑long screws securing the front sensor connector and screen connector covers.

  18. iPhone 16 Screen Installation, Remove the final adhesive liners: crwdns2935265:018crwdnd2935265:01crwdnd2935265:03crwdne2935265:0 iPhone 16 Screen Installation, Remove the final adhesive liners: crwdns2935265:018crwdnd2935265:02crwdnd2935265:03crwdne2935265:0 iPhone 16 Screen Installation, Remove the final adhesive liners: crwdns2935265:018crwdnd2935265:03crwdnd2935265:03crwdne2935265:0
    • As you remove the liners in this step, the adhesive will be fully exposed. Make sure nothing touches the exposed adhesive.

    • Use a pair of tweezers or your fingers to remove the two narrow liners covering the adhesive along the right, top, and bottom edges of the iPhone.

  19. iPhone 16 Screen Installation: crwdns2935265:019crwdnd2935265:01crwdnd2935265:03crwdne2935265:0 iPhone 16 Screen Installation: crwdns2935265:019crwdnd2935265:02crwdnd2935265:03crwdne2935265:0 iPhone 16 Screen Installation: crwdns2935265:019crwdnd2935265:03crwdnd2935265:03crwdne2935265:0
    • Without letting the screen touch the adhesive, hold the screen over the phone so you can access the final liner along the left edge of the phone.

    • Use a pair of tweezers or your fingers to remove the final liner along the left edge of the phone.

  20. iPhone 16 Screen Installation, Place the screen: crwdns2935265:020crwdnd2935265:01crwdnd2935265:02crwdne2935265:0 iPhone 16 Screen Installation, Place the screen: crwdns2935265:020crwdnd2935265:02crwdnd2935265:02crwdne2935265:0
    • Align the screen over the frame, then lower it into place.

  21. iPhone 16 Screen Installation: crwdns2935265:021crwdnd2935265:01crwdnd2935265:02crwdne2935265:0 iPhone 16 Screen Installation: crwdns2935265:021crwdnd2935265:02crwdnd2935265:02crwdne2935265:0
    • Firmly press the top edge of the screen into the adhesive, then the bottom edge, until the screen is fully seated in the frame.

  22. iPhone 16 Screen Installation, Heat the screen: crwdns2935265:022crwdnd2935265:01crwdnd2935265:02crwdne2935265:0 iPhone 16 Screen Installation, Heat the screen: crwdns2935265:022crwdnd2935265:02crwdnd2935265:02crwdne2935265:0
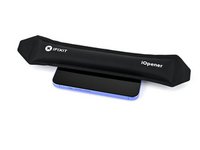
    • To help the adhesive bond, apply heat to the edges of the screen using an iOpener, hair dryer, or heat gun until it's hot to the touch.

    • Firmly press around the perimeter of the screen.

    • If you have screen vise clamps, use them to strengthen the bond of your new adhesive. If not, keep reading for more ways to secure the screen.

  23. iPhone 16 Screen Installation, Press the back glass: crwdns2935265:023crwdnd2935265:01crwdnd2935265:03crwdne2935265:0 iPhone 16 Screen Installation, Press the back glass: crwdns2935265:023crwdnd2935265:02crwdnd2935265:03crwdne2935265:0 iPhone 16 Screen Installation, Press the back glass: crwdns2935265:023crwdnd2935265:03crwdnd2935265:03crwdne2935265:0
    • To evenly compress your iPhone and strengthen the bond of the screen to the frame, you need to account for the camera bump.

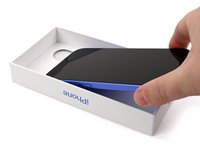
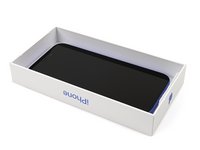
    • If you have the box your iPhone came in, take the lid and place it on a flat surface.

    • If you don't have your original box, skip this step for an alternate method.

    • Place your iPhone screen-side-up in the lid of your box with the camera bump in its recess.

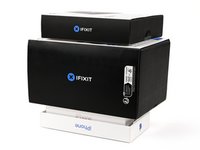
    • Find something close to the size of your iPhone, but taller than the sides of the box. Stack it on top of the iPhone, followed by a few heavy objects.

    • Leave the objects in place for at least thirty minutes. The lighter the objects, the longer they should be left. Ideally, leave them stacked overnight.

  24. iPhone 16 Screen Installation: crwdns2935265:024crwdnd2935265:01crwdnd2935265:02crwdne2935265:0 iPhone 16 Screen Installation: crwdns2935265:024crwdnd2935265:02crwdnd2935265:02crwdne2935265:0
    • If you don't have the original box for your iPhone, follow the next three steps for another method to evenly compress the screen.

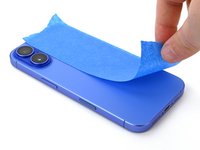
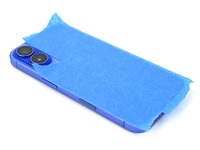
    • Place the iPhone screen-side-down on a soft, flat surface.

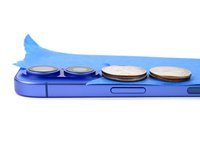
    • Apply tape to the back glass to protect its finish.

  25. iPhone 16 Screen Installation: crwdns2935265:025crwdnd2935265:01crwdnd2935265:03crwdne2935265:0 iPhone 16 Screen Installation: crwdns2935265:025crwdnd2935265:02crwdnd2935265:03crwdne2935265:0 iPhone 16 Screen Installation: crwdns2935265:025crwdnd2935265:03crwdnd2935265:03crwdne2935265:0
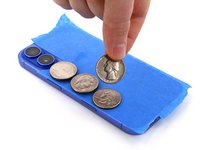
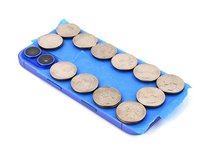
    • Place two layers of coins or similarly thick objects on the tape along the edges of the back glass.

    • Evenly distribute the coins and make sure they are at least as thick as the camera bump.

  26. iPhone 16 Screen Installation: crwdns2935265:026crwdnd2935265:01crwdnd2935265:01crwdne2935265:0
    • Stack multiple books or other heavy objects on your iPhone.

    • The coins may leave an impression on the bottom object, so don't use anything valuable.

    • Leave the objects in place for at least thirty minutes. The lighter the objects, the longer they should be left. Ideally, leave them stacked overnight.

crwdns2935217:0crwdne2935217:0
Spencer Pennington

crwdns2935283:009/09/23crwdne2935283:0

18,791 crwdns2915208:0crwdne2915208:0

crwdns2935297:0114crwdne2935297:0

crwdns2915084:0crwdne2915084:0
iFixit crwdns2935289:0iFixitcrwdne2935289:0

Staff

crwdns2931471:0121crwdne2931471:0

crwdns2935297:019,866crwdne2935297:0
crwdns2947412:00crwdne2947412:0
crwdns2917038:0crwdne2917038:0

crwdns2936625:0crwdne2936625:0:

crwdns2936751:024crwdne2936751:0 0

crwdns2936753:07crwdne2936753:0 4

crwdns2936753:030crwdne2936753:0 13

crwdns2942667:0crwdne2942667:0 48