crwdns2915892:0crwdne2915892:0
Use this guide to replace the battery in your iPhone 15 Plus.
iPhone batteries are rated to hold 80% of their capacity for up to 500 charge cycles, or roughly 18–24 months. If your iPhone needs to be charged more often or runs slower, it might be time to replace the battery.
You'll need replacement battery and back glass adhesive to complete this repair.
If your battery is swollen, take appropriate precautions.
Note: Due to Apple's parts pairing restrictions, on iOS 17.6 and earlier, you may receive warnings about your replacement part and lose access to battery health data, but your new battery will otherwise work normally. On iOS 18 and newer, calibrate authentic Apple batteries using Repair Assistant.
crwdns2942213:0crwdne2942213:0
-
-
Unplug any cables from your phone.
-
Hold the power and either volume buttons and slide to power off your phone.
-
-
-
If your screen or back glass is badly cracked, lay overlapping strips of packing tape over the glass to protect yourself and make disassembly easier.
-
-
-
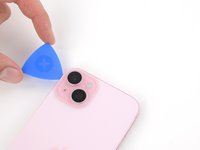
Measure 3 mm from the tip and mark the opening pick with a permanent marker.
-
-
-
Use a P2 pentalobe driver to remove the two 7.7 mm-long screws on either side of the charging port.
-
-
-
Use a hair dryer or heat gun to heat the bottom edge of the back glass until it's hot to the touch.
-
-
-
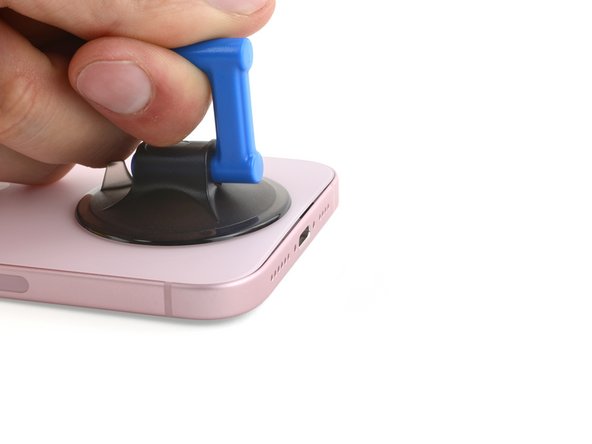
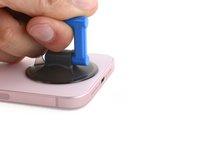
Apply a suction handle to the bottom edge of the back glass.
-
Pull up on the handle with a strong, steady force to create a gap between the back glass and the frame.
-
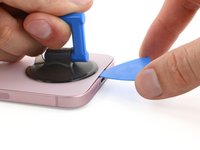
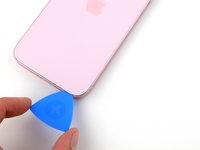
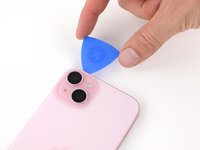
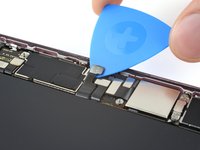
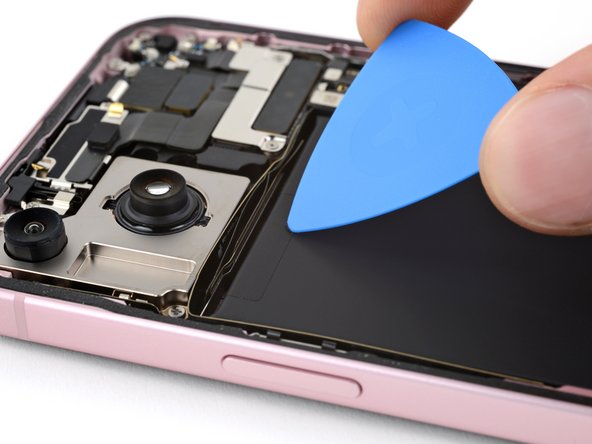
Insert the tip of an opening pick into the gap.
-
-
-
There's a delicate cable connecting the back glass to the phone, right next to the volume up button. Don't insert your pick here to avoid slicing the cable.
-
There are multiple spring contacts around the perimeter of the phone. Be extra careful not to insert your pick deeper than suggested in each step to avoid bending these contacts.
-
-
-
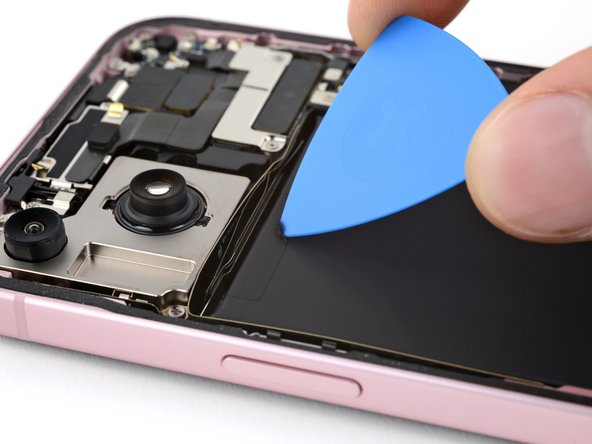
Slide your pick back and forth along the bottom edge to separate the adhesive.
-
Leave your pick inserted in the bottom right corner to prevent the adhesive from re-sealing.
-
-
-
Heat the right edge of the back glass until it's hot to the touch.
-
-
-
Rotate your pick around the bottom right corner and slide it halfway up the right edge or until you feel a hard stop at a clip securing the back glass.
-
Leave this pick inserted to prevent the adhesive from resealing.
-
-
-
Heat the left edge of the back glass until it's hot to the touch.
-
-
-
-
Insert a second opening pick at the bottom edge.
-
Rotate the second pick around the bottom left corner.
-
Slide this pick up to the top left corner to separate the adhesive.
-
Leave this pick inserted to prevent the adhesive from resealing.
-
-
-
Heat the top edge of the back glass until it's hot to the touch.
-
-
-
Rotate your second opening pick around the top left corner and slide it to the top right corner to separate the adhesive.
-
Leave this pick in place to prevent the adhesive from resealing.
-
-
-
Heat the top right corner of the back glass until it's hot to the touch.
-
-
-
Rotate the second opening pick around the top right corner and slide it to the volume up button to separate the adhesive.
-
-
-
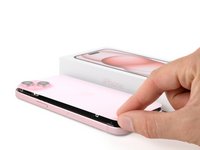
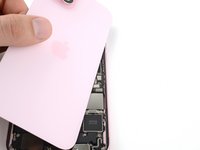
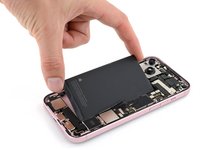
Gently swing open the back glass to the right of the phone.
-
Rest the back glass against a raised surface so it doesn't strain the cable.
-
-
crwdns2935267:0crwdne2935267:0FixMat$36.95
-
Use a tri-point Y000 driver to remove the two 1.3 mm-long screws securing the lower connector cover.
-
-
crwdns2935267:0crwdne2935267:0Tweezers$4.99
-
Use tweezers to slide the cover toward the top of the phone to unlatch it from the logic board.
-
Remove the cover.
-
-
-
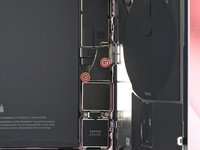
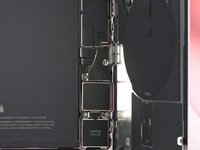
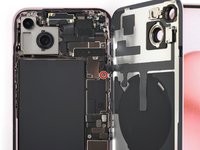
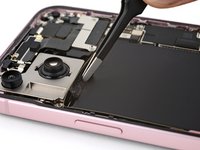
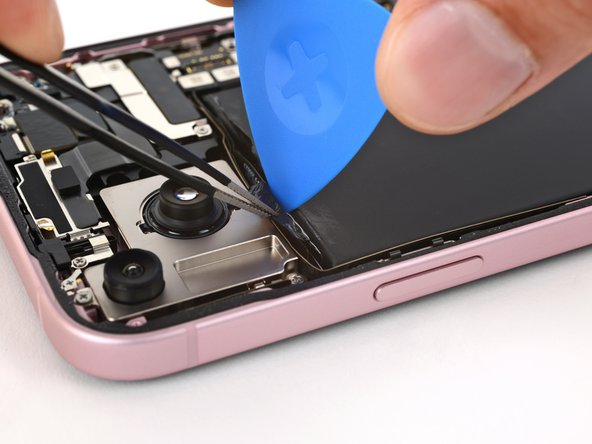
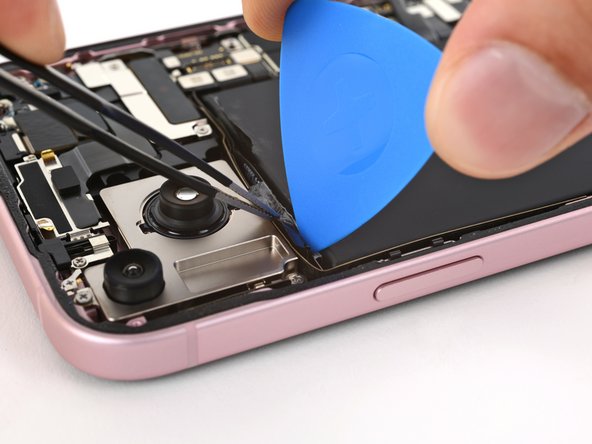
Hold the back glass upright with one hand and rotate the bottom edge to the left to reveal the battery press connector just below the volume buttons.
-
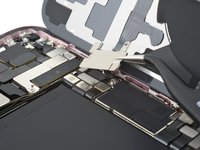
Use the tip of an opening pick to pry up and disconnect the battery press connector from the logic board.
-
-
-
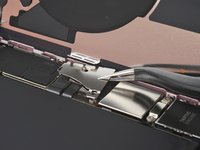
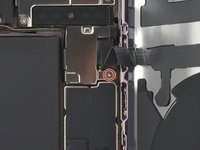
Use your tri-point Y000 driver to remove the 0.9 mm-long screw securing the middle connector cover.
-
-
-
Use the flat end of a spudger or your finger to push the cover toward the bottom of the phone and unclip its top edge.
-
Remove the cover.
-
-
-
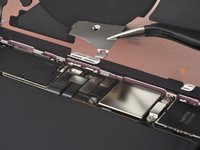
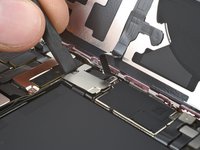
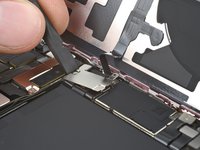
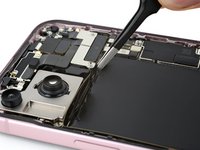
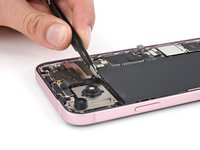
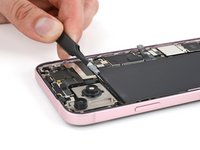
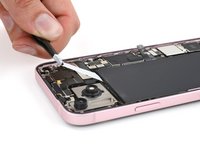
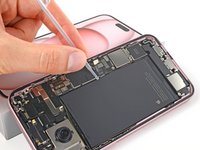
Use an opening pick to pry up and disconnect the wireless charging coil and NFC connector.
-
-
-
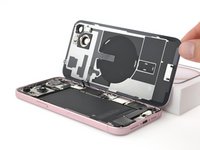
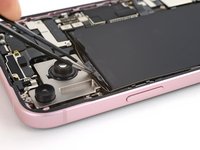
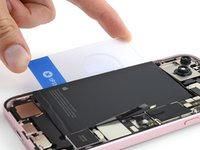
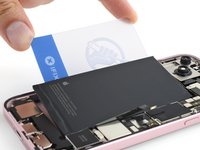
Remove the back glass.
-
This is a good point to test your repair before sealing up your phone. Temporarily reconnect the battery and back glass, power on your phone, and make sure it works as expected. Power it back down and continue reassembly.
-
Use this guide to reapply adhesive and install your back glass.
-
-
-
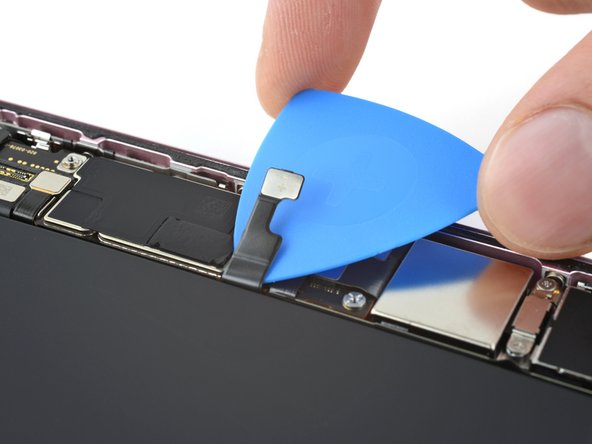
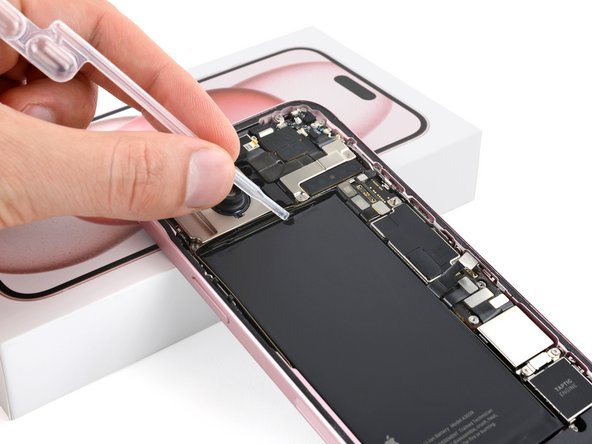
Slide an opening pick under the battery cable to separate it from the logic board.
-
-
crwdns2935267:0crwdne2935267:0Tweezers$4.99
-
Use the tip of an opening pick to scrape up an edge of each stretch release pull tab from the top of the battery until you can grip the tab with blunt nose tweezers.
-
-
-
Use blunt nose tweezers to grip a pull tab and peel it from the battery.
-
Repeat for the other pull tab.
-
-
-
Hold one of the pull tabs away from the battery with tweezers.
-
Use an opening pick to slice the adhesive securing the strip to the top edge of the battery.
-
Repeat for the other pull tab.
-
-
-
Use your blunt nose tweezers to grip the entire length of an adhesive strip's pull tab.
-
Twist your tweezers to roll the adhesive strip over itself and pull it slowly, evenly, and at a low angle out from under the battery.
-
Repeat for the other strip.
-
-
-
Prop up the right edge of the phone (the side with the volume buttons).
-
Use a pipette or syringe to apply a few drops of highly-concentrated isopropyl alcohol (over 90%) to the inside edge of the battery.
-
Prop up the top edge of the phone and repeat this for the upper edge of the battery.
-
Wait one minute for the isopropyl alcohol to flow under the battery and soften the adhesive.
-
-
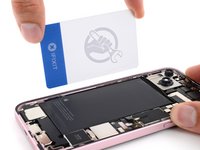
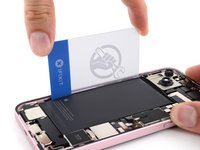
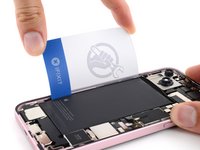
crwdns2935267:0crwdne2935267:0Plastic Cards$2.99
-
Insert the long edge of a plastic card between the left edge of the battery and the frame.
-
Hold the phone steady and pry the battery up.
-
-
-
Slide the plastic card deeper under the battery until you can pry it up.
-
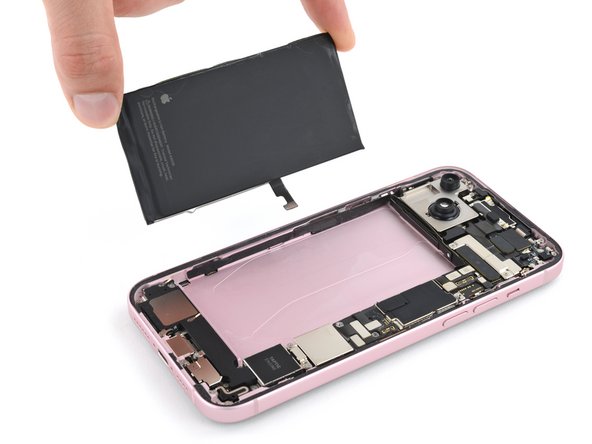
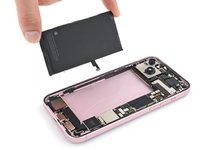
Lift the battery until you can grab it with your fingers.
-
-
crwdns2935267:0crwdne2935267:0Stretch Release Battery Adhesive$3.99
-
Remove the battery.
-
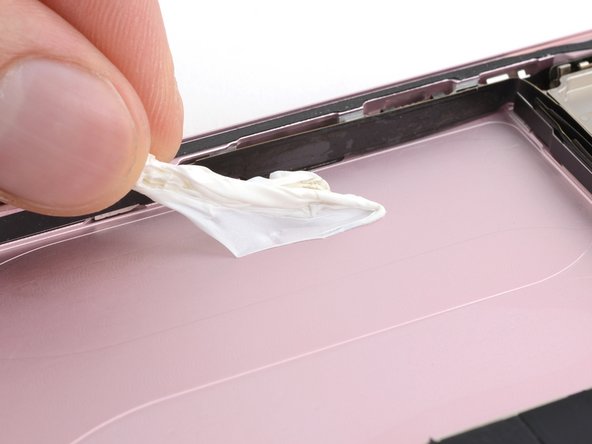
Clean your frame with isopropyl alcohol and a lint-free or microfiber cloth.
-
Before applying adhesive, temporarily reconnect your new battery and place it in its recess to check if it fits and that the cable reaches the socket on the logic board. Disconnect the battery before continuing.
-
If your replacement battery doesn't come with adhesive pre-installed, follow this guide to apply new stretch release adhesive strips.
-
If you don't have stretch release adhesive, use thin, double-sided tape to secure it.
-


To reassemble your phone, follow these instructions in reverse order.
After your repair, depending on the replacement part, you may be able to calibrate it using Apple's Repair Assistant, available as of iOS 18. Update your device, navigate to Settings → General →About → Parts & Service History, tap Restart & Finish Repair, and follow the onscreen prompts.
For optimal performance, calibrate your newly installed battery after completing this guide.
Take your e-waste to an R2 or e-Stewards certified recycler.
Repair didn’t go as planned? Try some basic troubleshooting, or ask our Answers community for help.
crwdns2935221:0crwdne2935221:0
crwdns2935229:08crwdne2935229:0

crwdns2915084:0crwdne2915084:0

Guide Team crwdns2935289:0Guide Teamcrwdne2935289:0
Staff
crwdns2931471:010crwdne2931471:0
crwdns2935297:015,319crwdne2935297:0
crwdns2947412:02crwdne2947412:0
I guess I don't get the rationale here. We come to iFixit, ostensibly to save money. Apple will replace the battery of virtually any iPhone for $69-$99, right? So, I buy an iFixit battery kit for $50. Then I have to purchase a heat gun or hair dryer, another $20-$25, then the back panel adhesive (which I can't find here for a 15 plus), so that's another $6, then I possibly need some 90% isopropyl alcohol for the battery adhesive (which is also a run to a store with time and money spent), and those things alone come to $85-$90. Which brings me to the point: Why would I bother to do a 1 hour (minimum) repair with all the fiddlies, and all the possibility of messing it up, when for about $10 service cost above the iFixit cost, I can just have a CERTIFIED GUARANTEED repair done at Apple. Right?
Everyone has a hair dryer in the house. And the apple repair is mor like 99 than 69, at least in my country. And I would pay no problem but they expect me to leave the phone and after that they order the battery and until it is delivered and repaired it takes a total of 10 days or so time where I don’t have my phone. Last time I just bought a new phone because of this but I got the ifixit battery replaced for a friend and he was very happy that it took 2 hours and he has the phone available same day. So yea… maybe it is not for you but it certainly is for a lot of people. Thank you ifixit for having an alternative.