crwdns2915892:0crwdne2915892:0
This guide walks through the disassembling of a Zojirushi Rice Cooker NP-HMH10 and replacing the internal battery.
If the front panel screen of a Zojirushi Rice Cooker does not show information, most likely the internal battery of the rice cooker is dead (except damage caused by human factors).
In this guide, the soldering iron is necessary, and be sure you have a basic knowledge of soldering or use the tool under the supervision of a person who has experience.
For safety reasons, unplug the device before you begin.
crwdns2942213:0crwdne2942213:0
-
-
Flip the device over and remove the four screws on the base using the Phillips #0 screwdriver.
-
-
-
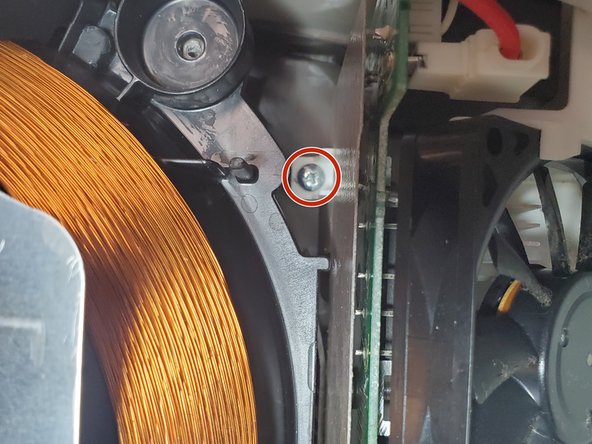
Using a Torx T9 screwdriver remove one screw from the bottom of the rice cooker.
-
-
-
Gently lift the base from the device.
For the HBC18 you may want to disconnect the while clip connecting cables coming from the front, and going to the little board at the back. This allows complete removal of the bottom.
-
-
-
Remove the five screws connecting the heatsink to the device.
-
-
-
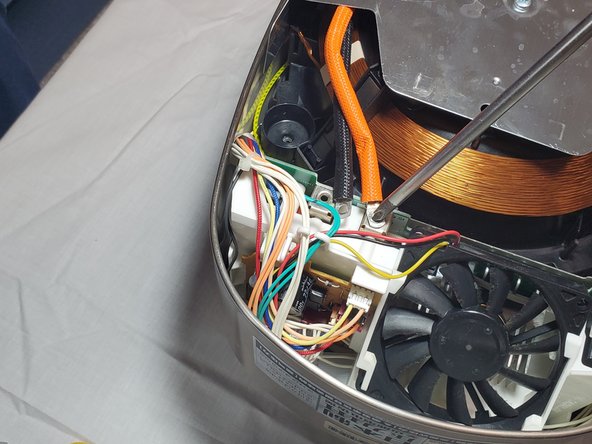
Remove the screws that connect the thick black and orange cables to the heat sink.
The heatsink cables do not exist for the HBC18, but undo the copper wiring from a little black tab in between the white housing and the pot coils.
-
-
-
-
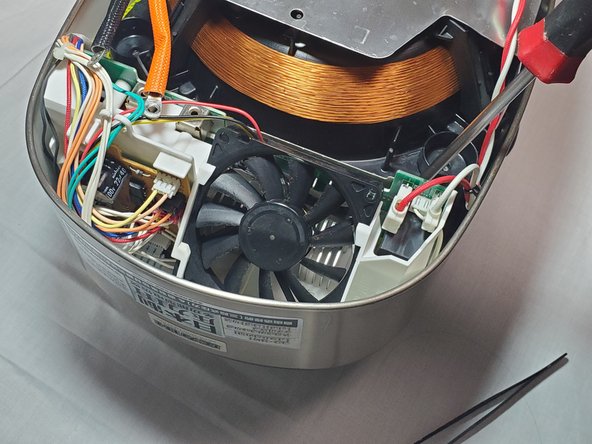
Gently unplug the white-head pins with red and white cables on the other side.
Pull up on the flat cable connectors on the upper circuit board and disconnect all connectors.
-
-
-
Now switch to the fan of the heatsink. Using a tweezer carefully lift the four clips around the fan.
-
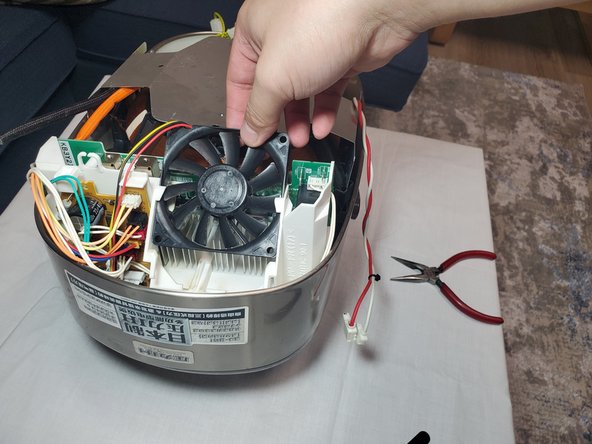
Pull out the fan.
For HBC18 pul out fan and moe to the left of the machine hang it down the front (still attached to lower circuit board).
-
-
-
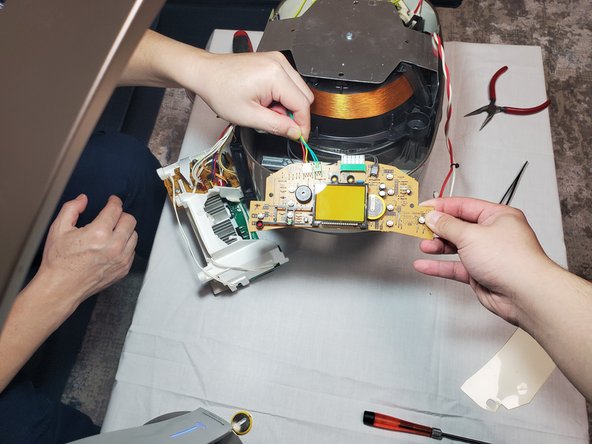
After removing the fan now you can take out the whole heatsink and access the below part.
For HBC18 you want to disconnect all cables and untangle them first. Take a picture if you need to remember where everything goes. After that gently lift up the white plastic contraption that holds the upper circuit board etc. Rotate it out of the way.
-
-
-
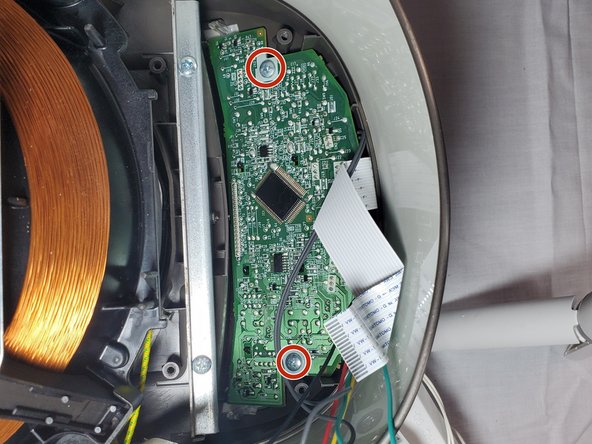
Above the PCB (Printed Circuit Board) is an isolated-plate. Take it away and unscrew the PCB below it.
HBC18 does not have the cover plate. Just unscrew the two screws lift up the PCB, disconnect remaining connecters so you can work on the PCB separately. This PCB is otherwise identical to what is described here, so no more HBC18 specific instructions.
-
-
-
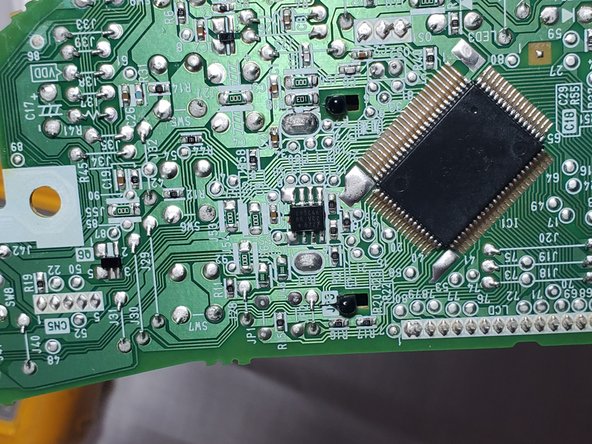
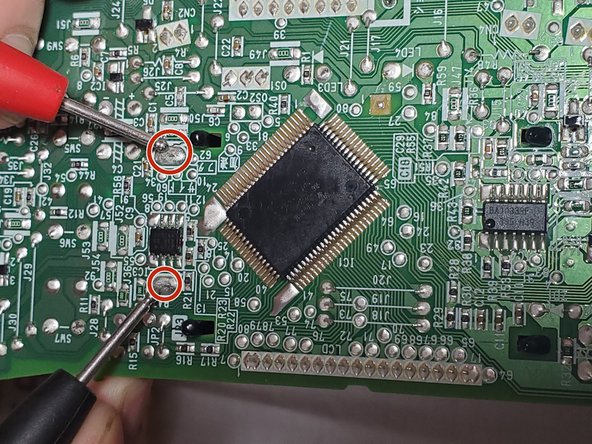
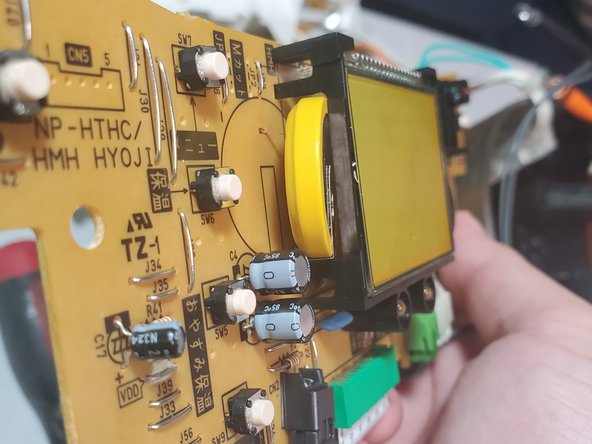
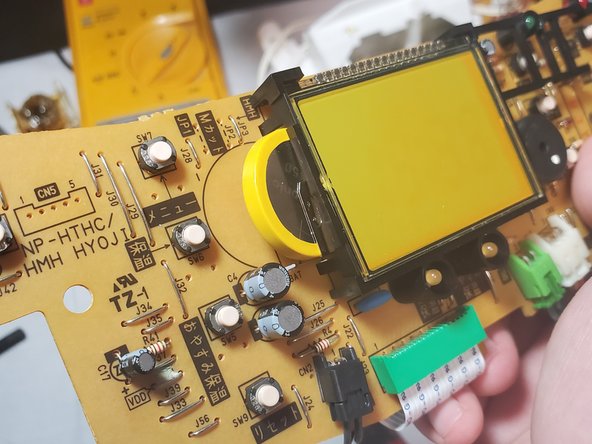
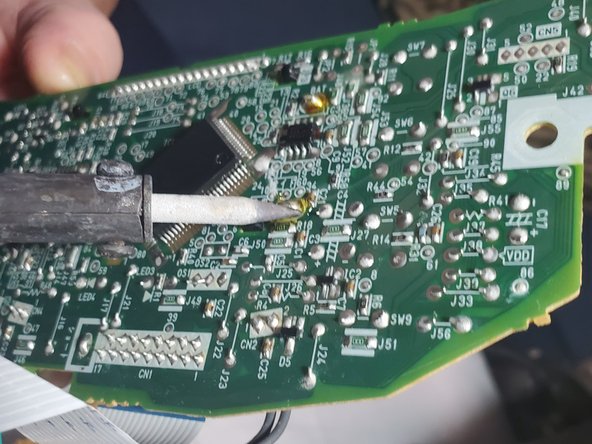
Turn the PCB to the other side. Find the soldering point of the battery as in the picture.
-
-
-
Desolder the two tabs then unplug the old battery.
-
-
-
Take out the new battery. Install it onto the PCB and solder it.
-
-
I changed the battery on a similar model (NP-HLH10), process is the same. But the front screen displayed a timing only after reconnecting most of the cable ! So don't be scared if there is noting just after soldering the new battery
-
Very instructive. Well done.
Completely POOR design to bury a battery replacement in such a difficult location!!!


To reassemble your device, follow these instructions in reverse order.
To reassemble your device, follow these instructions in reverse order.
crwdns2935221:0crwdne2935221:0
crwdns2935229:04crwdne2935229:0
crwdns2915084:0crwdne2915084:0

York University, Team S2-G29, O'Regan Winter 2021 crwdns2935289:0York University, Team S2-G29, O'Regan Winter 2021crwdne2935289:0
YORK-O'REGAN-W21S2G29
crwdns2934841:01crwdne2934841:0
crwdns2935303:01crwdne2935303:0
crwdns2947412:08crwdne2947412:0
Thank you! It’s a shame the machine was designed without easy servicing for the battery. Otherwise a great rice cooker!
do you fix rice cook
Nice repair. Thanks for sharing.
It looks as if you could replace the battery without doing any soldering. Once you break the yellow plastic surrounding the battery, can't you simply slide the battery out of the metal holder and slide in a new one?
That’s not a holder. It comes from Panasonic with the two leads welded on and the yellow wrap is just there to keep those welds from seeing mechanical stress during shipping of the device it’s soldered into. If you pry the battery out, it’ll just break those spot-welds and won’t hold a new battery. Bottom line: It’s not designed to be user serviceable. It’s a PCB-mounted, soldered-on battery type. Someone on youtube suggested replacing it with a coin cell holder for a different battery size, but to each their own. I’ll probably replace mine with a genuine part from Mouser or Digikey. It’d be nice to use the delay cooking function again without having to set the clock first each time. It definitely is annoying that they expect customers to go to a service center for this. We hardly even have any electronics component stores in the USA anymore.
Note- I have a different model and it has a different battery. Don’t assume these instructions will translate to a different model. But thank you is due to Sirui Wu for sharing these.
Good Morning, when you had the rice cooker apart did you happen to notice if there might be a 120v tap on the power supply? The rice cookers from japan are much less expensive but only come in 100v 50/60hz
Zojirushi is also having model for export that are sold in Japan. I bought mine there and bring it back to Europe
xtof -
I’m trying this on my NP-HBC 18. Thx for the steps.
I have this Zojirushi NP-NVC-10 Induction heating cooker. The clock on the panel is working but the clock cannot be adjusted using the up and down button and also the cooker is dead, not cooking at all. All the button controls do not respond. So, what is the problem with this cooker. I checked the power board and it had 120V ac going through; the power board is on the cooker base cover of the cooker. I would like to know what supplies the power to the microprocessor board? It is derived from the mains? I believe when you power the cooker up, the front panel of the cooker should show some sign of light but my is completely dark except the clock is working. I will this time open it up and dismantle it completely to see how the other parts of the cooker is powered up. do you have a schematic diagram for this cooker. I really need to know how the mains voltage is distributed throughout the cooker PCBs so that I can check the PCB when I power it up. By the way can I power the cooker up with all loose PCBs
I have the hex security screw. Where can I get that tool?
Michael Hoy - crwdns2934203:0crwdne2934203:0
My Zojirushi comes with the Hex security screw. Where can I get that tool?
Michael Hoy - crwdns2934203:0crwdne2934203:0
Hi, you can find these hex screwdrivers on any big online shopping website like amazon. Make sure you measure the screw size before your buying, the screw size may differ base on your product.
Sirui Wu -
Hi Michael, we don't sell individual Hex security screwdrivers but if you're interested in buying a toolkit, our Manta toolkit includes various Hex security bits and Hex security SAE bits. There is an assortment of 112 steel bits in total with 2 drivers included too. Thanks!
Sarah Westberg -
It might be relevant to mention that the battery has the solder tabs welded onto them, so you will need to have a new one with these pre-welded to keep things simple.
registration - crwdns2934203:0crwdne2934203:0
These instructions also work for the HB618, with a few slight modifications. I added comments where appropriate.
registration - crwdns2934203:0crwdne2934203:0