crwdns2915892:0crwdne2915892:0
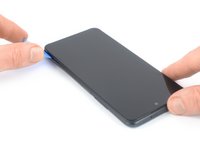
Use this guide to replace a cracked or broken screen on your Xiaomi Redmi Note 10 5G.
If the frame is deformed, it's important to replace it to make sure the new screen will mount correctly and won’t suffer damage from uneven pressure.
Due to the device’s design, you must remove the lithium-ion battery to access the display cables. If the battery was deformed during removal replace it with a new one—reusing a deformed battery is a potential safety hazard.
If your battery is swollen, take appropriate precautions. For your safety, discharge your battery below 25% before disassembling your device. This reduces the risk of a dangerous thermal event if the battery is accidentally damaged during the repair.
Note: This guide instructs you to replace only the screen while leaving the original frame and motherboard in place. However, some replacement screens for this phone come pre-installed in a new frame (a.k.a. chassis), which requires a very different procedure. Make sure you have the correct part before starting this guide.
You’ll need replacement adhesive to reattach components when reassembling the device.
crwdns2942213:0crwdne2942213:0
-
-
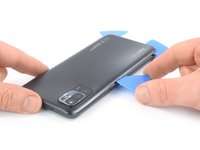
Prepare an iOpener and apply it to the back cover for at least two minutes to loosen the adhesive underneath.
-
-
-
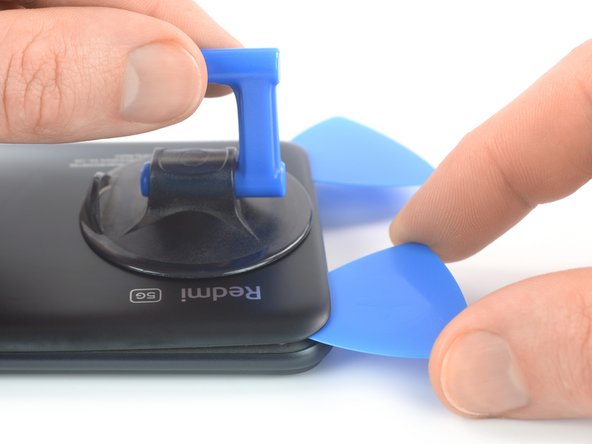
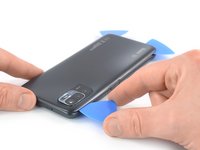
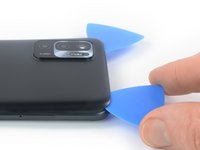
Secure a suction handle to the bottom edge of the back cover, as close to the edge as possible.
-
Lift the back cover with the suction handle to create a small gap between the back cover and the frame.
-
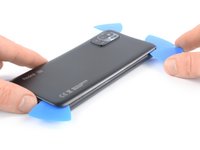
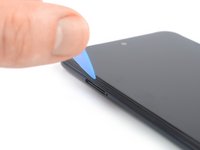
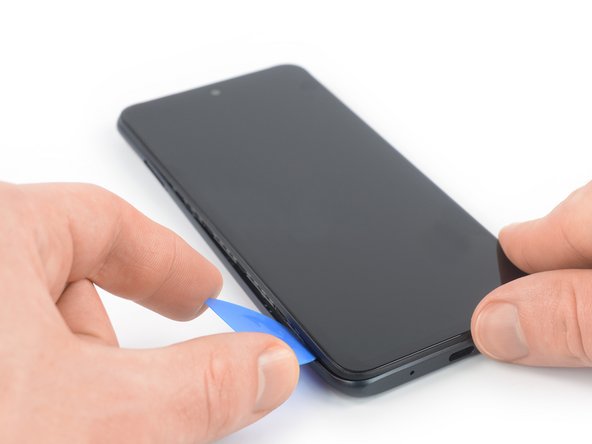
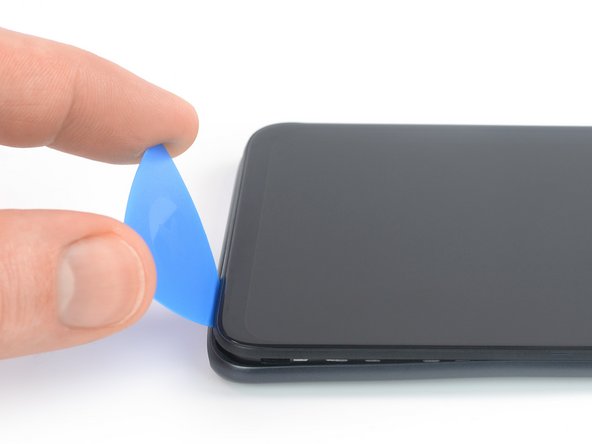
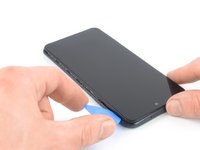
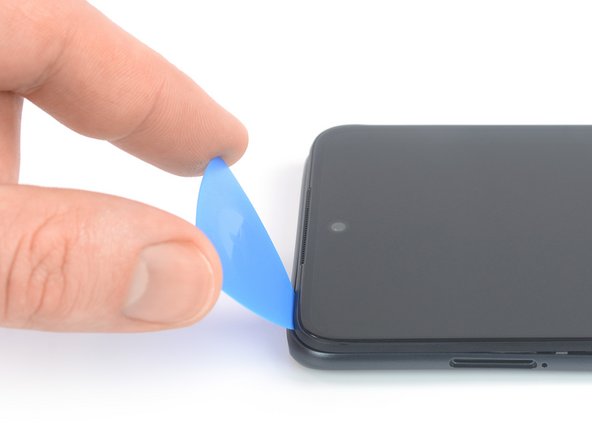
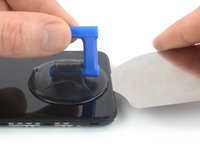
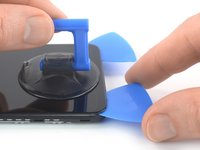
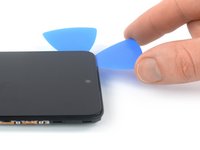
Insert an opening pick into the gap you created.
-
Slide the opening pick to the bottom right corner to slice the adhesive.
-
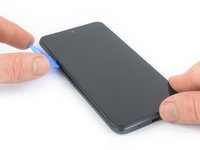
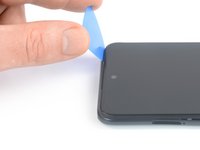
Leave the opening pick in place to prevent the adhesive from resealing.
-
-
-
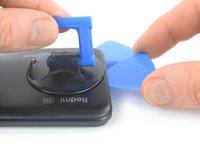
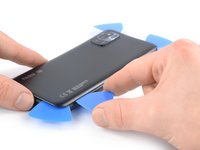
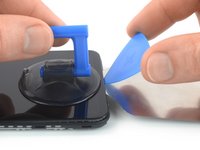
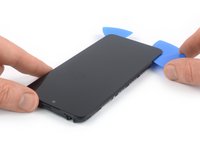
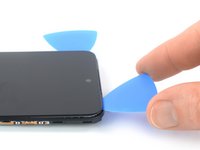
Insert a second opening pick at the bottom edge of your phone.
-
Slide the opening pick to the bottom left corner to slice the adhesive.
-
Leave the opening picks in place to prevent the adhesive from resealing.
-
-
-
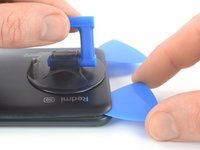
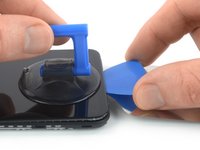
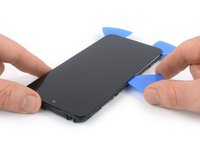
Insert a third opening pick at the bottom left corner of your phone.
-
Slide the opening pick along the left edge of your phone to slice the adhesive.
-
Leave the opening pick in the top left corner to prevent the adhesive from resealing.
attention à l'approche du bouton de volume ne pas couper la nappe qui est très proche de l'adhésif (voir photo étape 8)
-
-
-
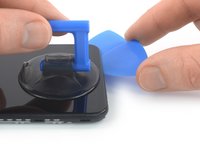
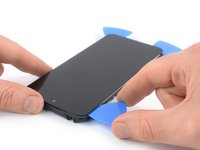
Insert a fourth opening pick underneath the top left corner of your phone.
-
Slide the opening pick along the top edge to slice the adhesive.
-
Leave the opening pick in the top right corner to prevent the adhesive from resealing.
-
-
-
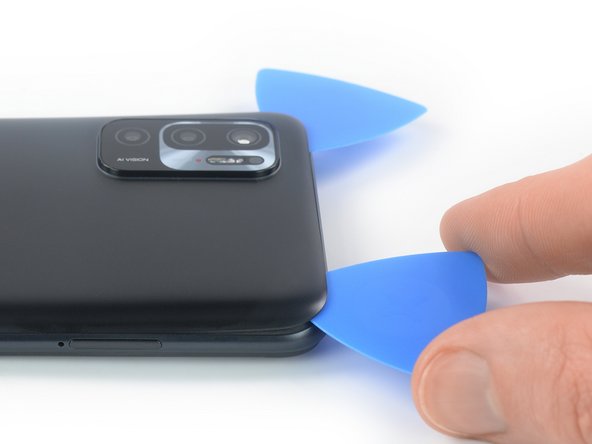
Insert a fifth opening pick underneath the top right corner.
-
Slide the opening pick along the right edge of the back cover to slice the remaining adhesive.
-
-
-
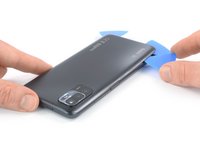
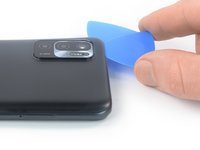
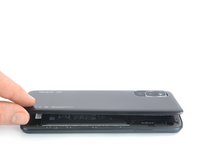
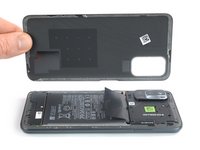
Remove the back cover.
-
-
-
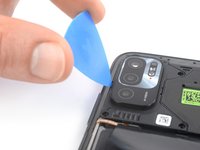
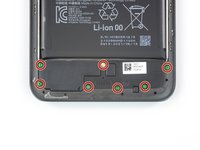
Use a Phillips screwdriver to remove the four 3.9 mm-long screws securing the camera cover.
-
-
-
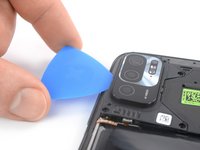
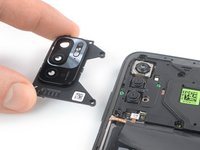
Insert an opening pick into the gap between the left edge of the camera cover and the midframe.
-
Use your opening pick to pry up the camera cover by tilting it downwards.
-
-
-
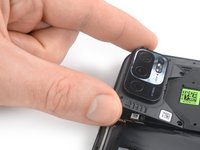
Remove the camera cover.
-
-
-
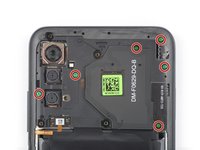
Use a Phillips screwdriver to remove the thirteen 3.9 mm-long screws securing the midframe.
-
-
-
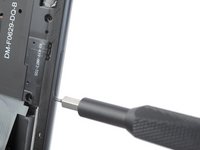
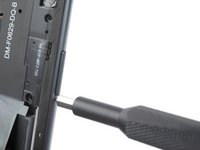
Insert a SIM card eject tool, a SIM eject bit, or a straightened paper clip into the hole on the SIM tray located at the left edge of the phone.
-
Press directly into the hole to eject the SIM card tray.
-
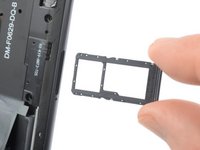
Remove the SIM card tray.
-
-
-
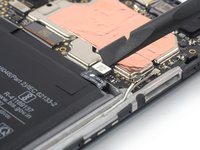
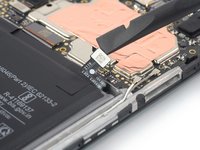
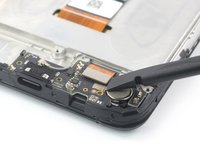
Use a spudger to disconnect the power and volume button flex cable by prying the connector straight up from its socket.
-
-
-
-
Insert an opening pick between the midframe and front panel assembly on the left edge of the phone where the SIM tray slot is located.
-
-
-
Slide the opening pick along the left edge of the phone to release the plastic clips.
-
-
-
Slide the opening pick along the bottom edge of the phone to release the plastic clips.
-
-
-
Slide the opening pick along the right edge of the phone to release the plastic clips.
-
-
-
Slide the opening pick along the top edge of the phone to release the remaining plastic clips.
-
-
-
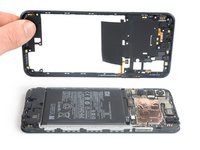
Remove the midframe.
-
-
-
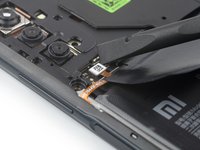
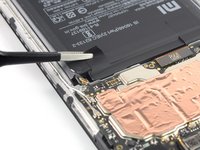
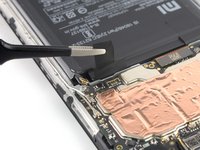
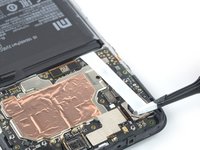
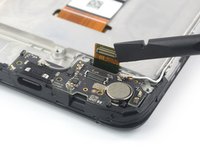
Use a spudger to disconnect the battery flex cable by prying the connector straight up from its socket.
-
Fold the battery cable to the side to get free access to the battery pull-tab.
-
-
crwdns2935267:0crwdne2935267:0Tweezers$4.99
-
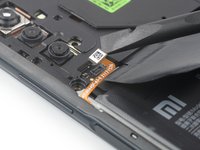
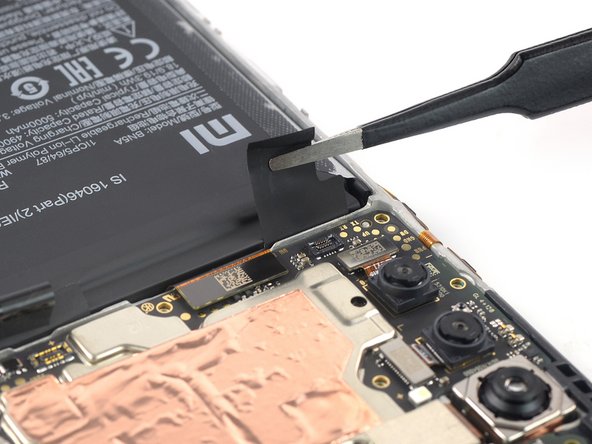
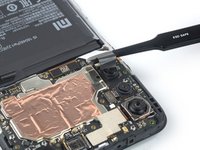
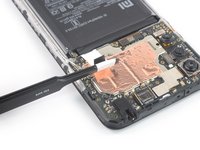
Use a pair of blunt nose tweezers or a clean fingernail to peel up both battery adhesive pull-tabs to unstick them from the top edge of the battery.
It would be helpful if you could put a link in the guide to where you can buy the stretch -release strips.
Thanks!
-
-
-
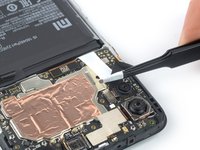
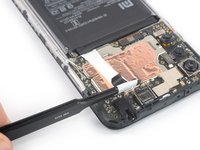
Grab the first pull-tab with a pair of blunt nose tweezers or your fingers and slowly pull it away from the battery towards the top edge of your phone.
-
Pull hard enough to maintain tension on the strip, but don't force it. Give it plenty of time to stretch and unstick from under the battery.
-
Don't press down on the battery. Hold the phone firmly by its sides.
-
Keep the strip flat and unwrinkled. Try to pull evenly on the whole strip, rather than pulling in the middle or on one side.
-
Pull at a low angle so the strip doesn't snag on the edge of the battery.
-
-
-
Repeat the previous pull-tab removal procedure on the second pull-tab.
-
Follow the same procedure as with the previous strip: don't press down on the battery, keep the strip flat and unwrinkled, and pull at a low angle.
-
Wait about one minute for the alcohol solution to weaken the adhesive.
-
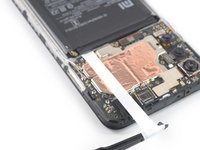
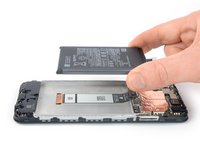
Use the flat end of a spudger to gently lift the battery.
-
-
-
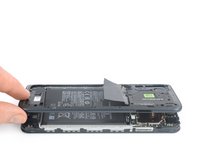
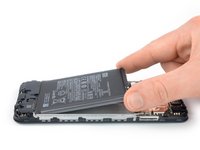
Remove the battery.
-
-
-
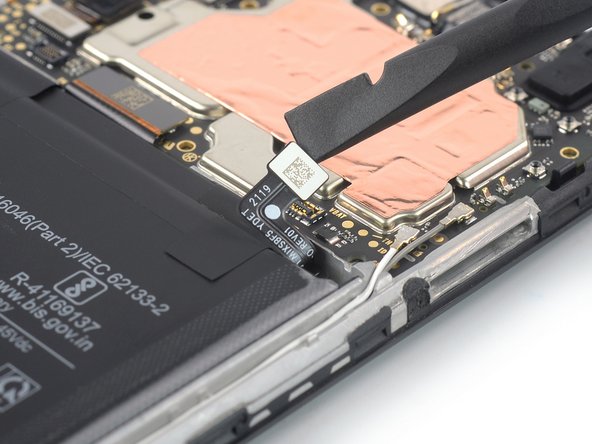
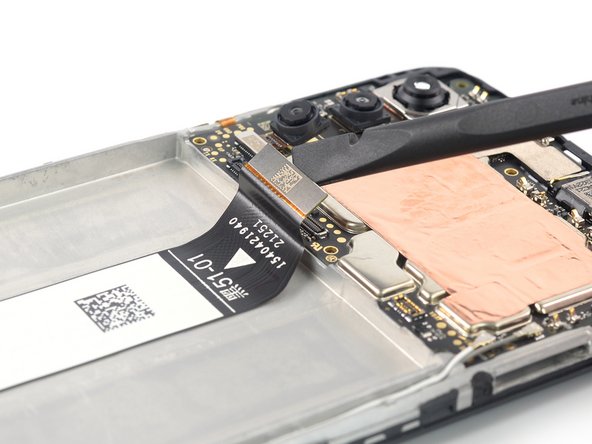
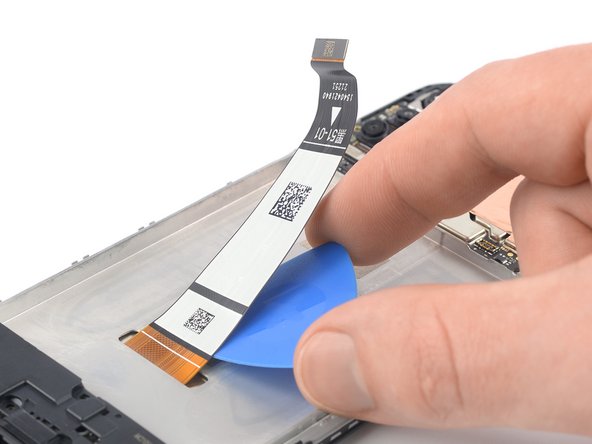
Use a spudger to disconnect the display flex cable by prying the connector straight up from its socket.
-
-
-
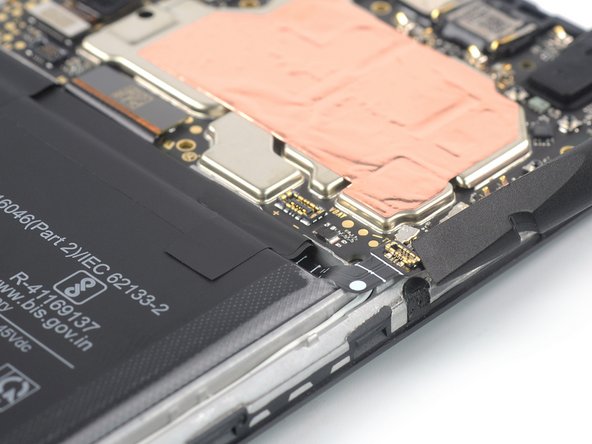
Carefully slide an opening pick underneath the display flex cable to separate it from the front panel assembly.
-
-
-
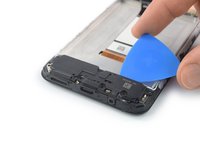
Insert an opening pick into the gap between the front panel assembly and the loudspeaker at the top edge of the speaker.
-
Twist the opening pick sideways to pry up the loudspeaker.
-
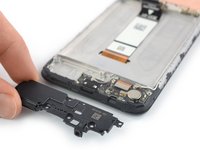
Remove the loudspeaker.
-
-
-
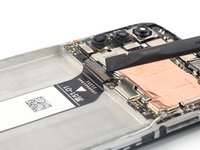
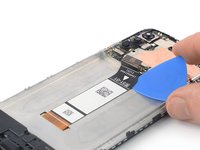
Use a spudger to disconnect the digitizer flex cable by prying the connector straight up from its socket.
-
-
-
Apply a heated iOpener or a heat gun to the screen to loosen the adhesive underneath. Apply the iOpener for at least two minutes.
-
-
-
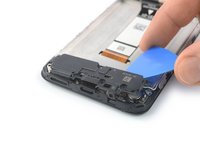
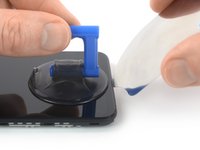
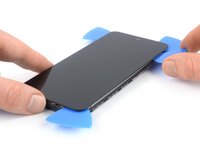
Once the screen is warm to the touch, apply a suction handle to the bottom edge of the screen.
-
Lift the screen with the suction handle to create a small gap between the screen and the frame.
-
Insert an iFlex into the gap between the midframe and the screen.
-
-
-
Insert an opening pick above the iFlex.
-
Slide the opening pick to the bottom right corner of the screen to slice its adhesive.
-
Leave the opening pick in place to prevent the adhesive from resealing.
-
-
-
Remove the iFlex.
-
Insert a second opening pick at the bottom right corner and slide it to the bottom left corner of the screen to slice the adhesive.
-
Leave the opening pick in place to prevent the adhesive from resealing.
-
-
-
Insert a third opening pick underneath the bottom left corner of the screen.
-
Slide the opening pick along the left edge of the screen to slice the adhesive.
-
Leave it in the top left corner to prevent the adhesive from resealing.
-
-
-
Insert a fourth opening pick at the top left corner of the screen.
-
Slide the opening pick along the top edge of the phone to slice the adhesive.
-
-
-
Insert a fifth opening pick and slide it along the right edge of the phone to slice the remaining adhesive.
-
-
-
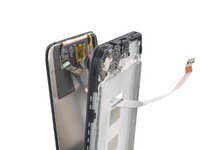
Thread the digitizer flex cable through the gap in the front panel assembly.
-
Thread the display flex cable through the gap in the front panel assembly.
-
-
-
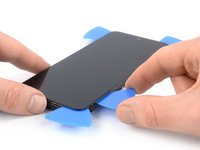
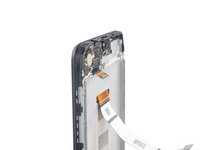
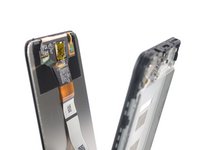
Remove the screen.
-


If possible, turn on your device and test your repair before installing new adhesive and resealing.
To reassemble your device, follow the above steps in reverse order.
The best way to secure the new screen is to apply a sheet of custom-cut double-sided tape to the back of the screen.
Take your e-waste to an R2 or e-Stewards certified recycler.
Repair didn’t go as planned? Try some basic troubleshooting, or ask our Answers community for help.
crwdns2935221:0crwdne2935221:0
crwdns2935229:012crwdne2935229:0


crwdns2947412:04crwdne2947412:0
Hi
I just did this and I had an issue with "don't cover earphone area". I realize that I can solve this by just switching off pocket mode but, that's a handy feature.
When I replaced the screen I had to use double sided sicky tape to stick the screen to the frame, can anyone tell me where the sensor is located, I intend to open it again and replace the double sided tape with phone adhesive.
Otherwise, super handy guide, thanks! Love this site for repairs. Complete, thorough, and the way every step is photographed and labelled.
Impeccable.
J'ai suivi de l'étape 1 à l'étape 37, tout s'est parfaitement déroulé, j'ai un écran tout neuf posé pour 0€ ( Sauf 20€ d'achat d'écran )
Merci
Thanks. Nice guide, well detailed.
Impeccable,
Malgré plusieurs vidéos sur YT, j'ai préféré voir ce tuto alors que je n'aime pas les tutos photos!!
Ça en dit long sur la qualité du tuto.
Juste un truc, j'ai le message qui dit que je doit pas caché le capteur de proximité alors qu'il n'y a rien. Je pense avoir oublié d'enlever un cache ou mal fixé le dit capteur.
Néanmoins, j'ai désactive dans les paramètres, puis dans écran de verrouillage (et non pas empreinte digitale, données faciale et verrouillage écran)le mode poche pour ne plus avoir le message.
Flemme de devoir re démonter !
Merci beaucoup
I have a digital heat gun, what temperature should I set it to, not to damage my phone battery and components.
M Ellison - crwdns2934203:0crwdne2934203:0