crwdns2933423:0crwdne2933423:0

Wireless Charging Coil and Loudspeaker Removal

crwdns2862623:0crwdne2862623:0
crwdns2942641:0crwdne2942641:0

crwdns2942213:0crwdne2942213:0

  1. Wireless Charging Coil and Loudspeaker Removal, Heat the right edge: crwdns2935265:01crwdnd2935265:01crwdnd2935265:01crwdne2935265:0
    • Heat an iOpener and apply it to the right edge of the back cover for two minutes to soften the adhesive.

    • A hair dryer, heat gun, or hot plate may also be used, but be careful not to overheat the phone—the display and internal battery are susceptible to heat damage.

  2. Wireless Charging Coil and Loudspeaker Removal, Insert an opening pick: crwdns2935265:02crwdnd2935265:01crwdnd2935265:03crwdne2935265:0 Wireless Charging Coil and Loudspeaker Removal, Insert an opening pick: crwdns2935265:02crwdnd2935265:02crwdnd2935265:03crwdne2935265:0 Wireless Charging Coil and Loudspeaker Removal, Insert an opening pick: crwdns2935265:02crwdnd2935265:03crwdnd2935265:03crwdne2935265:0
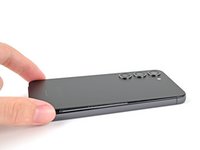
    • Apply a suction handle to the back cover, as close to the center of the right edge as possible.

    • Pull up on the suction handle with strong, steady force to create a gap between the cover and the frame.

    • If you have trouble creating a gap, apply more heat to further soften the adhesive. Follow the iOpener instructions to avoid overheating.

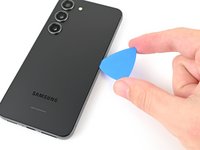
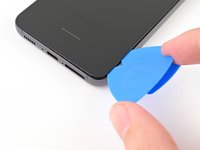
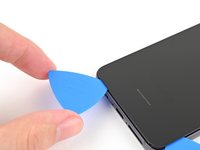
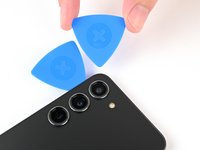
    • Insert an opening pick into the gap.

  3. Wireless Charging Coil and Loudspeaker Removal, Separate the right adhesive: crwdns2935265:03crwdnd2935265:01crwdnd2935265:03crwdne2935265:0 Wireless Charging Coil and Loudspeaker Removal, Separate the right adhesive: crwdns2935265:03crwdnd2935265:02crwdnd2935265:03crwdne2935265:0 Wireless Charging Coil and Loudspeaker Removal, Separate the right adhesive: crwdns2935265:03crwdnd2935265:03crwdnd2935265:03crwdne2935265:0
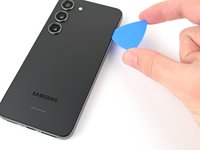
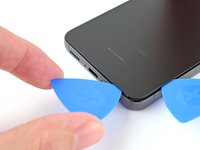
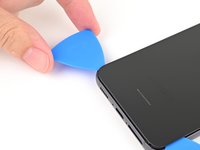
    • Slide the pick back and forth along the right edge to separate the adhesive.

    • Leave the pick inserted near the bottom right corner to prevent the adhesive from resealing.

  4. Wireless Charging Coil and Loudspeaker Removal, Heat the bottom edge: crwdns2935265:04crwdnd2935265:01crwdnd2935265:01crwdne2935265:0
    • Apply a heated iOpener to the bottom edge of the back cover for two minutes.

  5. Wireless Charging Coil and Loudspeaker Removal, Separate the corner adhesive: crwdns2935265:05crwdnd2935265:01crwdnd2935265:03crwdne2935265:0 Wireless Charging Coil and Loudspeaker Removal, Separate the corner adhesive: crwdns2935265:05crwdnd2935265:02crwdnd2935265:03crwdne2935265:0 Wireless Charging Coil and Loudspeaker Removal, Separate the corner adhesive: crwdns2935265:05crwdnd2935265:03crwdnd2935265:03crwdne2935265:0
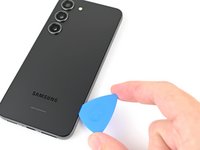
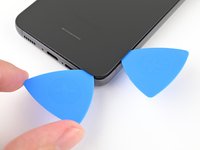
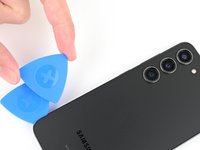
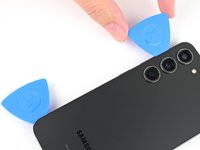
    • Insert a second opening pick at the bottom right corner.

    • Rotate it around the bottom right corner to separate the adhesive.

  6. Wireless Charging Coil and Loudspeaker Removal, Separate the bottom adhesive: crwdns2935265:06crwdnd2935265:01crwdnd2935265:02crwdne2935265:0 Wireless Charging Coil and Loudspeaker Removal, Separate the bottom adhesive: crwdns2935265:06crwdnd2935265:02crwdnd2935265:02crwdne2935265:0
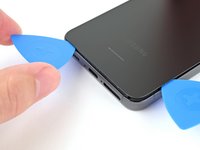
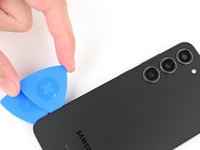
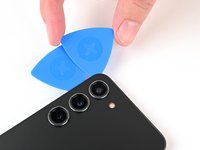
    • Slide your opening pick to the bottom left corner to separate the adhesive.

    • Leave the pick in the bottom left corner to prevent the adhesive from resealing.

  7. Wireless Charging Coil and Loudspeaker Removal, Heat the left edge: crwdns2935265:07crwdnd2935265:01crwdnd2935265:01crwdne2935265:0
    • Apply a heated iOpener to the left edge of the back cover for two minutes.

  8. Wireless Charging Coil and Loudspeaker Removal, Separate the corner adhesive: crwdns2935265:08crwdnd2935265:01crwdnd2935265:02crwdne2935265:0 Wireless Charging Coil and Loudspeaker Removal, Separate the corner adhesive: crwdns2935265:08crwdnd2935265:02crwdnd2935265:02crwdne2935265:0
    • Rotate the opening pick around the bottom left corner to separate the adhesive.

  9. Wireless Charging Coil and Loudspeaker Removal, Separate the left adhesive: crwdns2935265:09crwdnd2935265:01crwdnd2935265:03crwdne2935265:0 Wireless Charging Coil and Loudspeaker Removal, Separate the left adhesive: crwdns2935265:09crwdnd2935265:02crwdnd2935265:03crwdne2935265:0 Wireless Charging Coil and Loudspeaker Removal, Separate the left adhesive: crwdns2935265:09crwdnd2935265:03crwdnd2935265:03crwdne2935265:0
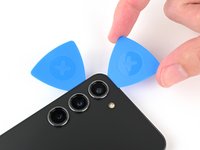
    • Insert a third opening pick at the bottom left corner.

    • Slide your pick toward the top left corner to separate the adhesive.

    • Leave the pick in the top left corner to prevent the adhesive from resealing.

  10. Wireless Charging Coil and Loudspeaker Removal, Heat the top edge: crwdns2935265:010crwdnd2935265:01crwdnd2935265:01crwdne2935265:0
    • Heat an iOpener and apply it to the top edge of the back cover for two minutes.

  11. Wireless Charging Coil and Loudspeaker Removal, Separate the corner adhesive: crwdns2935265:011crwdnd2935265:01crwdnd2935265:03crwdne2935265:0 Wireless Charging Coil and Loudspeaker Removal, Separate the corner adhesive: crwdns2935265:011crwdnd2935265:02crwdnd2935265:03crwdne2935265:0 Wireless Charging Coil and Loudspeaker Removal, Separate the corner adhesive: crwdns2935265:011crwdnd2935265:03crwdnd2935265:03crwdne2935265:0
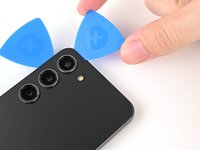
    • Insert a fourth opening pick at the top left corner.

    • Rotate it around the top left corner to separate the adhesive.

  12. Wireless Charging Coil and Loudspeaker Removal, Separate the top adhesive: crwdns2935265:012crwdnd2935265:01crwdnd2935265:02crwdne2935265:0 Wireless Charging Coil and Loudspeaker Removal, Separate the top adhesive: crwdns2935265:012crwdnd2935265:02crwdnd2935265:02crwdne2935265:0
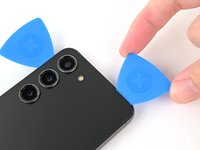
    • Slide your opening pick to the top right corner to separate the adhesive.

    • Leave the pick in the top right corner to prevent the adhesive from resealing.

  13. Wireless Charging Coil and Loudspeaker Removal, Separate the flash adhesive: crwdns2935265:013crwdnd2935265:01crwdnd2935265:03crwdne2935265:0 Wireless Charging Coil and Loudspeaker Removal, Separate the flash adhesive: crwdns2935265:013crwdnd2935265:02crwdnd2935265:03crwdne2935265:0 Wireless Charging Coil and Loudspeaker Removal, Separate the flash adhesive: crwdns2935265:013crwdnd2935265:03crwdnd2935265:03crwdne2935265:0
    • There's a remaining patch of adhesive directly under the flash.

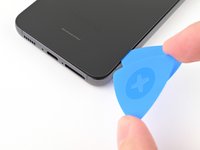
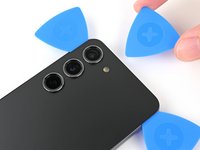
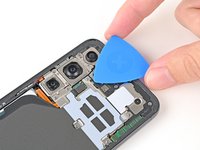
    • Line up the tip of an opening pick with the flash cutout.

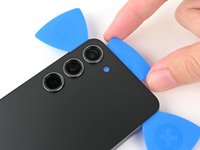
    • Slide the opening pick under the top of the back cover until you feel it start to snag on the adhesive.

    • You should see the opening pick through the flash cutout.

    • Keep sliding the pick toward the bottom of the phone until you feel the adhesive completely separate from the back cover.

    • Avoid touching the rear cameras with your pick. Pushing against the lenses risks damaging them.

  14. Wireless Charging Coil and Loudspeaker Removal, Remove the back cover: crwdns2935265:014crwdnd2935265:01crwdnd2935265:03crwdne2935265:0 Wireless Charging Coil and Loudspeaker Removal, Remove the back cover: crwdns2935265:014crwdnd2935265:02crwdnd2935265:03crwdne2935265:0 Wireless Charging Coil and Loudspeaker Removal, Remove the back cover: crwdns2935265:014crwdnd2935265:03crwdnd2935265:03crwdne2935265:0
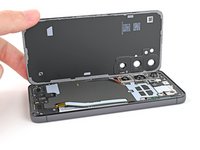
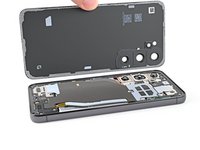
    • Grab and remove the back cover.

    • If your cover is still sticking to the frame, slide an opening pick around the perimeter until the cover completely separates.

    • During reassembly:

    • This is a good point to power on your phone and test all functions before sealing it up. Be sure to power your phone back down completely before you continue working.

    • Remove any adhesive chunks with a pair of tweezers or your fingers. Apply heat and isopropyl alcohol (90% or greater) if you're having trouble removing the adhesive.

    • If you're using custom-cut adhesives, follow this guide.

    • If you're using double-sided tape, follow this guide.

  15. Wireless Charging Coil and Loudspeaker Removal, Disconnect the wireless charging coil: crwdns2935265:015crwdnd2935265:01crwdnd2935265:02crwdne2935265:0 Wireless Charging Coil and Loudspeaker Removal, Disconnect the wireless charging coil: crwdns2935265:015crwdnd2935265:02crwdnd2935265:02crwdne2935265:0
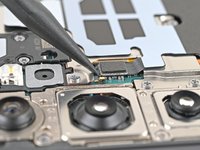
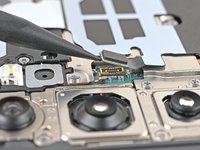
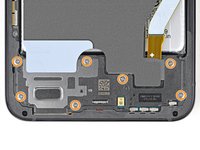
    • Use the point of your spudger to pry up and disconnect the wireless charging coil press connector from the motherboard.

    • To re-attach press connectors, carefully align and press down on one side until it clicks into place, then repeat on the other side. Don't press down on the middle. If the connector is misaligned, the pins can bend and cause permanent damage.

  16. Wireless Charging Coil and Loudspeaker Removal, Remove the wireless charging coil and loudspeaker screws: crwdns2935265:016crwdnd2935265:01crwdnd2935265:03crwdne2935265:0 Wireless Charging Coil and Loudspeaker Removal, Remove the wireless charging coil and loudspeaker screws: crwdns2935265:016crwdnd2935265:02crwdnd2935265:03crwdne2935265:0 Wireless Charging Coil and Loudspeaker Removal, Remove the wireless charging coil and loudspeaker screws: crwdns2935265:016crwdnd2935265:03crwdnd2935265:03crwdne2935265:0
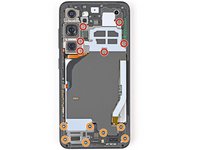
    • Use a Phillips screwdriver to remove the thirteen 3.5 mm‑long screws securing the wireless charging coil and the loudspeaker:

    • Six screws securing the wireless charging coil

    • Seven screws securing the loudspeaker

  17. Wireless Charging Coil and Loudspeaker Removal, Remove the wireless charging coil and loudspeaker: crwdns2935265:017crwdnd2935265:01crwdnd2935265:03crwdne2935265:0 Wireless Charging Coil and Loudspeaker Removal, Remove the wireless charging coil and loudspeaker: crwdns2935265:017crwdnd2935265:02crwdnd2935265:03crwdne2935265:0 Wireless Charging Coil and Loudspeaker Removal, Remove the wireless charging coil and loudspeaker: crwdns2935265:017crwdnd2935265:03crwdnd2935265:03crwdne2935265:0
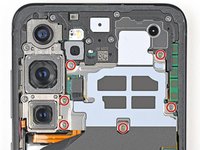
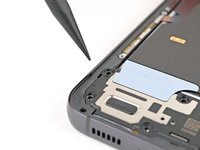
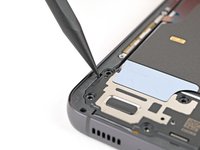
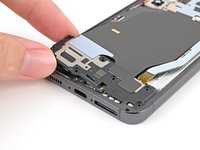
    • Insert the point of your spudger in the notch at the top left corner of the loudspeaker.

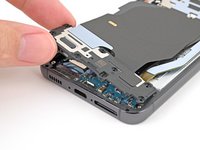
    • Pry up to unclip the loudspeaker from the frame.

  18. Wireless Charging Coil and Loudspeaker Removal: crwdns2935265:018crwdnd2935265:01crwdnd2935265:03crwdne2935265:0 Wireless Charging Coil and Loudspeaker Removal: crwdns2935265:018crwdnd2935265:02crwdnd2935265:03crwdne2935265:0 Wireless Charging Coil and Loudspeaker Removal: crwdns2935265:018crwdnd2935265:03crwdnd2935265:03crwdne2935265:0
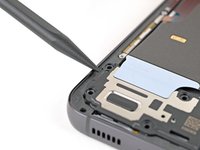
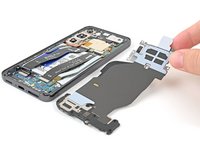
    • Use your fingers to lift the loudspeaker away from the frame to fully separate it.

    • Remove the wireless charging coil and loudspeaker from the frame.

    • During reassembly, press around the perimeter of the loudspeaker to clip it to the frame.

crwdns2915888:0crwdne2915888:0

To reassemble your device, follow these instructions in reverse order.

Alex Diaz-Kokaisl

crwdns2935283:001/16/22crwdne2935283:0

164.345 crwdns2915208:0crwdne2915208:0

crwdns2935297:0769crwdne2935297:0

crwdns2915084:0crwdne2915084:0

iFixit crwdns2935289:0iFixitcrwdne2935289:0

Staff

crwdns2931471:0121crwdne2931471:0

crwdns2935297:019.715crwdne2935297:0

crwdns2947412:00crwdne2947412:0

crwdns2917038:0crwdne2917038:0

crwdns2936625:0crwdne2936625:0:

crwdns2936751:024crwdne2936751:0 0

crwdns2936753:07crwdne2936753:0 0

crwdns2936753:030crwdne2936753:0 21

crwdns2942667:0crwdne2942667:0 66