crwdns2915892:0crwdne2915892:0
Use this guide to replace a worn-out or dead battery in your TicWatchPro.
If your battery is swollen, take appropriate precautions. For your safety, discharge your battery below 25% before disassembling your watch. This reduces the risk of a dangerous thermal event if the battery is accidentally damaged during the repair.
You’ll need replacement adhesive to reattach a new battery when reassembling the device.
crwdns2942213:0crwdne2942213:0
-
-
Before starting repairs, take your watch off the charger and power it down.
-
Remove the four 3.9 mm-long Torx T3 screws.
-
-
-
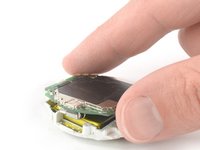
Carefully lift the back cover by the watch crown edge and swing it open to an upward position.
-
-
-
Use the flat end of a spudger to pry up and disconnect the sensor flex cable.
-
-
-
Remove the back cover.
-
-
-
Remove the three 3.7 mm-long Phillips #00 screws.
-
-
-
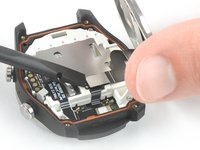
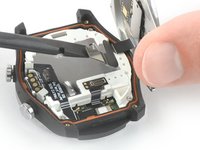
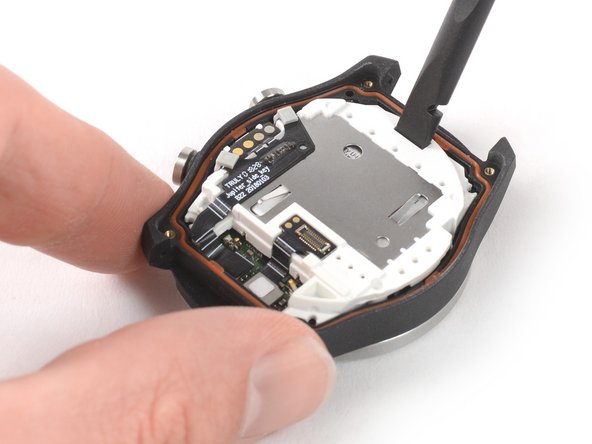
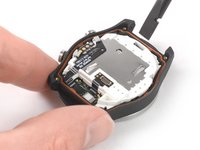
Insert the flat end of a spudger into the notch at the upper end of the white plastic frame.
-
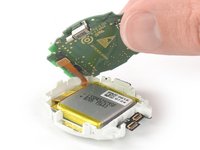
Use your spudger as a lever and pry up the core assembly.
-
-
-
-
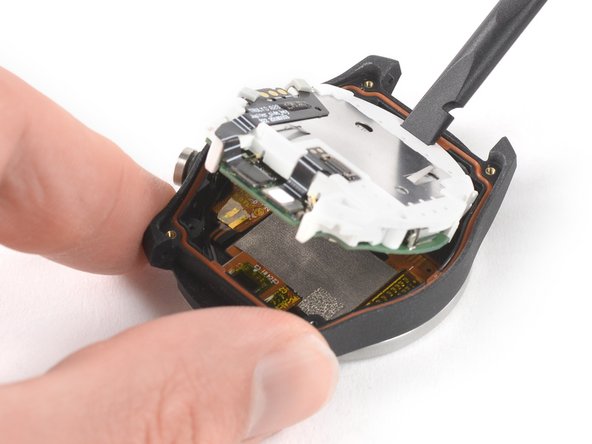
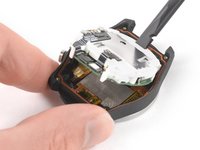
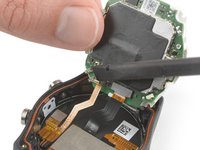
Carefully lift the loose edge of the core assembly up and swing it to a 100-degree angle.
-
-
-
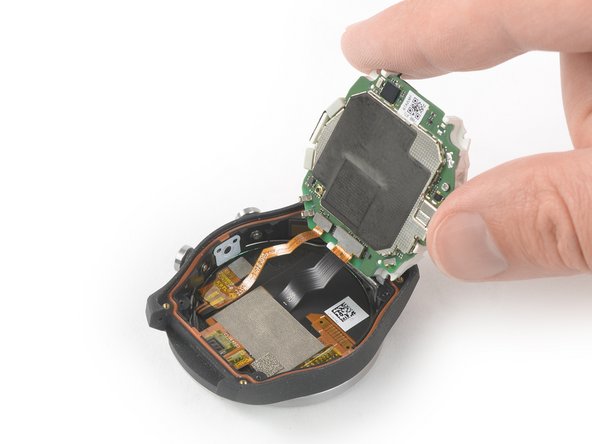
Use the flat end of a spudger to pry up and disconnect the sensor flex cable from the core assembly.
-
-
-
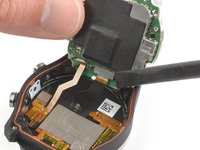
Use the flat end of a spudger to pry up and disconnect the display flex cable from the core assembly.
-
-
-
Remove the core assembly.
Voor je de plastic klemmen los begint te wrikken in stap 11 moet je het vijsje dat het moederbord op de witte plastic body vasthoud losmaken en verwxijderen! (PH0 schroevendraaier)
what version on this photo, 2018 or 2020 ?
-
-
-
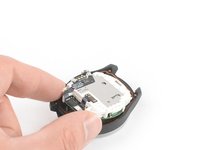
Use a Phillips driver to remove the screw securing the motherboard.
Before bending the plastic clips and separating the white plastic frame from the motherboard, the two connectors that connect the white plastic frame with the motherboard should be disconnected and on reassembly reconnected.
Thank you Björn. Very helpful.
-
-
-
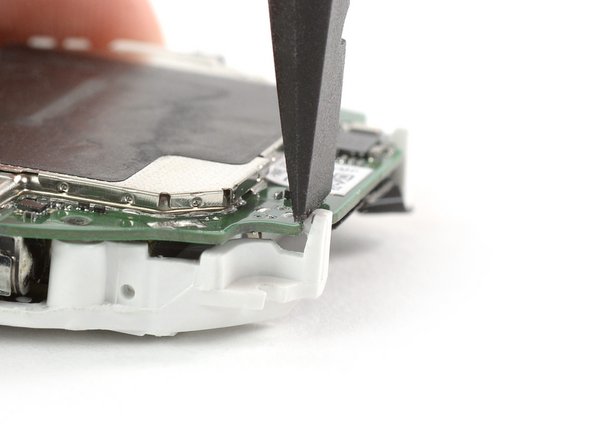
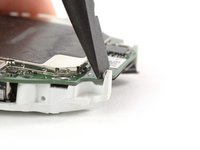
Use the flat end of a spudger or your fingernail to carefully bend the plastic clips around the motherboard to the side in order to free the motherboard.
-
Repeat this procedure for all plastic clips around the motherboard.
You guys totally missed a step here. There are two connectors that must be removed BEFORE you pry the motherboard out of the white plastic frame that the battery is glued to.
-
-
-
Carefully lift the motherboard assembly to free it from any remaining plastic clips.
-
-
-
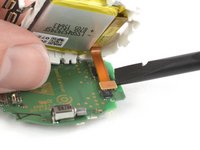
Use the flat end of a spudger to pry up and disconnect the battery flex cable from the motherboard.
-
-
-
Apply a heated iOpener to the back of the white plastic frame for at least two minutes to loosen the adhesive beneath the battery.
-
-
-
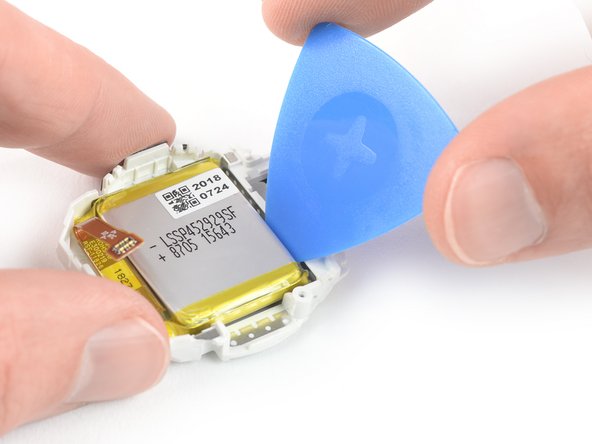
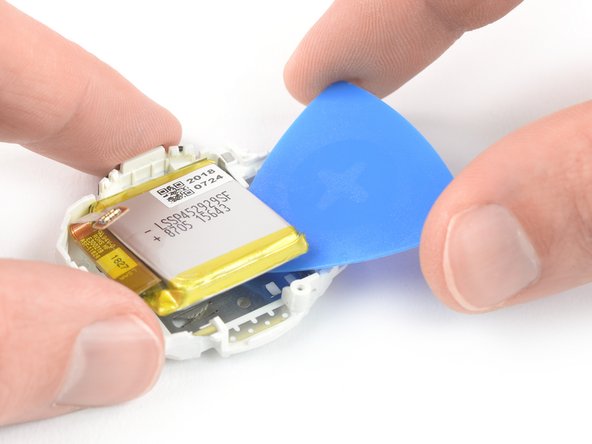
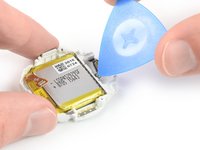
Insert an opening pick in the gap between the white plastic frame and the battery.
-
Use the opening pick to pry the battery up and out of its recess.
-


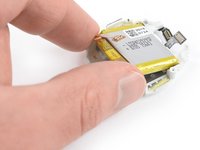

If possible, turn on your device and test your repair before installing new adhesive and resealing.
Secure the new battery with pre-cut adhesive or double-sided adhesive tape. In order to position it correctly, apply the new adhesive into the device at the places where the old adhesive was located, not directly onto the battery. Press the new battery firmly into place.
To reassemble your device, follow these instructions in reverse order. Apply new adhesive where necessary after cleaning the relevant areas with isopropyl alcohol (>90%).
For optimal performance, calibrate your newly installed battery: Charge it to 100% and keep charging it for at least 2 more hours. Then use your device until it shuts off due to low battery. Finally, charge it uninterrupted to 100%.
Take your e-waste to an R2 or e-Stewards certified recycler.
Repair didn’t go as planned? Try some basic troubleshooting, or ask our Answers community for help.
crwdns2935221:0crwdne2935221:0
crwdns2935229:024crwdne2935229:0


crwdns2947412:014crwdne2947412:0
What is the battery part number that is required for replacement?
Thank you!
Saved my ticwatch! Hopefully I get a couple more years out of it!
(Part nr sp452929sf, same for 4g as none 4g watch)
Where did you find this new battery?
No way to get the external screws out. Any advice?
Use a T4 bit not a T3 as the directions say. A couple of mine were tight to get out. I put good pressure down on the screw and turned it slowly. I thought for sure I had stripped out the screw head. Using the T4 bit helped immensely.
Hola buenas, me gustaría saber, ¿para que sirve el agujero que tiene el reloj en la parte superior a un costado de la ranura para correa?:
https://drive.google.com/file/d/1t_qUDU4...
de antemano muchas gracias.
I found this very helpful thanks, but when I let my watch drain 100% to condition the battery a few days later it wouldn't charge again :(
This is an easy battery swap. I purchased my battery from Amazon. I used the warm air from my pellet stove to heat the glue holding the battery. I was able to peel the glue tape from the old battery and put it on the new battery. The old battery was bloated/swollen. The tools that came with the new battery are useless. Take your time and make sure the ribbon cable connectors snap back into place. Buy yourself a good set of tools to do this job. I have a set from Lowes that is Kobalt brand. Kobalt Electronic repair Screwdriver Bit Set (50-Piece) in the Screwdriver Bits department at Lowes.com
is there a way that i can bring it in and have someone fix it that way or ship it?
The brand does not repair this watch
Hello, I have changed the battery and the touch screen does not respond. I have restarted and done a reset from the bootloader and the touch screen still does not work. Any suggestions? I have reassembled and disassembled the watch three times and with the same problem
Is the battery the same as the one in the ticwatch pro 2020?
Best and clearest instructions I have ever followed
I received ticwatch pro from birthday present and its my favorite watch.
It stop and i charge it and nothing.
Where can i fix this ticwatch pro?
Live here in peachland british columbia
Thanks
Ines
The screws at least on my unit seem to be Torx T4. A T3 will work, but be careful not to strip the screws.
Jappu - crwdns2934203:0crwdne2934203:0
Yes! They are T4 on my watch too.
Jim Bondly - crwdns2934203:0crwdne2934203:0
They're T4 on mine as well.
Jared Capson - crwdns2934203:0crwdne2934203:0