crwdns2915892:0crwdne2915892:0
Use this guide to replace the motherboard in your TicWatch Pro 3 GPS.
Replacing the motherboard in the TicWatch Pro 3 GPS requires you to remove the battery. Do not reuse the battery if it has been deformed or damaged, as doing so is a potential safety hazard. Replace it with a new battery.
For your safety, discharge the battery below 25% before disassembling your watch. This reduces the risk of fire if the battery is accidentally damaged during the repair. If your battery is swollen, take appropriate precautions.
You’ll need replacement adhesive when reassembling the device. Your device will function normally, but will lose its IP (Ingress Protection) rating.
crwdns2942213:0crwdne2942213:0
-
-
Before starting repairs, take your watch off the charger and power it down.
-
Remove the watch band.
-
-
-
Use a Torx T3 screwdriver to remove the four 4.1 mm-long screws securing the back cover.
-
-
-
Apply a heated iOpener to the rear side of the watch for 5 minutes to loosen the adhesive underneath.
-
-
-
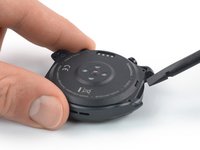
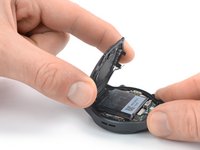
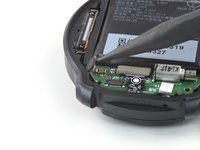
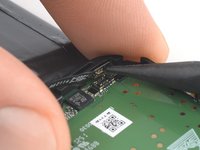
Insert the flat end of a spudger into the microphone opening at the top edge of the back cover.
-
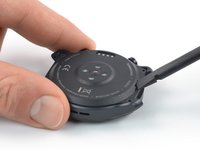
Pry upwards to loosen the back cover assembly. This may require some force.
-
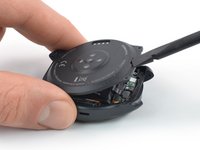
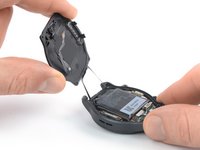
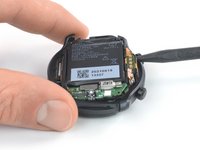
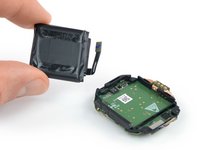
Swing the back cover assembly open by 45 degrees to gain access to the sensor assembly cable.
-
-
-
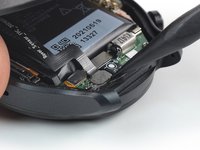
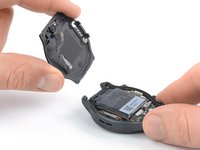
Use a spudger to disconnect the sensor assembly cable by prying the connector straight up from its socket.
-
-
-
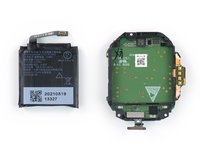
Remove the back cover assembly.
-
-
-
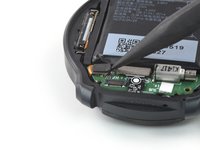
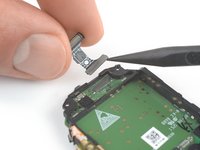
Use a spudger to disconnect the microphone cable by prying the connector straight up from its socket.
-
-
-
-
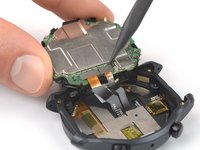
Use a Phillips screwdriver to remove the three 4.1 mm-long screws securing the core assembly.
-
-
-
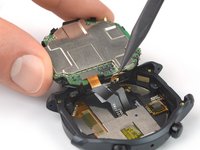
Insert the point of a spudger between the right edge of the core assembly and the watch frame.
-
Pry upwards to loosen the core assembly.
-
-
-
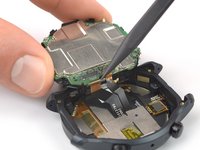
Carefully swing open the core assembly like the front cover of a book.
At this point, the little transparent plastic square over each button got away on my tear-down.
Those have a black dot in the middle, i though they might only be for waterproofing, but with or without them in place, i cannot push any of the button anymore. I think i just killed my watch.
If i'm not a fluke, i think this need a bit more warning. -
-
-
Use a spudger to disconnect the screen and the digitizer cables by prying the connectors straight up from their sockets.
-
-
-
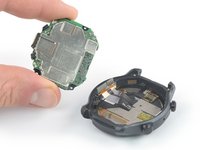
Remove the core assembly.
-
-
-
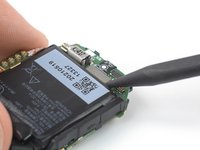
Use a spudger to disconnect the interconnect cable by prying the connector straight up from its socket.
-
-
crwdns2935267:0crwdne2935267:0Tweezers$4.99
-
Use a pair of tweezers to remove the daughterboard.
-
-
-
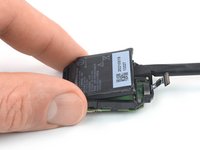
Insert the flat end of a spudger between the bottom edge of the battery and the midframe.
-
Pry upwards to loosen the battery.
-
-
-
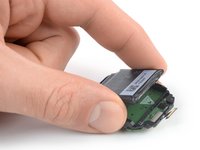
Carefully fold the battery over to gain access to the battery cable connector.
-
-
-
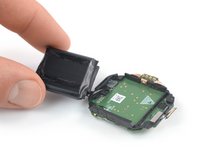
Use a spudger to disconnect the battery cable by prying the connector straight up from its socket.
-
-
-
Remove the battery.
Battery : pls advise the exact dimensions of the battery? And or provide a weblink?
Thanks,
Donde comprar la batería?
I passaggi dal n° 5 al n° 14 non sono necessari !!! Più connettori si scollegano e più si ha la probabilità di rovinarli quando si andranno a riattaccare !!! Basta fare un po' di attenzione e si riesce a sollevare la batteria senza staccare tutti i connettori indicati in questi passaggi non necessari.
How do you restore the water resistance during reassembly?
Quando la batteria si gonfia i pulsanti non funzionano più specie dopo una carica completa
Quando l orologio fa una carica completa la batteria si gonfia e spinge sul connettore pulsanti che smettono di funzionare come risolvere .
Forse sostituire batteria?
-
-
-
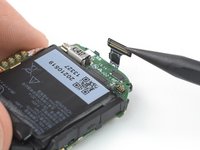
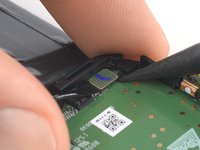
Use a spudger to disconnect the interconnect cable by prying the connector straight up from its socket.
-
Remove the interconnect cable.
-
-
-
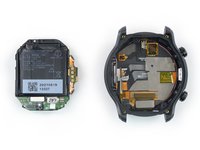
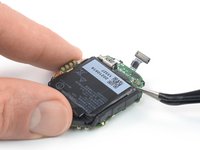
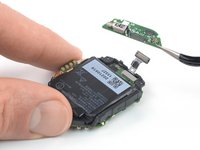
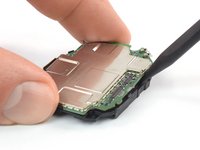
Insert the point of a spudger between the midframe and the motherboard.
-
Pry upwards to loosen the motherboard.
-
-
-
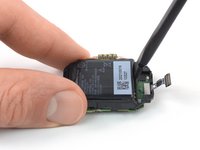
Remove the motherboard.
-


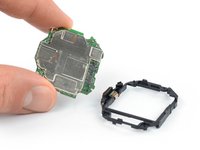
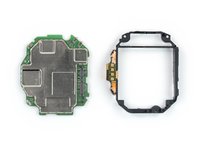
Compare your new replacement part to the original part—you may need to transfer remaining components or remove adhesive backings from the new part before you install it.
To reassemble your device, follow these instructions in reverse order.
During reassembly, apply new adhesive where it's necessary after cleaning the relevant areas with isopropyl alcohol (>90%).
For optimal performance, calibrate your newly installed battery after completing this guide.
Take your e-waste to an R2 or e-Stewards certified recycler.
Repair didn’t go as planned? Try some basic troubleshooting, or ask our TicWatch Pro 3 answers community for help.
crwdns2935221:0crwdne2935221:0
crwdns2935229:03crwdne2935229:0


crwdns2947412:05crwdne2947412:0
Hi there , just disassembled the motherboard no issues, i wanted to see what was wrong with the watch and its atleast from what i can tell water damage to the motherboard, can anyone help me find a replacement ? I'm struggling with that
Hi, have you found a replacement? The second display is the one that is failing for me. Thank you.
IP68 ... haha. Also water damage here. It's so small, that I needed to remove the mainboard to finally see it.
This is the 2nd TicWatch that was failing...
Any idea where to get a proper and working replacement motherboard? Ebay has a few, but that are all marked as "defective" --> useless.
This fixed the small dark spot near the seconds digits (Essential mode). Some said it was a expanded battery, but upon disassembly the battery was still completely flat, so no dice there. However, I've reassembled the watch with all screws loosely tightened and it fixed it. Of course not waterproof anymore, but at least the display won't damage itself now. The spot disappeared completely.
I have 2 tw pro 3 . 1st one water damaged cause 2nd display not to work and watch goes into freeze mode . The 2nd tw motherboard completely dead . Struggling to find motherboards for these watches . Any suggestions?