crwdns2915892:0crwdne2915892:0
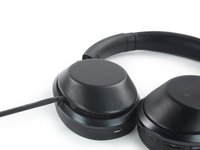
Use this guide to replace a worn out or dead battery in your Sony MDR-1000X.
If your battery is swollen, take appropriate precautions. For your safety, discharge your battery below 25% before disassembling your headphones. This reduces the risk of a dangerous thermal event if the battery is accidentally damaged during the repair.
crwdns2942213:0crwdne2942213:0
-
-
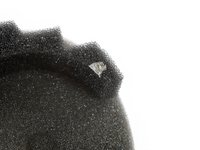
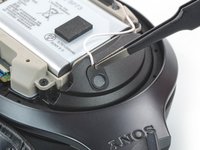
Insert a spudger into the gap between the right ear cup cushion and the headphone frame.
-
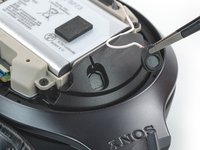
Lever the spudger downwards to pry up the ear cup cushion.
-
-
-
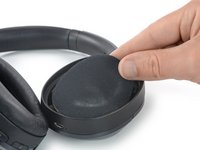
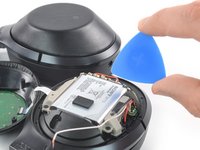
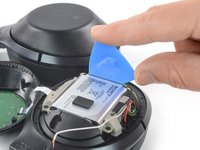
Remove the ear cup cushion.
-
-
-
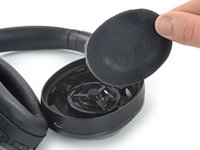
Carefully remove the protective cloth in the inside of the ear cup including the foam spacers.
You may not need to remove this foam, I was able to gently pull it back to access the screws. This way you dont need to worry about tearing the foam or compromising the double sided tape attachment.
-
-
-
Remove the four 8.3 mm-long Phillips #00 screws securing the ear cup cover.
-
-
-
-
Insert a spudger into the gap between the ear cup cover and the headphone frame.
-
Lever down the spudger to pry up the ear cup cover and pop open the plastic clips.
-
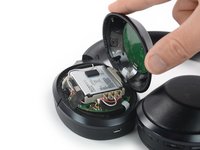
Carefully open the ear cup cover.
-
-
crwdns2935267:0crwdne2935267:0Tweezers$4.99
-
Use a pair of blunt nose blunt nose tweezers to carefully lift the microphone cable out of its routing.
Bei neueren Modellen nicht erfoderlich, da das Kabel am Akku vorbeiläuft.
-
-
-
Use a pair of blunt nose tweezers to lift the microphone out of its recess.
Bei neueren Modellen nicht erfoderlich, da das Kabel am Akku vorbeiläuft.
-
-
-
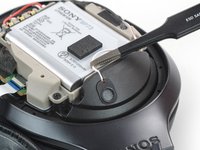
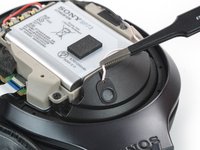
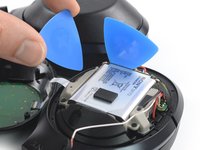
Insert an opening pick in between the bottom edge of the battery and the battery contact plate.
-
-
-
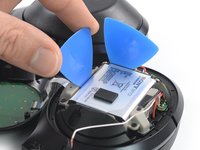
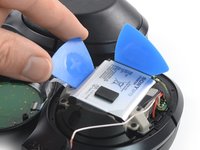
Insert a second opening pick between the right edge of the battery and the battery frame.
-
Lever down the opening pick to pry up the battery. This might require a little bit force due to the battery adhesive underneath.
I used some isopropyl alcohol to soften the adhesive so I could work the battery free without using too much force. Take your time, let the isopropyl soften the adhesive and it will come out easily
-
-
-
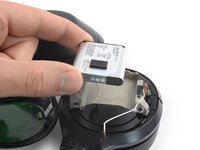
Remove the battery.
After replacing the battery, definitely check to make sure you are able to charge. I found that putting a pick to block off the contacts meant tht the new battery didnt make good contact with the terminals, and the headphones didnt want to charge. I gently used a set of tweezers to adjust the contacts, tested again to confirm that charging was working before reassembling.
-


If possible, turn on your device and test your repair before resealing.
To reassemble your device, follow these instructions in reverse order.
For optimal performance, calibrate your newly installed battery: Charge it to 100%, and keep charging it for at least two more hours. Then, use it until it shuts off due to low battery. Finally, charge it uninterrupted to 100%
Take your e-waste to an R2 or e-Stewards certified recycler.
Repair didn’t go as planned? Check out our Answers community for troubleshooting help.
crwdns2935221:0crwdne2935221:0
crwdns2935229:05crwdne2935229:0


crwdns2947412:09crwdne2947412:0
Ugh…. I broke one of the gold pins attached to the red/white/black wires to the battery…. Does anyone know if there’s a fix or solution for that save for soldering?
At least I figured out it was the battery that was the initial issue! But now…. UGH.
Thank you so much for this guide, Dominik!
Hi Kaldea, I’m not sure which part you actually broke off but in case you’re fit in soldering you should be able to solder the cable back onto the pin. In case you broke the side which is in contact with the battery you need to find a replacement part for it. You might be lucky in a well sorted electronic or model making store.
I broke the pin too, wonder did you eventually find a way to fix it?
Thanks for the instructions. Repair went well and worked. I did notice those pins are touchy.
Yes, BE CAREFUL! I too broke one of the gold pins - they're not even pins, they're kind of folded metal foil, and very brittle. It snapped and although I put it back in place, I'm guessing it did not make a connection because the battery did not charge. I can't solder and don't have the equipment :-( So now I need to buy new headphones. Still it was worth a try.
Same problem but i solder it back and i can play musik but cant charge them anymore
Kim l -
Mijn koptelefoon gaat niet meer aan. Ik zie ook geen afwijkingen aan de batterij (niet gezwollen of iets dergelijks). Hoe groot is de kans dat toch de batterij het probleem is? Zal ik proberen hem te vervangen? Alvast dank!
super Anleitung!!
Bei meinem MDR-1000X habe ich das Problem, dass sich der Akku nicht mehr laden lässt. Wenn ich das Kabel anschliesse, dann leuchtet das LED nicht und es lädt auch nicht. Kann dies mit einem defekten Akku zu tun haben? Löse ich das mit einem neuen Akku eventuell? Vielen Dank
Gruss
Franco
Thank you. I made sure to follow instructions carefully step by step. The cloth with foam has no adhesive attached to the body. Snug it up a bit on all sides, easily remove the screws. Now the headset is back to life.