crwdns2933423:0crwdne2933423:0

Shortcut method - HP Touchsmart IQ506 CMOS Battery

crwdns2942213:0crwdne2942213:0

  1. Shortcut method - HP Touchsmart IQ506 CMOS Battery, Unplug the power cord: crwdns2935265:01crwdnd2935265:01crwdnd2935265:02crwdne2935265:0 Shortcut method - HP Touchsmart IQ506 CMOS Battery, Unplug the power cord: crwdns2935265:01crwdnd2935265:02crwdnd2935265:02crwdne2935265:0
    • Shut the computer down and unplug the power adapter.

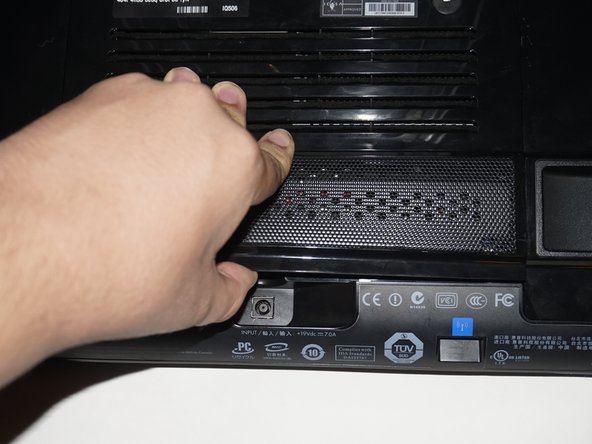
  2. Shortcut method - HP Touchsmart IQ506 CMOS Battery, Lock the stand: crwdns2935265:02crwdnd2935265:01crwdnd2935265:01crwdne2935265:0
    • Lock the system stand before starting. Hold the stand up, while pushing the locking tab towards the side that locked side.

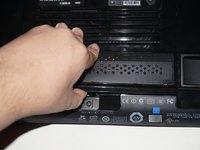
  3. Shortcut method - HP Touchsmart IQ506 CMOS Battery, Remove the RAM door screw: crwdns2935265:03crwdnd2935265:01crwdnd2935265:03crwdne2935265:0 Shortcut method - HP Touchsmart IQ506 CMOS Battery, Remove the RAM door screw: crwdns2935265:03crwdnd2935265:02crwdnd2935265:03crwdne2935265:0 Shortcut method - HP Touchsmart IQ506 CMOS Battery, Remove the RAM door screw: crwdns2935265:03crwdnd2935265:03crwdnd2935265:03crwdne2935265:0
    • Remove the screw on the RAM door. Once you remove the screw, unclip the door.

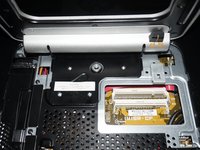
  4. Shortcut method - HP Touchsmart IQ506 CMOS Battery, Remove the RAM: crwdns2935265:04crwdnd2935265:01crwdnd2935265:02crwdne2935265:0 Shortcut method - HP Touchsmart IQ506 CMOS Battery, Remove the RAM: crwdns2935265:04crwdnd2935265:02crwdnd2935265:02crwdne2935265:0
    • Unclip the RAM from the RAM slots in the machine. If possible, put the RAM in a ESD safe area.

  5. Shortcut method - HP Touchsmart IQ506 CMOS Battery, Remove the stand: crwdns2935265:05crwdnd2935265:01crwdnd2935265:03crwdne2935265:0 Shortcut method - HP Touchsmart IQ506 CMOS Battery, Remove the stand: crwdns2935265:05crwdnd2935265:02crwdnd2935265:03crwdne2935265:0 Shortcut method - HP Touchsmart IQ506 CMOS Battery, Remove the stand: crwdns2935265:05crwdnd2935265:03crwdnd2935265:03crwdne2935265:0
    • Some people may find it easier to remove the top screws from the stand first. These screws can be difficult to remove.

    • Remove the stand from the system. Use a Phillips #1 screwdriver to loosen the 4 screws.

  6. Shortcut method - HP Touchsmart IQ506 CMOS Battery, Removing the battery: Part 1: crwdns2935265:06crwdnd2935265:01crwdnd2935265:02crwdne2935265:0 Shortcut method - HP Touchsmart IQ506 CMOS Battery, Removing the battery: Part 1: crwdns2935265:06crwdnd2935265:02crwdnd2935265:02crwdne2935265:0
    crwdns2935267:0crwdne2935267:0
    Tweezers
    $4.99
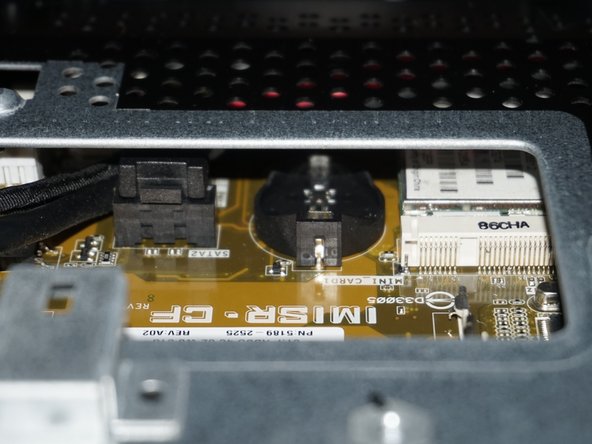
    • This is when the method used in this guide starts to get advanced. DO NOT CONTINUE unless you know how to disassemble the system should the battery fall in the system! IMPORTANT: Make sure you use blunt-ended tweezers.

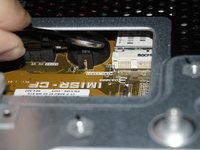
    • Unclip the top of the battery using your fingernails. You do not need to use tweezers yet.

  7. Shortcut method - HP Touchsmart IQ506 CMOS Battery, Removing the battery: Part 2: crwdns2935265:07crwdnd2935265:01crwdnd2935265:02crwdne2935265:0 Shortcut method - HP Touchsmart IQ506 CMOS Battery, Removing the battery: Part 2: crwdns2935265:07crwdnd2935265:02crwdnd2935265:02crwdne2935265:0
    • With the battery unclipped, use the tweezers to grab the battery. Pull the battery out while keeping a firm grip to avoid dropping it.

  8. Shortcut method - HP Touchsmart IQ506 CMOS Battery, Optional: Identify when the battery was replaced: crwdns2935265:08crwdnd2935265:01crwdnd2935265:01crwdne2935265:0
    • Example: If you replaced the battery in May of 2016, you would write 5/16 on the battery. If you wanted to use the full D/M/Y, this should go on the chassis with the abridged date on the battery using a label maker.

    • Put a note on the RAM door out of sight or write when the battery was replaced on the new battery.

  9. Shortcut method - HP Touchsmart IQ506 CMOS Battery, Replacing the battery: Part 1: crwdns2935265:09crwdnd2935265:01crwdnd2935265:02crwdne2935265:0 Shortcut method - HP Touchsmart IQ506 CMOS Battery, Replacing the battery: Part 1: crwdns2935265:09crwdnd2935265:02crwdnd2935265:02crwdne2935265:0
    • Make sure you do not drop the battery in the machine!

    • Open the new battery, and grab it with the tweezers. Do not grab too much so it will drop, but get enough you can keep a good grip on it.

  10. Shortcut method - HP Touchsmart IQ506 CMOS Battery, Replacing the battery: Part 2: crwdns2935265:010crwdnd2935265:01crwdnd2935265:01crwdne2935265:0
    • With the battery in the tweezers, slowly slide the battery in the clip. Once you have it in, put one finger on the battery while removing the tweezers.

  11. Shortcut method - HP Touchsmart IQ506 CMOS Battery, Replacing the battery: Part 3: crwdns2935265:011crwdnd2935265:01crwdnd2935265:02crwdne2935265:0 Shortcut method - HP Touchsmart IQ506 CMOS Battery, Replacing the battery: Part 3: crwdns2935265:011crwdnd2935265:02crwdnd2935265:02crwdne2935265:0
    • With the battery in the clip, push down on the battery to lock it in the system.

  12. Shortcut method - HP Touchsmart IQ506 CMOS Battery, Legacy iFixit driver ONLY - how to access the screws on the top: crwdns2935265:012crwdnd2935265:01crwdnd2935265:01crwdne2935265:0
    • (Legacy iFixit driver only): The top hinge screws can be difficult to get to. If you have the classic iFixit screwdriver handle, lock the stand upright and slide it under the stand from the rear to access the top screws. This should not be needed with the 64-bit Manta driver or EET handle. Remove the bottom screws as normal.

crwdns2915888:0crwdne2915888:0

To reassemble your device, replace the stand, RAM and RAM door. You will also have to reconfigure the BIOS. The machine will resort to checksum defaults since the battery was removed.

crwdns2935229:04crwdne2935229:0

Nick

crwdns2935283:011/10/09crwdne2935283:0

94,133 crwdns2915208:0crwdne2915208:0

crwdns2935297:059crwdne2935297:0

crwdns2915084:0crwdne2915084:0

Master Techs crwdns2935289:0Master Techscrwdne2935289:0

Community

crwdns2931471:0326crwdne2931471:0

crwdns2935297:01,683crwdne2935297:0

crwdns2947410:01crwdne2947410:0

I’d put a piece of sticky tape on the top of the battery to keep it under control.

info - crwdns2934203:0crwdne2934203:0

crwdns2917038:0crwdne2917038:0

crwdns2936625:0crwdne2936625:0:

crwdns2936751:024crwdne2936751:0 2

crwdns2936753:07crwdne2936753:0 3

crwdns2936753:030crwdne2936753:0 13

crwdns2942667:0crwdne2942667:0 3,049