crwdns2915892:0crwdne2915892:0
This guide will show you how to replace the brush roll motor for your Shark Ion RV754 robot vacuum. The brush roll motor is responsible for rotating the brush roll to collect debris.
If you notice the brush roll not spinning, the motor could be responsible. Replacement parts can be found on Amazon and Walmart.
Before you begin the repair, make sure the issue isn’t caused by something else—check the Shark ION RV754 Not Picking Up Debris troubleshooting page for possible solutions.
Also, power off your vacuum and disconnect it from the charging dock or cord.
crwdns2942213:0crwdne2942213:0
-
-
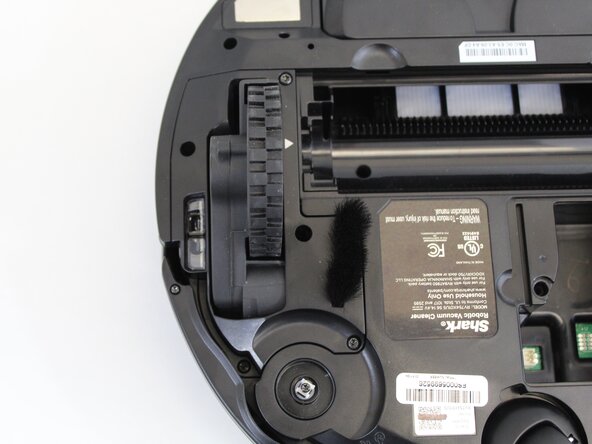
Place the unit on its back with the wheels facing up.
-
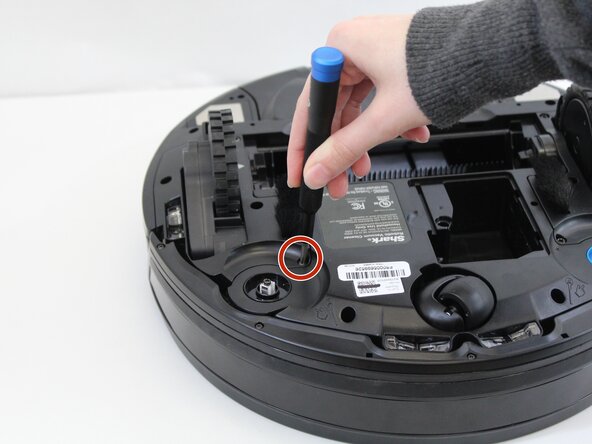
Use a Phillips #1 screwdriver to remove the single screw securing the battery compartment door.
-
Use your finger to lift off the battery door using the small indent next to it.
-
-
-
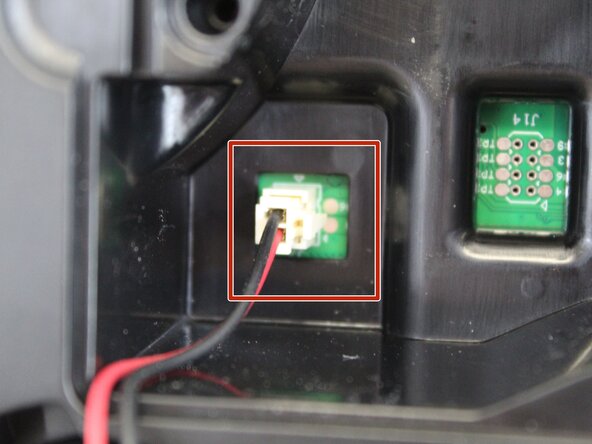
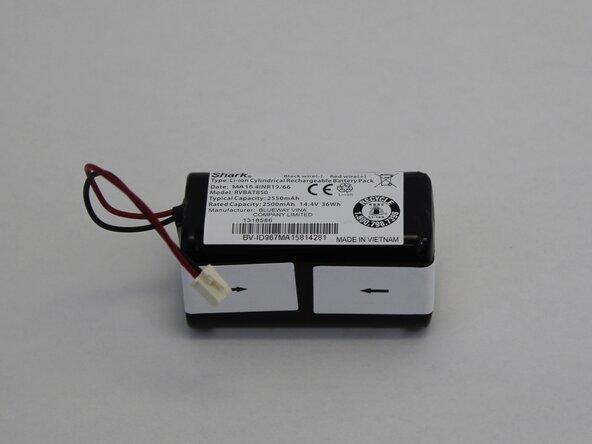
Lift the battery out just above the compartment to access the battery connector.
-
Squeeze the tab against the connector and pull it straight up to disconnect it.
-
Remove the battery completely.
-
-
-
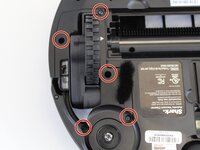
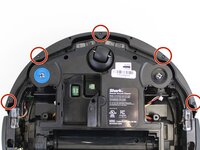
Use a TR15 Torx security screwdriver to remove five 13.85 mm screws from the left and right wheel assemblies.
-
-
-
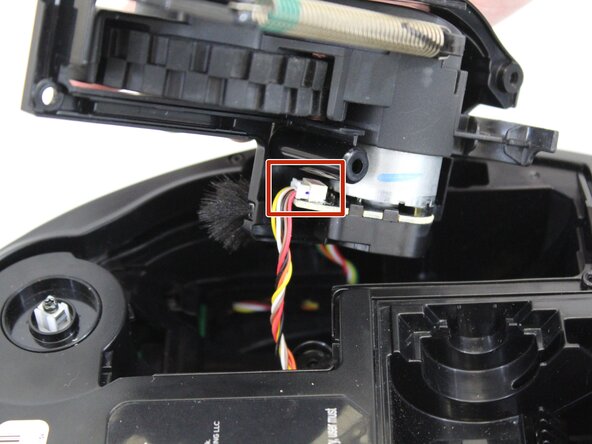
Lift the wheel assembly out to access the cable connectors that are attached to the wheels.
-
Squeeze the tab against the connector and pull it straight out to disconnect it from the wheel.
-
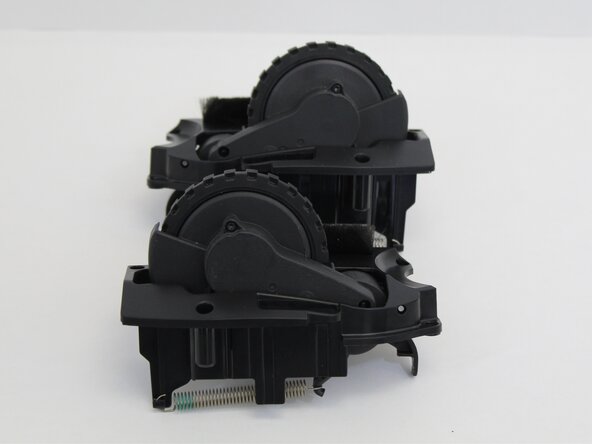
Remove the wheel assembly.
-
Repeat the steps to remove the other wheel.
-
-
-
-
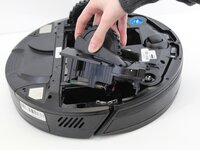
Press the dust bin latch and slide the bin out to remove it.
-
-
-
Remove the 5 9.30 mm screws securing the bumper trim using a Torx TR8 screwdriver.
-
Use an opening tool or spudger to release the clips securing the bumper trip.
-
Carefully pull the bumper trim off the vacuum.
-
Lift the front bumper off of the vacuum.
-
-
-
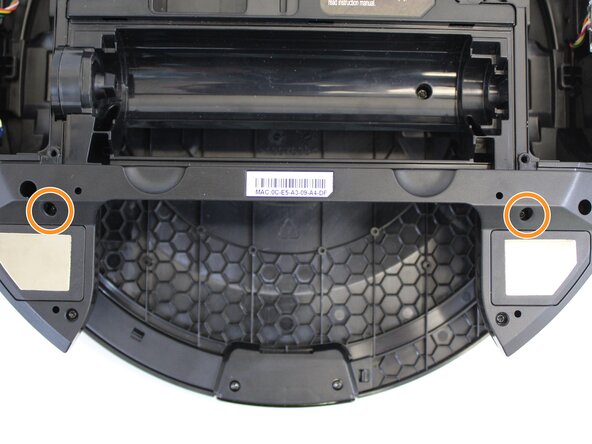
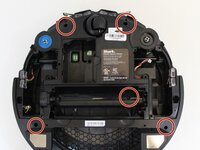
Use a TR8 Torx Security screwdriver to remove the five 13.9 mm screws from the bottom of the vacuum.
-
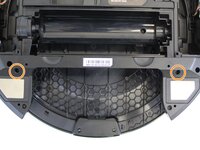
Remove the two 9.3 mm screws from the bottom of the vacuum near the dust bin cavity using a TR15 Torx Security screwdriver.
-
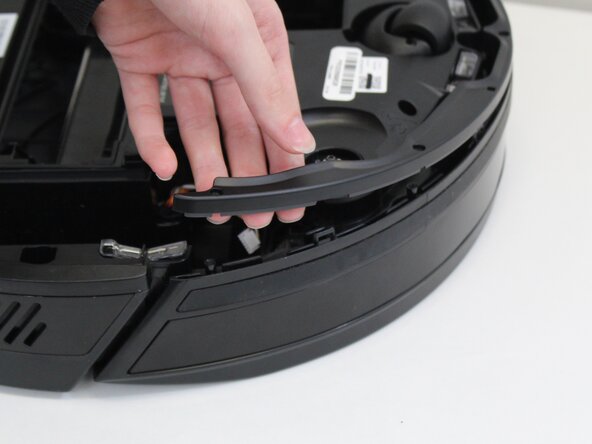
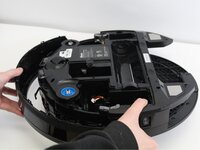
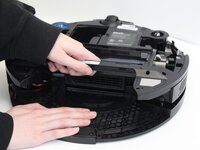
To separate the vacuum body, place one hand on the bottom and pull with the other from the brush roll recess.
-
-
-
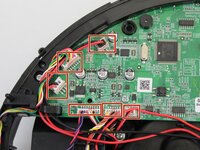
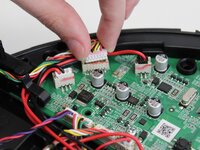
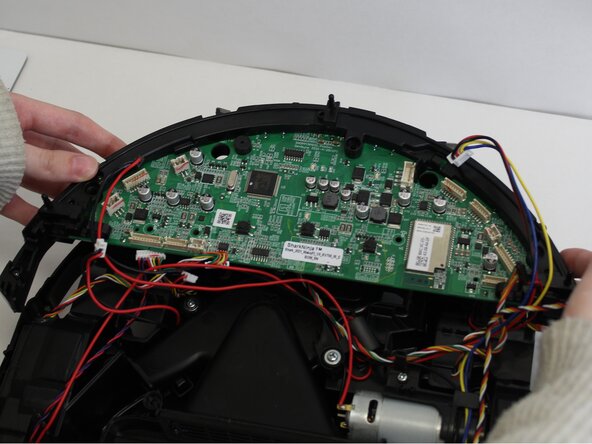
Remove the 6 circuit board wire connectors on the left side of the board as shown.
-
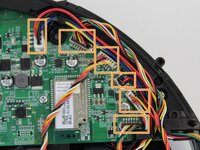
Remove the 6 circuit board wire connectors on the right side of the board using the same method.
-
-
-
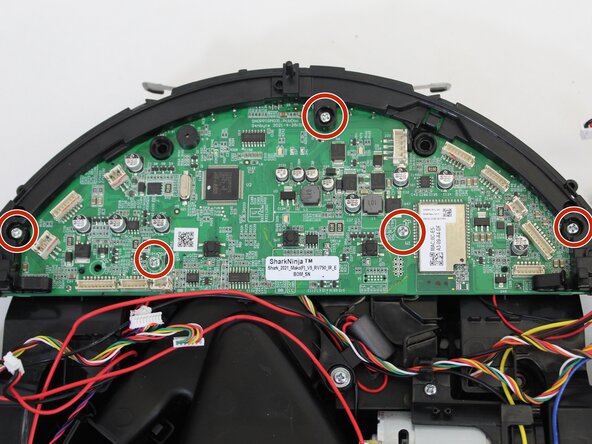
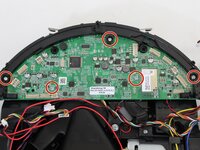
Use a Phillips #1 screwdriver to remove the five 9.80 mm screws from the circuit board.
-
Gently remove the circuit board by pulling up on it as shown and set it aside.
-
-
-
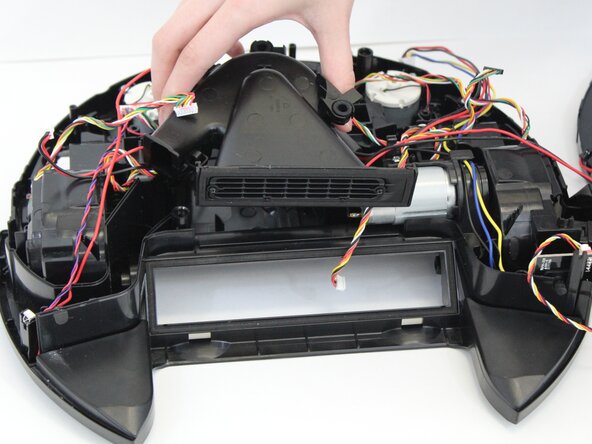
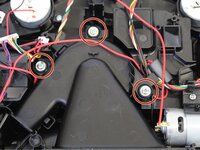
Remove the three 11.6 mm screws securing the suction motor using a Phillips #1 screwdriver.
-
Disconnect the remaining wires connected to the suction motor and move the wires aside to avoid pulling on them when removing the suction motor.
-
Pull up on the suction motor to remove it.
-
-
-
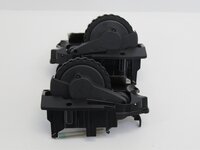
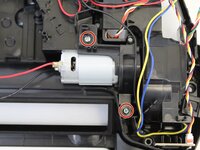
Use a Phillips #1 screwdriver to remove the two 4.8 mm screws holding the brush roll motor.
-
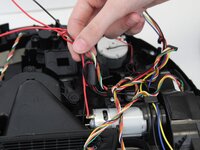
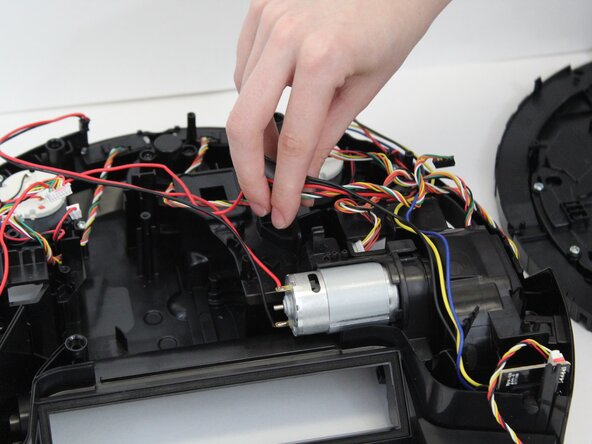
Remove the wires attached to the clip by pulling them away gently.
-
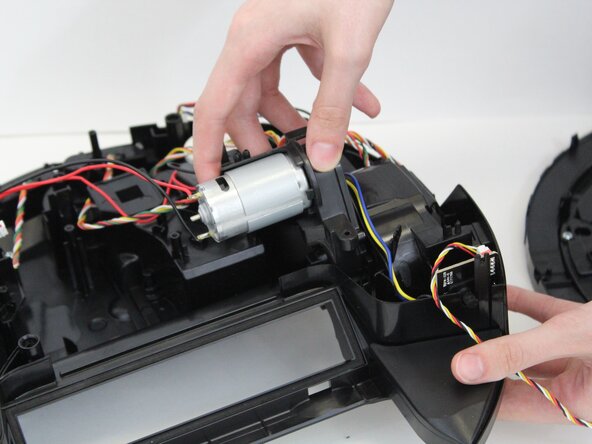
Pull the brush roll motor up to remove it.
-


To reassemble your device, follow these instructions in reverse order. Take your e-waste to an R2 or e-Stewards certified recycler.

crwdns2935287:0crwdne2935287:0

Tennessee Tech University, Team 1-1, Pickering Spring 2025 crwdns2935289:0Tennessee Tech University, Team 1-1, Pickering Spring 2025crwdne2935289:0
TNTECH-PICKERING-S25S1G1
crwdns2931471:04crwdne2931471:0
crwdns2935297:07crwdne2935297:0