crwdns2915892:0crwdne2915892:0
Follow this guide to remove and replace the icemaker assembly in your older Samsung refrigerator.
This guide will work for older (2013) French-door Samsung refrigerators where the icemaker is in the refrigerator compartment. If your icemaker is in the freezer drawer, follow this guide instead.
If your ice maker is frozen, follow this guide to defrost it.
Note: Even if you've followed instructions to defrost your refrigerator, you may need a steamer to aid in removing any leftover ice build up. You should use the steamer whenever necessary throughout the repair to melt any iced over areas.
This guide is based on a model RFG298HDRS refrigerator. If you have a different model, you may encounter some minor disassembly differences, but the overall repair process will be the same.
crwdns2942213:0crwdne2942213:0
-
-
Unplug your refrigerator before you begin your repair.
-
Condenser fan motor
-
Compressor motor and thermal overload device
-
Water supply valve assembly
-
-
-
Open both French doors for the refrigerator compartment.
-
-
-
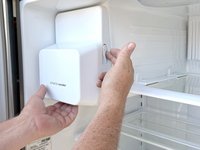
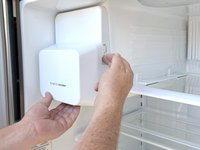
Pull the release lever forward to unlatch the ice bucket.
-
-
-
Pull the ice bucket out of the ice maker room.
-
-
-
-
Remove the screw securing the cable cover.
-
-
-
Use your fingers to pull the front edge of cable cover out from the side of the ice room.
-
-
-
Slide the cable cover out toward the front of the ice room by pulling the front edge.
-
-
crwdns2931653:08crwdne2931653:0 Disconnect the ice maker and ice auger cablesUnfasten the air tunnel
-
Locate the ice maker and ice auger motor connectors.
-
-
-
Squeeze the locking tab to release the connector and pull it to disconnect.
-
Repeat this for the other connector.
-
-
-
Remove both cables from the cable guide channel.
-
Depress the locking tab at the top of the ice maker.
-
-
-
Pull the icemaker toward you.
-
Lower and remove the icemaker from the ice room.
-
To reassemble your device, follow these instructions in reverse order.
Be sure to dry any moisture that remains in the ice room before reassembly to prevent repair failure.
Take your e-waste to an R2 or e-Stewards certified recycler.
Repair didn’t go as planned? Ask our Answers Community for help.
To reassemble your device, follow these instructions in reverse order.
Be sure to dry any moisture that remains in the ice room before reassembly to prevent repair failure.
Take your e-waste to an R2 or e-Stewards certified recycler.
Repair didn’t go as planned? Ask our Answers Community for help.


