crwdns2933423:0crwdne2933423:0

Polaroid I-2 Lens Assembly Replacement

crwdns2942213:0crwdne2942213:0

  1. Polaroid I-2 Lens Assembly Replacement, Safety information: crwdns2935265:01crwdnd2935265:01crwdnd2935265:03crwdne2935265:0 Polaroid I-2 Lens Assembly Replacement, Safety information: crwdns2935265:01crwdnd2935265:02crwdnd2935265:03crwdne2935265:0 Polaroid I-2 Lens Assembly Replacement, Safety information: crwdns2935265:01crwdnd2935265:03crwdnd2935265:03crwdne2935265:0
    • If you have any film left, take some photos and remove the cartridge! Disassembly will expose the film and damage it.

    • Before you begin:

    • Power down and unplug your camera.

    • Put on the lens cap to avoid scratching your lens during disassembly.

  2. Polaroid I-2 Lens Assembly Replacement, Open the film door: crwdns2935265:02crwdnd2935265:01crwdnd2935265:02crwdne2935265:0 Polaroid I-2 Lens Assembly Replacement, Open the film door: crwdns2935265:02crwdnd2935265:02crwdnd2935265:02crwdne2935265:0
    • In the following steps, "left" and "right" are written from the perspective of using the camera—or when the lens is facing away from you.

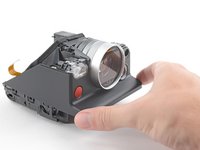
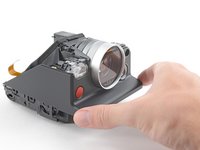
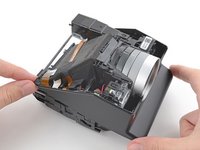
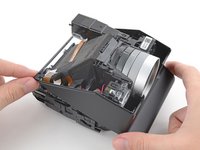
    • Use the latch on the left side of the camera to open the film door.

  3. Polaroid I-2 Lens Assembly Replacement, Insert a blocker: crwdns2935265:03crwdnd2935265:01crwdnd2935265:03crwdne2935265:0 Polaroid I-2 Lens Assembly Replacement, Insert a blocker: crwdns2935265:03crwdnd2935265:02crwdnd2935265:03crwdne2935265:0 Polaroid I-2 Lens Assembly Replacement, Insert a blocker: crwdns2935265:03crwdnd2935265:03crwdnd2935265:03crwdne2935265:0
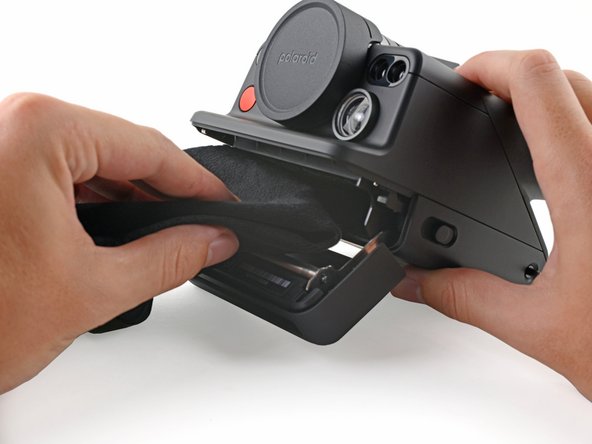
    • Fold a piece of cloth or napkin (or the included bag) into a small square.

    • Insert the cloth into the film compartment far enough to block the film door from closing during disassembly.

  4. Polaroid I-2 Lens Assembly Replacement, Flip the camera over: crwdns2935265:04crwdnd2935265:01crwdnd2935265:03crwdne2935265:0 Polaroid I-2 Lens Assembly Replacement, Flip the camera over: crwdns2935265:04crwdnd2935265:02crwdnd2935265:03crwdne2935265:0 Polaroid I-2 Lens Assembly Replacement, Flip the camera over: crwdns2935265:04crwdnd2935265:03crwdnd2935265:03crwdne2935265:0
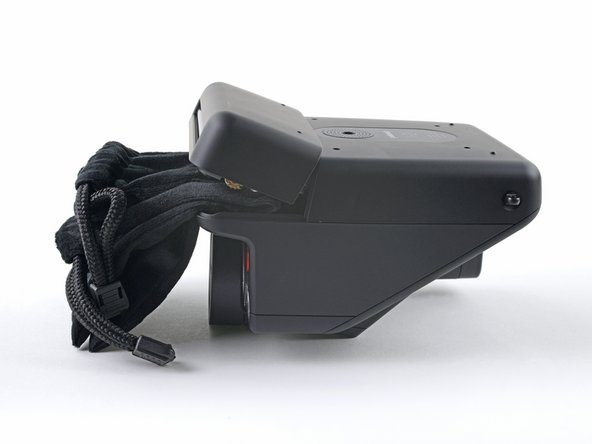
    • Flip the camera over, making sure the cloth stays lodged in the film compartment.

  5. Polaroid I-2 Lens Assembly Replacement, Unfasten the bottom cover: crwdns2935265:05crwdnd2935265:01crwdnd2935265:01crwdne2935265:0
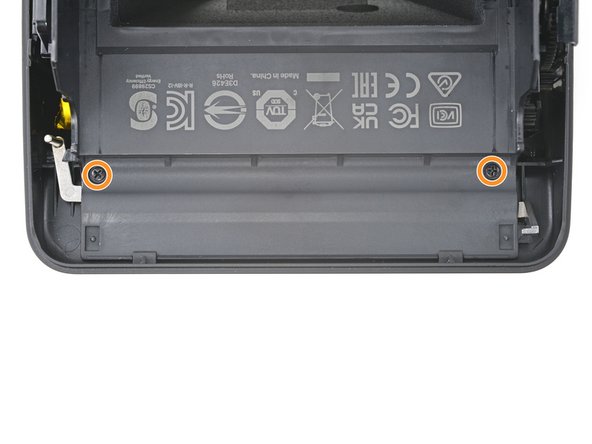
    • Use a Phillips screwdriver to remove the four 3.9 mm-long screws securing the bottom cover.

  6. Polaroid I-2 Lens Assembly Replacement, Unclip the bottom cover: crwdns2935265:06crwdnd2935265:01crwdnd2935265:03crwdne2935265:0 Polaroid I-2 Lens Assembly Replacement, Unclip the bottom cover: crwdns2935265:06crwdnd2935265:02crwdnd2935265:03crwdne2935265:0 Polaroid I-2 Lens Assembly Replacement, Unclip the bottom cover: crwdns2935265:06crwdnd2935265:03crwdnd2935265:03crwdne2935265:0
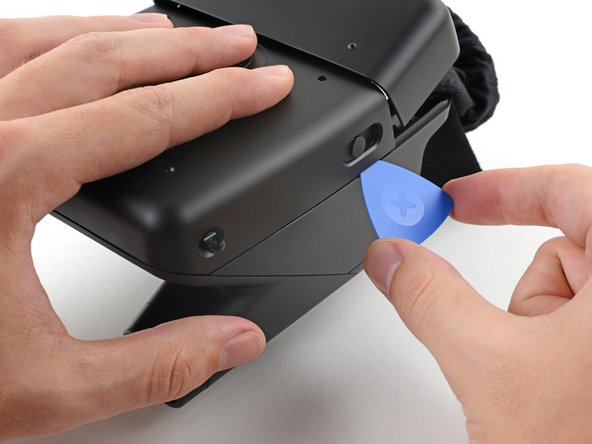
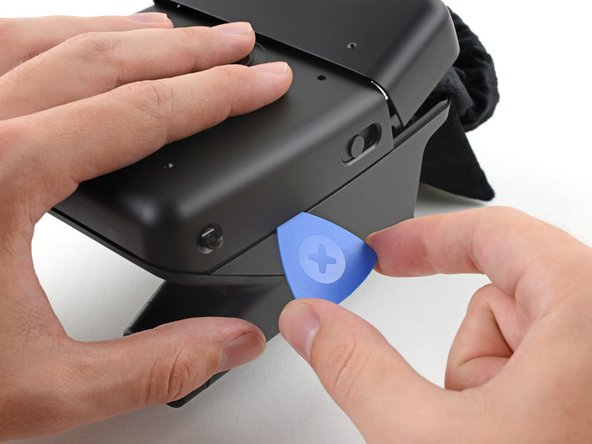
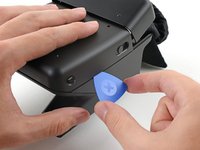
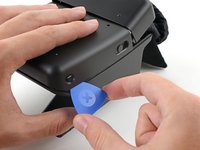
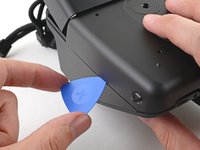
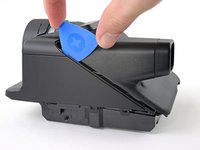
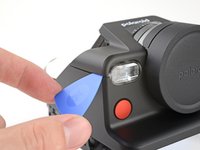
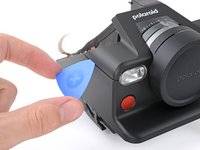
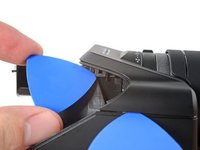
    • Insert the tip of an opening pick under the top left corner of the bottom cover, near the slider button.

    • Tilt the pick up and push to position the pick between the bottom and front covers.

  7. Polaroid I-2 Lens Assembly Replacement: crwdns2935265:07crwdnd2935265:01crwdnd2935265:03crwdne2935265:0 Polaroid I-2 Lens Assembly Replacement: crwdns2935265:07crwdnd2935265:02crwdnd2935265:03crwdne2935265:0 Polaroid I-2 Lens Assembly Replacement: crwdns2935265:07crwdnd2935265:03crwdnd2935265:03crwdne2935265:0
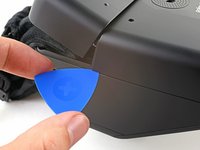
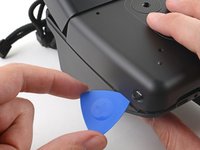
    • Slide the opening pick toward the rear of the camera to release the clips along the left edge.

    • Leave the opening pick at the bottom left corner to prevent the clips from resecuring.

  8. Polaroid I-2 Lens Assembly Replacement: crwdns2935265:08crwdnd2935265:01crwdnd2935265:03crwdne2935265:0 Polaroid I-2 Lens Assembly Replacement: crwdns2935265:08crwdnd2935265:02crwdnd2935265:03crwdne2935265:0 Polaroid I-2 Lens Assembly Replacement: crwdns2935265:08crwdnd2935265:03crwdnd2935265:03crwdne2935265:0
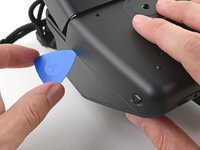
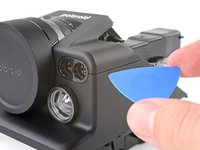
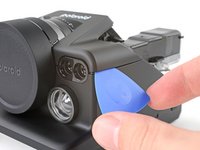
    • Insert the tip of a second opening pick under the top right corner of the bottom cover.

    • Tilt the pick up and push to position the pick between the bottom and front covers.

  9. Polaroid I-2 Lens Assembly Replacement: crwdns2935265:09crwdnd2935265:01crwdnd2935265:03crwdne2935265:0 Polaroid I-2 Lens Assembly Replacement: crwdns2935265:09crwdnd2935265:02crwdnd2935265:03crwdne2935265:0 Polaroid I-2 Lens Assembly Replacement: crwdns2935265:09crwdnd2935265:03crwdnd2935265:03crwdne2935265:0
    • Slide the opening pick toward the rear of the camera to release the clips along the right edge.

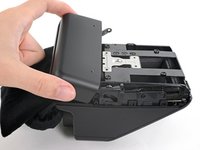
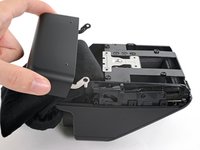
  10. Polaroid I-2 Lens Assembly Replacement, Remove the bottom cover: crwdns2935265:010crwdnd2935265:01crwdnd2935265:03crwdne2935265:0 Polaroid I-2 Lens Assembly Replacement, Remove the bottom cover: crwdns2935265:010crwdnd2935265:02crwdnd2935265:03crwdne2935265:0 Polaroid I-2 Lens Assembly Replacement, Remove the bottom cover: crwdns2935265:010crwdnd2935265:03crwdnd2935265:03crwdne2935265:0
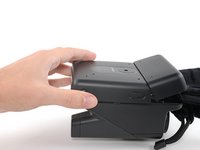
    • At this point, the bottom cover clips should be released. If not, slide an opening pick along the perimeter of the back cover to release any remaining clips.

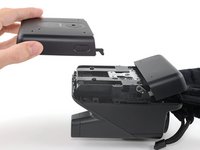
    • Tilt the back of the bottom cover upward and pull it away from the camera, making sure to thread the film door lever from its recess.

    • Remove the back cover.

    • During reassembly, insert the film door lever into its recess before aligning the bottom cover and pressing it into place to secure its clips.

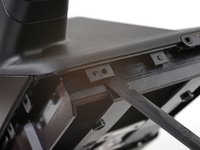
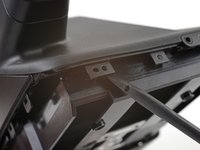
  11. Polaroid I-2 Lens Assembly Replacement, Disconnect the film door: crwdns2935265:011crwdnd2935265:01crwdnd2935265:03crwdne2935265:0 Polaroid I-2 Lens Assembly Replacement, Disconnect the film door: crwdns2935265:011crwdnd2935265:02crwdnd2935265:03crwdne2935265:0 Polaroid I-2 Lens Assembly Replacement, Disconnect the film door: crwdns2935265:011crwdnd2935265:03crwdnd2935265:03crwdne2935265:0
    • Insert the flat end of a spudger between the film door's left hinge and the frame.

    • Twist the spudger to separate the rubber hinge grommet from its peg in the frame.

    • Pull the film door towards the front of the camera to completely disconnect its left hinge.

  12. Polaroid I-2 Lens Assembly Replacement: crwdns2935265:012crwdnd2935265:01crwdnd2935265:03crwdne2935265:0 Polaroid I-2 Lens Assembly Replacement: crwdns2935265:012crwdnd2935265:02crwdnd2935265:03crwdne2935265:0 Polaroid I-2 Lens Assembly Replacement: crwdns2935265:012crwdnd2935265:03crwdnd2935265:03crwdne2935265:0
    • Tilt the left edge of the film door up to separate the left hinge's rubber grommet.

    • Remove the film door.

    • At this point, you can remove the cloth blocker from under the print roller.

    • During reassembly, hook the left hinge on its post and push the right hinge over its post until it snaps into place.

  13. Polaroid I-2 Lens Assembly Replacement, Unfasten the back cover: crwdns2935265:013crwdnd2935265:01crwdnd2935265:01crwdne2935265:0
    • Use a Phillips screwdriver to remove the two 3.9 mm-long screws securing the back cover.

  14. Polaroid I-2 Lens Assembly Replacement, Unclip the back cover: crwdns2935265:014crwdnd2935265:01crwdnd2935265:03crwdne2935265:0 Polaroid I-2 Lens Assembly Replacement, Unclip the back cover: crwdns2935265:014crwdnd2935265:02crwdnd2935265:03crwdne2935265:0 Polaroid I-2 Lens Assembly Replacement, Unclip the back cover: crwdns2935265:014crwdnd2935265:03crwdnd2935265:03crwdne2935265:0
    • There are two alignment pegs along the bottom edge of the back cover.

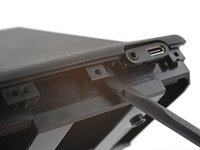
    • Insert a spudger between the frame and the alignment hole on the back cover.

    • Twist the spudger to lift the back cover off of the alignment peg.

    • Repeat for the second alignment peg.

  15. Polaroid I-2 Lens Assembly Replacement, Disassembly information: crwdns2935265:015crwdnd2935265:01crwdnd2935265:03crwdne2935265:0 Polaroid I-2 Lens Assembly Replacement, Disassembly information: crwdns2935265:015crwdnd2935265:02crwdnd2935265:03crwdne2935265:0 Polaroid I-2 Lens Assembly Replacement, Disassembly information: crwdns2935265:015crwdnd2935265:03crwdnd2935265:03crwdne2935265:0
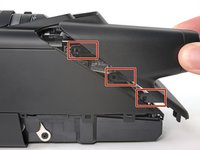
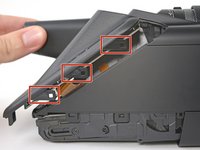
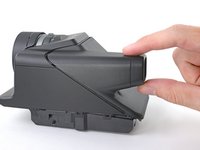
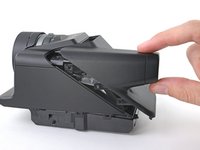
    • There are eight large clips that secure the back cover. The next four steps show how to release them.

    • These clips are very strong and require significant force to release.

    • The procedure to release the clips is tricky and will require time and patience to perform correctly.

  16. Polaroid I-2 Lens Assembly Replacement, Insert an opening pick: crwdns2935265:016crwdnd2935265:01crwdnd2935265:03crwdne2935265:0 Polaroid I-2 Lens Assembly Replacement, Insert an opening pick: crwdns2935265:016crwdnd2935265:02crwdnd2935265:03crwdne2935265:0 Polaroid I-2 Lens Assembly Replacement, Insert an opening pick: crwdns2935265:016crwdnd2935265:03crwdnd2935265:03crwdne2935265:0
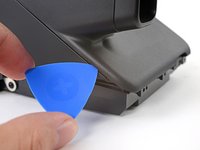
    • Releasing the clips requires getting a tool between the covered "thin" edge of the front cover and the clips themselves.

    • Angle an opening pick upward and insert it at the gap where the bottom right corner of the back cover meets the triangular tip of the front cover’s right edge.

    • Push the pick up to get it above the overhanging lip in the back cover.

    • You'll see the plastic warp a little. This is normal.

    • While pushing upward, slowly rotate the pick towards the left edge of the camera until it's under the front cover.

    • The pick can slip out easily, so this may take a few tries.

  17. Polaroid I-2 Lens Assembly Replacement: crwdns2935265:017crwdnd2935265:01crwdnd2935265:03crwdne2935265:0 Polaroid I-2 Lens Assembly Replacement: crwdns2935265:017crwdnd2935265:02crwdnd2935265:03crwdne2935265:0 Polaroid I-2 Lens Assembly Replacement: crwdns2935265:017crwdnd2935265:03crwdnd2935265:03crwdne2935265:0
    • While pushing the pick downward, slide it all the way up the right edge to release the clips.

    • Keep the pick as upright as possible while sliding to avoid hitting the clips.

    • The plastic in the lip of the back cover will warp. This is normal.

    • Leave the pick at the top corner before continuing to prevent the clips from resecuring.

  18. Polaroid I-2 Lens Assembly Replacement: crwdns2935265:018crwdnd2935265:01crwdnd2935265:03crwdne2935265:0 Polaroid I-2 Lens Assembly Replacement: crwdns2935265:018crwdnd2935265:02crwdnd2935265:03crwdne2935265:0 Polaroid I-2 Lens Assembly Replacement: crwdns2935265:018crwdnd2935265:03crwdnd2935265:03crwdne2935265:0
    • Angle a second opening pick upward and insert it at the gap where the bottom left corner of the back cover meets the triangular tip of the front cover’s left edge.

    • Push the pick up to get it above the overhanging lip in the back cover.

    • You'll see the plastic warp a little. This is normal.

    • While pushing upward, slowly rotate the pick towards the right edge of the camera until it's under the front cover.

    • The pick can slip out easily, so this may take a few tries.

  19. Polaroid I-2 Lens Assembly Replacement: crwdns2935265:019crwdnd2935265:01crwdnd2935265:03crwdne2935265:0 Polaroid I-2 Lens Assembly Replacement: crwdns2935265:019crwdnd2935265:02crwdnd2935265:03crwdne2935265:0 Polaroid I-2 Lens Assembly Replacement: crwdns2935265:019crwdnd2935265:03crwdnd2935265:03crwdne2935265:0
    • While pushing the pick downward, slide it all the way up the left edge to release the remaining clips.

    • Keep the pick as upright as possible while sliding to avoid hitting the clips.

    • The plastic in the lip of the back cover will warp. This is normal.

  20. Polaroid I-2 Lens Assembly Replacement, Reposition the back cover: crwdns2935265:020crwdnd2935265:01crwdnd2935265:03crwdne2935265:0 Polaroid I-2 Lens Assembly Replacement, Reposition the back cover: crwdns2935265:020crwdnd2935265:02crwdnd2935265:03crwdne2935265:0 Polaroid I-2 Lens Assembly Replacement, Reposition the back cover: crwdns2935265:020crwdnd2935265:03crwdnd2935265:03crwdne2935265:0
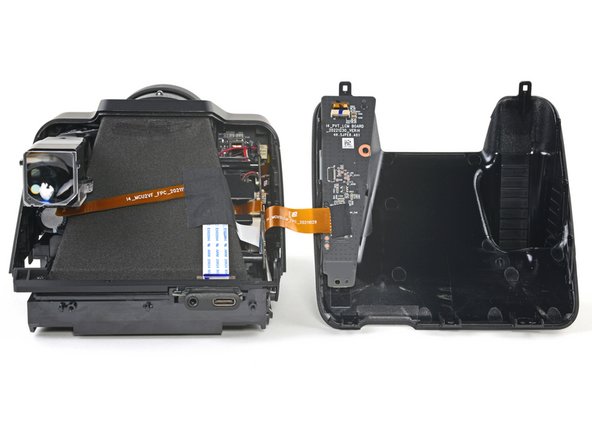
    • Don't try to pull the back cover off just yet, as it's still connected by a cable.

    • At this point, the back cover should feel loose. If any parts still feel connected, repeat the last four steps until all the clips release.

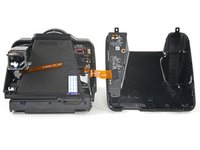
    • Pull the back cover off the camera and rotate it over the right edge to expose the flex cable.

    • During reassembly, make sure the the flex cable isn't caught between the covers before re‑engaging the clips.

  21. Polaroid I-2 Lens Assembly Replacement, Remove the tape: crwdns2935265:021crwdnd2935265:01crwdnd2935265:03crwdne2935265:0 Polaroid I-2 Lens Assembly Replacement, Remove the tape: crwdns2935265:021crwdnd2935265:02crwdnd2935265:03crwdne2935265:0 Polaroid I-2 Lens Assembly Replacement, Remove the tape: crwdns2935265:021crwdnd2935265:03crwdnd2935265:03crwdne2935265:0
    crwdns2935267:0crwdne2935267:0
    Tweezers
    $4.99
    crwdns2942207:0crwdne2942207:0
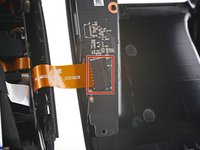
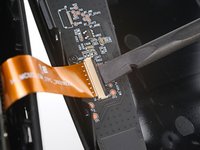
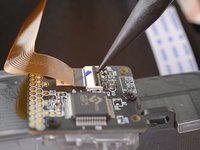
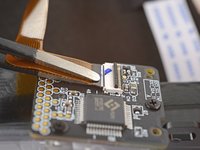
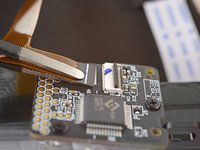
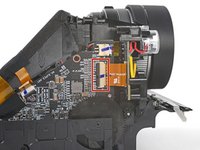
    • Use tweezers to peel off the tape covering the interconnect cable ZIF connector on the control board.

    • Set the tape aside. You'll reuse it during reassembly.

  22. Polaroid I-2 Lens Assembly Replacement, Disconnect the control board: crwdns2935265:022crwdnd2935265:01crwdnd2935265:02crwdne2935265:0 Polaroid I-2 Lens Assembly Replacement, Disconnect the control board: crwdns2935265:022crwdnd2935265:02crwdnd2935265:02crwdne2935265:0
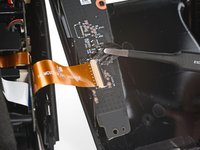
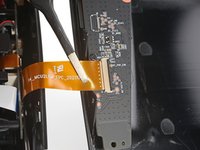
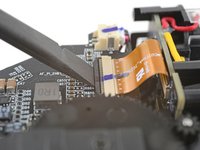
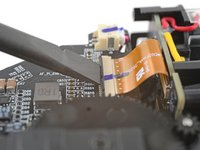
    • Use the flat end of a spudger to lift up the locking flap on the control board ZIF connector.

  23. Polaroid I-2 Lens Assembly Replacement: crwdns2935265:023crwdnd2935265:01crwdnd2935265:03crwdne2935265:0 Polaroid I-2 Lens Assembly Replacement: crwdns2935265:023crwdnd2935265:02crwdnd2935265:03crwdne2935265:0 Polaroid I-2 Lens Assembly Replacement: crwdns2935265:023crwdnd2935265:03crwdnd2935265:03crwdne2935265:0
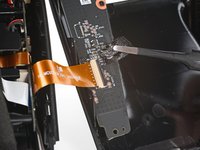
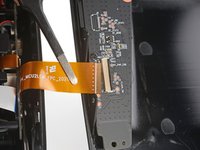
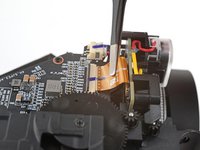
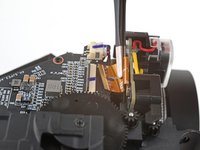
    • Use tweezers to pull the interconnect cable out of its slot in the control board.

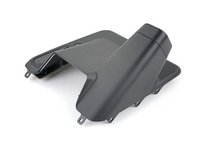
    • Remove the back cover.

  24. Polaroid I-2 Lens Assembly Replacement, Unfasten the top cover: crwdns2935265:024crwdnd2935265:01crwdnd2935265:03crwdne2935265:0 Polaroid I-2 Lens Assembly Replacement, Unfasten the top cover: crwdns2935265:024crwdnd2935265:02crwdnd2935265:03crwdne2935265:0 Polaroid I-2 Lens Assembly Replacement, Unfasten the top cover: crwdns2935265:024crwdnd2935265:03crwdnd2935265:03crwdne2935265:0
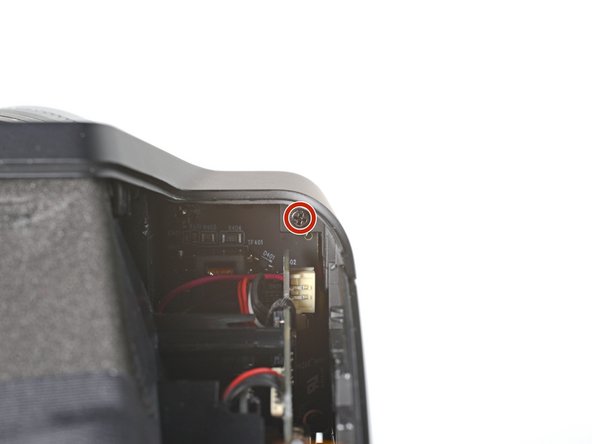
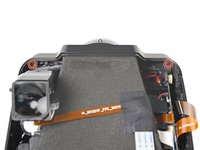
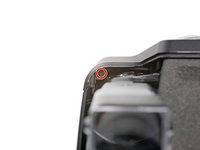
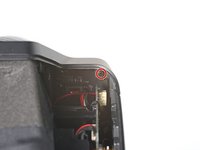
    • Use a Phillips screwdriver to remove the two 3.9 mm-long screws securing the top cover.

  25. Polaroid I-2 Lens Assembly Replacement, Unclip the top cover: crwdns2935265:025crwdnd2935265:01crwdnd2935265:02crwdne2935265:0 Polaroid I-2 Lens Assembly Replacement, Unclip the top cover: crwdns2935265:025crwdnd2935265:02crwdnd2935265:02crwdne2935265:0
    • The next six steps demonstrate how to release the top cover's clips. These clips can re-engage easily, so you may need to repeat certain steps to release all of the clips.

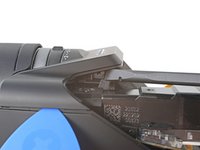
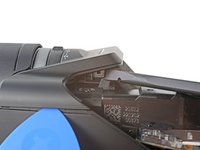
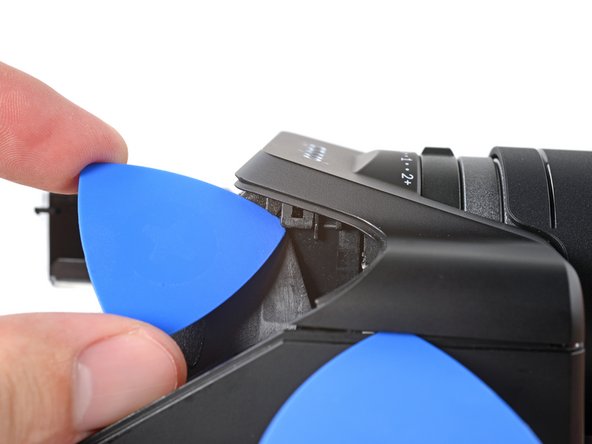
    • Angle an opening pick upward and insert in the gap at the top right corner of the top cover and front cover, next to the flash.

  26. Polaroid I-2 Lens Assembly Replacement: crwdns2935265:026crwdnd2935265:01crwdnd2935265:02crwdne2935265:0 Polaroid I-2 Lens Assembly Replacement: crwdns2935265:026crwdnd2935265:02crwdnd2935265:02crwdne2935265:0
    • Slide the opening pick toward the rear of the camera to release the clips along the right edge.

    • Leave the pick in the gap before continuing to prevent the clips from re‑engaging.

  27. Polaroid I-2 Lens Assembly Replacement: crwdns2935265:027crwdnd2935265:01crwdnd2935265:02crwdne2935265:0 Polaroid I-2 Lens Assembly Replacement: crwdns2935265:027crwdnd2935265:02crwdnd2935265:02crwdne2935265:0
    • Angle a second opening pick upward and insert in the gap at the top left corner of the top cover and front cover.

  28. Polaroid I-2 Lens Assembly Replacement: crwdns2935265:028crwdnd2935265:01crwdnd2935265:02crwdne2935265:0 Polaroid I-2 Lens Assembly Replacement: crwdns2935265:028crwdnd2935265:02crwdnd2935265:02crwdne2935265:0
    • Slide the opening pick toward the rear of the camera to release the clips along the left edge.

    • Leave the pick in the gap before continuing to prevent the clips from re-engaging.

  29. Polaroid I-2 Lens Assembly Replacement: crwdns2935265:029crwdnd2935265:01crwdnd2935265:02crwdne2935265:0 Polaroid I-2 Lens Assembly Replacement: crwdns2935265:029crwdnd2935265:02crwdnd2935265:02crwdne2935265:0
    • Insert the flat end of a spudger between the frame and the top cover's left external clip, above the viewfinder.

    • Twist the spudger to release the clip.

    • If one of the opening picks fall out, don't worry! Continue with the guide as normal.

  30. Polaroid I-2 Lens Assembly Replacement: crwdns2935265:030crwdnd2935265:01crwdnd2935265:02crwdne2935265:0 Polaroid I-2 Lens Assembly Replacement: crwdns2935265:030crwdnd2935265:02crwdnd2935265:02crwdne2935265:0
    • Insert the tip of an opening pick between the frame and the top cover's right external clip.

    • Pry up to release the clip.

  31. Polaroid I-2 Lens Assembly Replacement, Remove the lens cap: crwdns2935265:031crwdnd2935265:01crwdnd2935265:01crwdne2935265:0
    • Pull the lens cap off and remove it.

  32. Polaroid I-2 Lens Assembly Replacement, Remove the top cover: crwdns2935265:032crwdnd2935265:01crwdnd2935265:02crwdne2935265:0 Polaroid I-2 Lens Assembly Replacement, Remove the top cover: crwdns2935265:032crwdnd2935265:02crwdnd2935265:02crwdne2935265:0
    • Lift the top cover off the camera and remove it.

    • During reassembly, push the top cover onto the frame until the clips re-engage.

  33. Polaroid I-2 Lens Assembly Replacement, Unfasten the front cover: crwdns2935265:033crwdnd2935265:01crwdnd2935265:02crwdne2935265:0 Polaroid I-2 Lens Assembly Replacement, Unfasten the front cover: crwdns2935265:033crwdnd2935265:02crwdnd2935265:02crwdne2935265:0
    • Use a Phillips screwdriver to remove the four screws securing the front cover:

    • Two 5.9 mm-long screws along the back edge of the front cover

    • Flip your camera over.

    • Two 3.9 mm-long screws under the front of the camera

  34. Polaroid I-2 Lens Assembly Replacement, Unclip the front cover: crwdns2935265:034crwdnd2935265:01crwdnd2935265:02crwdne2935265:0 Polaroid I-2 Lens Assembly Replacement, Unclip the front cover: crwdns2935265:034crwdnd2935265:02crwdnd2935265:02crwdne2935265:0
    • The clips that secure the front cover are tricky to release. During the removal procedure, you may have to wiggle and bend the plastic to get the clips to release properly.

    • Pull the front cover away from the lens to release the clips along the front edge and slide the viewfinder out of its cutout.

    • You'll hear a "click" and the front cover will be able to move freely.

    • During reassembly, align the viewfinder cutout over the viewfinder lens before pressing the front cover into place and re-engaging the clips.

  35. Polaroid I-2 Lens Assembly Replacement, Remove the lidar sensor bracket: crwdns2935265:035crwdnd2935265:01crwdnd2935265:03crwdne2935265:0 Polaroid I-2 Lens Assembly Replacement, Remove the lidar sensor bracket: crwdns2935265:035crwdnd2935265:02crwdnd2935265:03crwdne2935265:0 Polaroid I-2 Lens Assembly Replacement, Remove the lidar sensor bracket: crwdns2935265:035crwdnd2935265:03crwdnd2935265:03crwdne2935265:0
    crwdns2935267:0crwdne2935267:0
    Tweezers
    $4.99
    crwdns2942207:0crwdne2942207:0
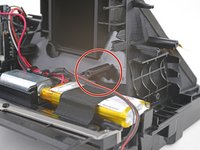
    • The lidar sensor bracket is secured with two alignment pegs that fit into cutouts on the bracket.

    • Use tweezers, or your fingers, to push the lidar sensor bracket toward the lidar sensor and off its alignment pegs.

    • Remove the lidar sensor bracket.

  36. Polaroid I-2 Lens Assembly Replacement, Remove the front cover: crwdns2935265:036crwdnd2935265:01crwdnd2935265:02crwdne2935265:0 Polaroid I-2 Lens Assembly Replacement, Remove the front cover: crwdns2935265:036crwdnd2935265:02crwdnd2935265:02crwdne2935265:0
    • Lift the rear of the front cover while pulling the entire cover toward the front of the camera to separate it from its lip under the lens.

    • If you're having trouble, rock the cover side-to-side while pulling.

  37. Polaroid I-2 Lens Assembly Replacement: crwdns2935265:037crwdnd2935265:01crwdnd2935265:03crwdne2935265:0 Polaroid I-2 Lens Assembly Replacement: crwdns2935265:037crwdnd2935265:02crwdnd2935265:03crwdne2935265:0 Polaroid I-2 Lens Assembly Replacement: crwdns2935265:037crwdnd2935265:03crwdnd2935265:03crwdne2935265:0
    • Lift the front of the cover over the lens.

    • Slide the front cover toward the rear of the camera until the back edge clears the viewfinder.

  38. Polaroid I-2 Lens Assembly Replacement: crwdns2935265:038crwdnd2935265:01crwdnd2935265:02crwdne2935265:0 Polaroid I-2 Lens Assembly Replacement: crwdns2935265:038crwdnd2935265:02crwdnd2935265:02crwdne2935265:0
    • Remove the front cover.

    • If you're disassembling further, put the lens cover back on to prevent scratching the lens.

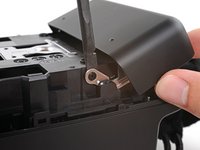
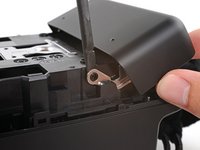
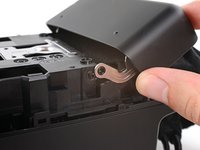
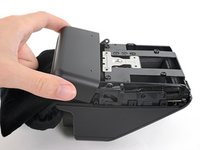
    • At this point, the metal film door lever and spring are at risk of falling out. If they do, follow this guide to reinstall them.

  39. Polaroid I-2 Lens Assembly Replacement, Safety information: crwdns2935265:039crwdnd2935265:01crwdnd2935265:02crwdne2935265:0 Polaroid I-2 Lens Assembly Replacement, Safety information: crwdns2935265:039crwdnd2935265:02crwdnd2935265:02crwdne2935265:0
    • The flash's capacitor is now exposed and can deliver a potentially dangerous electric shock if you touch the main board incorrectly.

    • To minimize the risk, make sure to either discharge the capacitor properly before continuing, or wear rubber gloves for added protection.

    • If you don't use rubber gloves, don't touch exposed parts of the main board to avoid getting shocked.

  40. Polaroid I-2 Lens Assembly Replacement, Remove the tape: crwdns2935265:040crwdnd2935265:01crwdnd2935265:03crwdne2935265:0 Polaroid I-2 Lens Assembly Replacement, Remove the tape: crwdns2935265:040crwdnd2935265:02crwdnd2935265:03crwdne2935265:0 Polaroid I-2 Lens Assembly Replacement, Remove the tape: crwdns2935265:040crwdnd2935265:03crwdnd2935265:03crwdne2935265:0
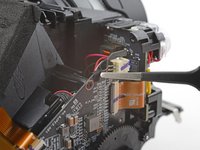
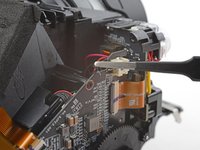
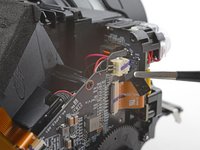
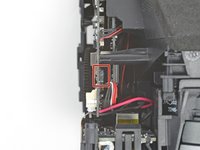
    • Remove the tape covering the battery connector at the top of the main board.

  41. Polaroid I-2 Lens Assembly Replacement, Disconnect the battery: crwdns2935265:041crwdnd2935265:01crwdnd2935265:03crwdne2935265:0 Polaroid I-2 Lens Assembly Replacement, Disconnect the battery: crwdns2935265:041crwdnd2935265:02crwdnd2935265:03crwdne2935265:0 Polaroid I-2 Lens Assembly Replacement, Disconnect the battery: crwdns2935265:041crwdnd2935265:03crwdnd2935265:03crwdne2935265:0
    • The battery connector is located on the inside of the main board.

    • Insert the tip of a spudger under the head of the battery connector, where the cables meet the head itself.

    • Pry up to disconnect the battery.

  42. Polaroid I-2 Lens Assembly Replacement, Reposition the lidar sensor: crwdns2935265:042crwdnd2935265:01crwdnd2935265:03crwdne2935265:0 Polaroid I-2 Lens Assembly Replacement, Reposition the lidar sensor: crwdns2935265:042crwdnd2935265:02crwdnd2935265:03crwdne2935265:0 Polaroid I-2 Lens Assembly Replacement, Reposition the lidar sensor: crwdns2935265:042crwdnd2935265:03crwdnd2935265:03crwdne2935265:0
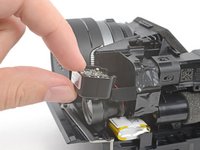
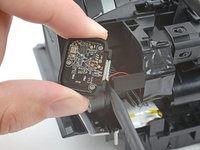
    • Pull the lidar sensor up and out of its slot in the frame.

    • Rotate the sensor so its exposed board is facing upward and let it hang over its slot.

  43. Polaroid I-2 Lens Assembly Replacement, Remove the lidar sensor: crwdns2935265:043crwdnd2935265:01crwdnd2935265:03crwdne2935265:0 Polaroid I-2 Lens Assembly Replacement, Remove the lidar sensor: crwdns2935265:043crwdnd2935265:02crwdnd2935265:03crwdne2935265:0 Polaroid I-2 Lens Assembly Replacement, Remove the lidar sensor: crwdns2935265:043crwdnd2935265:03crwdnd2935265:03crwdne2935265:0
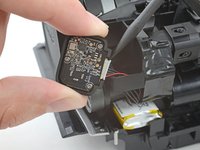
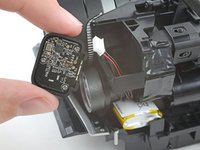
    • Use the point of a spudger to "walk" the lidar sensor cable connector out of its socket until it's disconnected.

    • Remove the lidar sensor.

  44. Polaroid I-2 Lens Assembly Replacement, Unfasten the viewfinder: crwdns2935265:044crwdnd2935265:01crwdnd2935265:02crwdne2935265:0 Polaroid I-2 Lens Assembly Replacement, Unfasten the viewfinder: crwdns2935265:044crwdnd2935265:02crwdnd2935265:02crwdne2935265:0
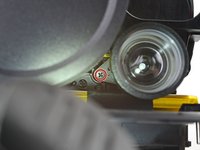
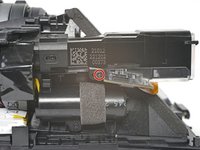
    • Use a Phillips screwdriver to remove the two 5.9 mm-long screws securing the viewfinder, one near the front of the viewfinder and the other along the side.

    • The screw near the front of the viewfinder is hidden and might require a flashlight to see properly.

  45. Polaroid I-2 Lens Assembly Replacement, Reposition the lidar sensor cable: crwdns2935265:045crwdnd2935265:01crwdnd2935265:03crwdne2935265:0 Polaroid I-2 Lens Assembly Replacement, Reposition the lidar sensor cable: crwdns2935265:045crwdnd2935265:02crwdnd2935265:03crwdne2935265:0 Polaroid I-2 Lens Assembly Replacement, Reposition the lidar sensor cable: crwdns2935265:045crwdnd2935265:03crwdnd2935265:03crwdne2935265:0
    • Push the lidar sensor cable down through its slot in the frame.

    • Reposition the lidar sensor cable so the viewfinder can move sideways without snagging it.

    • During reassembly, make sure the cable is correctly routed under the viewfinder before reinserting any screws.

  46. Polaroid I-2 Lens Assembly Replacement, Reposition the viewfinder: crwdns2935265:046crwdnd2935265:01crwdnd2935265:03crwdne2935265:0 Polaroid I-2 Lens Assembly Replacement, Reposition the viewfinder: crwdns2935265:046crwdnd2935265:02crwdnd2935265:03crwdne2935265:0 Polaroid I-2 Lens Assembly Replacement, Reposition the viewfinder: crwdns2935265:046crwdnd2935265:03crwdnd2935265:03crwdne2935265:0
    • The viewfinder cable connector is very fragile and can accidentally disconnect during this step. Take your time and follow the instructions carefully to avoid damaging the connector.

    • If your cable accidentally disconnects, don't worry! It's unlikely the cable is damaged. Follow the next two steps to understand how to reconnect it.

    • Grip both ends of the viewfinder, making sure to secure the cable connector with your fingers.

    • Pull the front of the viewfinder away from the camera and out of its recess.

    • You may need to move the viewfinder side‑to‑side to get the plastic cutouts to flex enough for the viewfinder to slide out.

  47. Polaroid I-2 Lens Assembly Replacement: crwdns2935265:047crwdnd2935265:01crwdnd2935265:02crwdne2935265:0 Polaroid I-2 Lens Assembly Replacement: crwdns2935265:047crwdnd2935265:02crwdnd2935265:02crwdne2935265:0
    • Flip the viewfinder over to access its ZIF connector on the bottom of it.

  48. Polaroid I-2 Lens Assembly Replacement, Disconnect the viewfinder: crwdns2935265:048crwdnd2935265:01crwdnd2935265:02crwdne2935265:0 Polaroid I-2 Lens Assembly Replacement, Disconnect the viewfinder: crwdns2935265:048crwdnd2935265:02crwdnd2935265:02crwdne2935265:0
    • Use the tip of a spudger to lift up the locking flap on the viewfinder ZIF connector.

  49. Polaroid I-2 Lens Assembly Replacement: crwdns2935265:049crwdnd2935265:01crwdnd2935265:02crwdne2935265:0 Polaroid I-2 Lens Assembly Replacement: crwdns2935265:049crwdnd2935265:02crwdnd2935265:02crwdne2935265:0
    crwdns2935267:0crwdne2935267:0
    Tweezers
    $4.99
    crwdns2942207:0crwdne2942207:0
    • Use tweezers to pull the viewfinder cable out of its slot.

  50. Polaroid I-2 Lens Assembly Replacement, Remove the viewfinder: crwdns2935265:050crwdnd2935265:01crwdnd2935265:01crwdne2935265:0
    • Remove the viewfinder.

  51. Polaroid I-2 Lens Assembly Replacement, Disconnect the lens assembly: crwdns2935265:051crwdnd2935265:01crwdnd2935265:03crwdne2935265:0 Polaroid I-2 Lens Assembly Replacement, Disconnect the lens assembly: crwdns2935265:051crwdnd2935265:02crwdnd2935265:03crwdne2935265:0 Polaroid I-2 Lens Assembly Replacement, Disconnect the lens assembly: crwdns2935265:051crwdnd2935265:03crwdnd2935265:03crwdne2935265:0
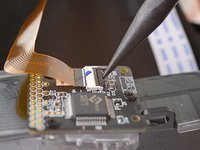
    • Use the flat end of a spudger to lift up the locking flap on the lens assembly ZIF connector.

  52. Polaroid I-2 Lens Assembly Replacement: crwdns2935265:052crwdnd2935265:01crwdnd2935265:02crwdne2935265:0 Polaroid I-2 Lens Assembly Replacement: crwdns2935265:052crwdnd2935265:02crwdnd2935265:02crwdne2935265:0
    crwdns2935267:0crwdne2935267:0
    Tweezers
    $4.99
    crwdns2942207:0crwdne2942207:0
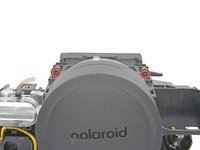
    • Use tweezers to pull the lens assembly cable out of its slot in the main board.

  53. Polaroid I-2 Lens Assembly Replacement, Unfasten the lens assembly: crwdns2935265:053crwdnd2935265:01crwdnd2935265:03crwdne2935265:0 Polaroid I-2 Lens Assembly Replacement, Unfasten the lens assembly: crwdns2935265:053crwdnd2935265:02crwdnd2935265:03crwdne2935265:0 Polaroid I-2 Lens Assembly Replacement, Unfasten the lens assembly: crwdns2935265:053crwdnd2935265:03crwdnd2935265:03crwdne2935265:0
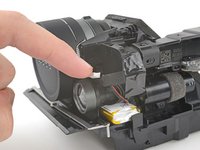
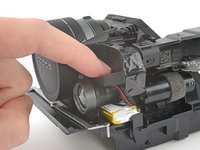
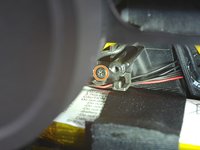
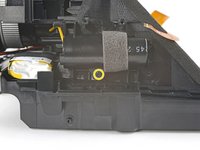
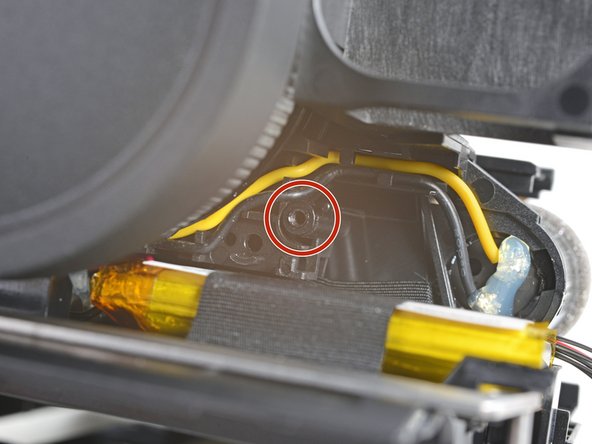
    • Use a Phillips screwdriver to remove the four 5.9 mm-long screws securing the lens assembly:

    • Two screws along the top of the lens

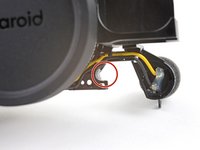
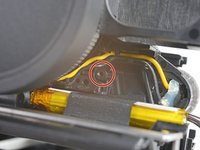
    • One screw under the lens

    • The screw under the lens is hidden and might require a flashlight to see properly.

    • One screw along the left edge of the camera, under the capacitor.

  54. Polaroid I-2 Lens Assembly Replacement, Disassembly information: crwdns2935265:054crwdnd2935265:01crwdnd2935265:03crwdne2935265:0 Polaroid I-2 Lens Assembly Replacement, Disassembly information: crwdns2935265:054crwdnd2935265:02crwdnd2935265:03crwdne2935265:0 Polaroid I-2 Lens Assembly Replacement, Disassembly information: crwdns2935265:054crwdnd2935265:03crwdnd2935265:03crwdne2935265:0
    • The lens assembly slots against a peg on the frame. Removing the assembly requires pulling it forward enough for the peg to slide out of the cutout.

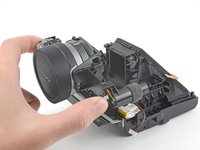
    • The capacitor will brush against the battery during this procedure. Don't force the lens assembly out to avoid puncturing the battery.

  55. Polaroid I-2 Lens Assembly Replacement, Remove the lens assembly: crwdns2935265:055crwdnd2935265:01crwdnd2935265:03crwdne2935265:0 Polaroid I-2 Lens Assembly Replacement, Remove the lens assembly: crwdns2935265:055crwdnd2935265:02crwdnd2935265:03crwdne2935265:0 Polaroid I-2 Lens Assembly Replacement, Remove the lens assembly: crwdns2935265:055crwdnd2935265:03crwdnd2935265:03crwdne2935265:0
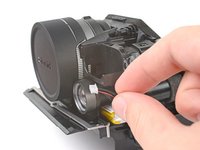
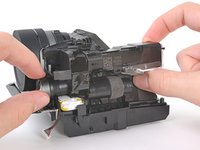
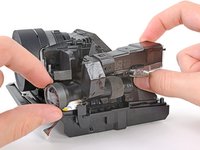
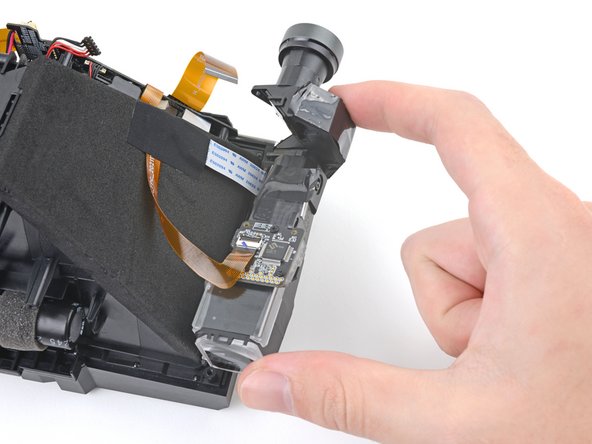
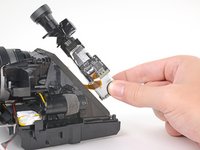
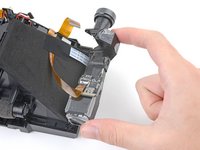
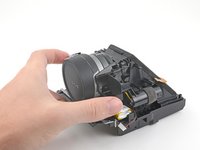
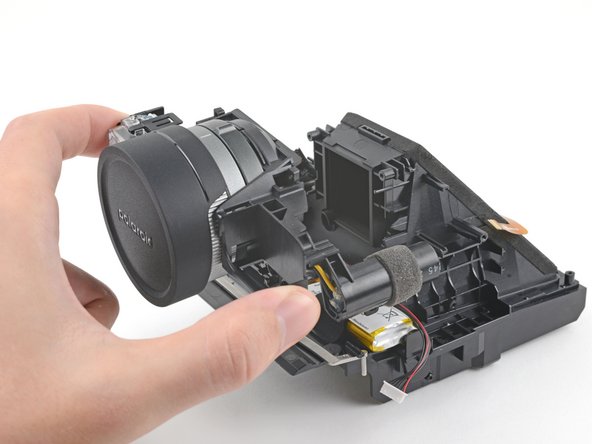
    • Pull the lens assembly toward the front of the camera until it slides out of its alignment peg.

    • Rotate the left side of the lens assembly up to separate the capacitor from its slot in the frame.

    • If you're having trouble, try gently rocking the lens assembly side-to-side to flex the plastic in the frame.

    • During reassembly, make sure the capacitor is in its slot before realigning the lens assembly on its peg.

  56. Polaroid I-2 Lens Assembly Replacement: crwdns2935265:056crwdnd2935265:01crwdnd2935265:03crwdne2935265:0 Polaroid I-2 Lens Assembly Replacement: crwdns2935265:056crwdnd2935265:02crwdnd2935265:03crwdne2935265:0 Polaroid I-2 Lens Assembly Replacement: crwdns2935265:056crwdnd2935265:03crwdnd2935265:03crwdne2935265:0
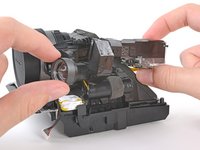
    • Pull the lens assembly out of its slot in the frame and remove it.

crwdns2915888:0crwdne2915888:0

Compare your new replacement part to the original part—you may need to transfer remaining components or remove adhesive backings from the new part before you install it.

To reassemble your device, follow these instructions in reverse order.

Take your e-waste to an R2 or e-Stewards certified recycler.

Repair didn’t go as planned? Try some basic troubleshooting, or ask our Polaroid I-2 Answers community for help.

crwdns2935227:0crwdne2935227:0

Alex Diaz-Kokaisl

crwdns2935283:001/16/22crwdne2935283:0

124,915 crwdns2915208:0crwdne2915208:0

crwdns2935297:0582crwdne2935297:0

crwdns2915084:0crwdne2915084:0

iFixit crwdns2935289:0iFixitcrwdne2935289:0

Staff

crwdns2931471:0136crwdne2931471:0

crwdns2935297:017,392crwdne2935297:0

crwdns2944067:00crwdne2944067:0

crwdns2917038:0crwdne2917038:0

crwdns2936625:0crwdne2936625:0:

crwdns2936751:024crwdne2936751:0 0

crwdns2936753:07crwdne2936753:0 6

crwdns2936753:030crwdne2936753:0 28

crwdns2942667:0crwdne2942667:0 149