crwdns2915892:0crwdne2915892:0
This guide takes you through the process of installing the start/select button on the PlayStation Vita.
crwdns2942213:0crwdne2942213:0
-
-
Using a Phillips #00 screwdriver, remove the four 6.4mm screws on the back casing.
-
-
-
Using your fingernail or a spudger, pry open the accessory port cover on the top of the device.
-
Using a Phillips #00 screwdriver, remove the two 5.4mm screws hidden beneath the accessory port cover.
-
-
-
Remove the two 5.4mm Phillips #00 screws on the bottom of the device near the charging port.
-
-
-
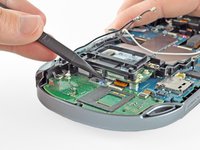
Beginning at the sides of the device, use a plastic opening tool to separate the front and rear cases.
-
Continue working your way around the device gently prying it open.
-
-
-
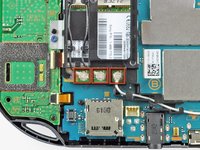
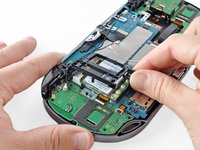
Gently separate the two cases, minding the battery and the touch screen controller connectors holding the two cases together.
One of the shoulder buttons fell out when I was doing this step, along with the piece holding it in place. They go back in just fine when reassembling but make sure that they are oriented properly, of course.
-
-
-
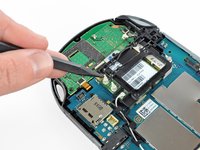
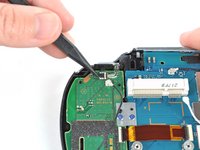
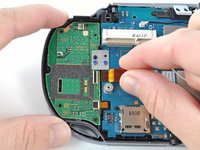
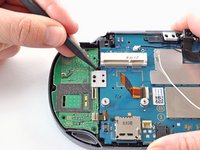
Using a spudger, free the touch screen controller flex cable by gently prying up the connection.
-
-
-
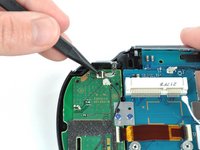
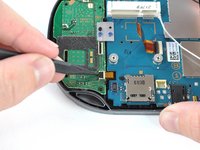
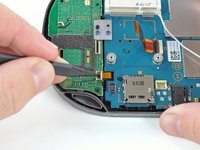
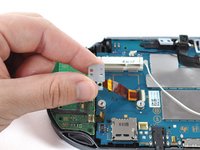
Free the battery cable by gently prying up on the connection with a spudger.
Any idea what type of pcb header is on the board for the battery? I have a motherboard with a broken header but I cant source a replacement
This is where I screwed up so I recommend extra caution for other newbies. Only the black part is supposed to come off. Don't be an idiot like me and pry off too much...
Yea I messed up there too. Is there a way to fix it?
This component was far more stubborn than the screen connector when it came to removal. I opted for a smaller tool than the spudger (small flat-head) and managed to disconnect it after determining the best bit size for the job. Screwdriver is metal, obviously, so being gentle helps to avoid damaging anything.
broke the white part
-
-
-
-
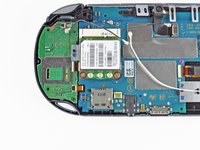
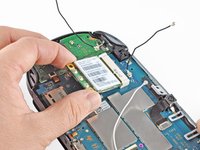
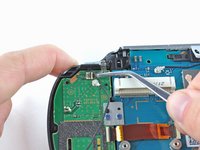
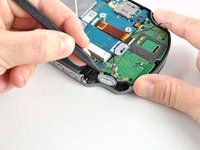
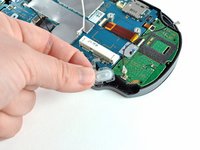
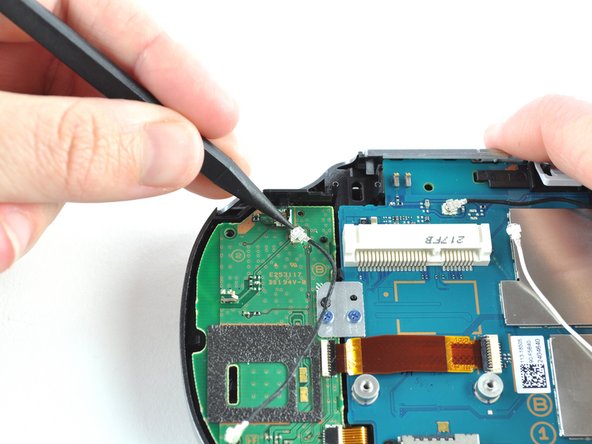
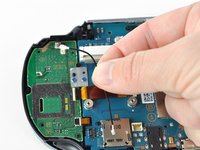
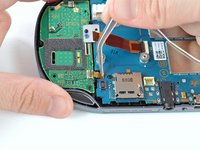
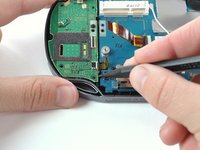
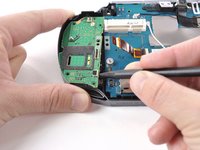
Using the pointy end of the spudger, disconnect the three antenna cable connectors on top of the wireless card.
-
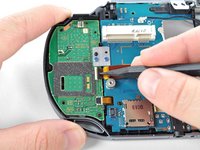
Deroute the antenna cables so that they are out of the wireless card casing. Rest the wires out of the way.
Step 9-11 only apply to the 3G version of the PS Vita.
Hello, I have the PCH-2001 model of the PS vita and the right analog stick went out. I ordered a replacement and the stick is slightly larger than the original. The original has a black rectangle on the back, the new version has the star version, which is what you have on this website as the replacement part. Any help here would be much appreciated. Thanks.
Can I install a WiFi motherboard on a 3g ps vita model 1100?
-
-
-
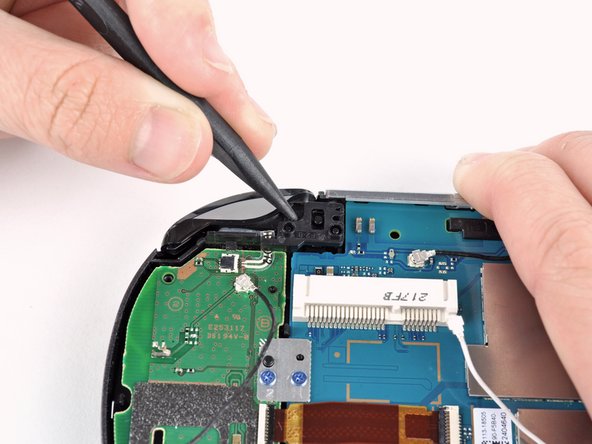
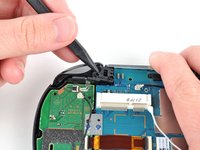
Hook the spudger beneath the tab on the wireless card casing and release the tab.
-
Peel up and remove the wireless card casing.
-
-
-
Remove the two 4.4mm Phillips #00 screws on the wireless card.
-
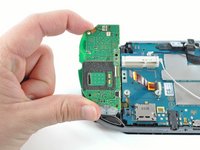
Pull out the wireless card.
My screwdriver does not want to unscrew those. They won’t turn at all.
My screwdriver does not want to unscrew those. They won’t turn at all.
Got the same, used PH #0 and grabbed wireless card casing with fingers from the top to release pressure on screen and avoid (possibly) breaking it.
Some PS vita models seem to use a T2 screw instead of a PH#00. I’ve encountered this twice now.
I replaced de wifi card but is still difficult to connect to wifi. Could it be the wifi antenna? which cable model is it?
3G Vita 1000.
I found that the PH00 head wouldn't actually fit in to the screw correctly. A PH000 fit but was still requiring a bit more force than seemed necessary. Also the card did not pop up when the screws were released and that's because Sony used a tacky pad under the card so needed a bit of prying up to get the angle.
-
-
-
Pry up the right shoulder button casing with a spudger and set it aside.
-
-
-
Remove the translucent, plastic right shoulder button cover.
-
-
crwdns2935267:0crwdne2935267:0Tweezers$4.99
-
Release the right shoulder button flex cable socket by using a spudger to gently pry open the tab.
-
Using tweezers, slide the flex cable out of the socket.
-
-
-
Using a spudger, gently peel up the right shoulder button from the light adhesive connecting it to casing.
-
-
-
Using the pointy end of a spudger, detach the antenna cable on the right button board.
-
Remove the antenna cable.
-
-
-
Using a spudger, pry up and release the ZIF socket on the right button board.
-
Gently pull the flex cable out of the socket. Rest the flex cable out of the way.
-
-
crwdns2935267:0crwdne2935267:0Tweezers$4.99
-
Release the tab on the small flex cable socket by prying up the tab with a spudger.
-
Using tweezers, gently pull the flex cable out of the socket. Rest the flex cable out of the way.
-
-
-
Remove the two 5.0mm Phillips #00 screws from the metal bracket securing the right button board to the motherboard.
-
Remove the metal bracket, using a spudger as necessary to lift it out.
-
-
-
Use a spudger to free the right button board by prying up from the bottom right corner of board.
-
Gently lift the right button board out.
-
-
crwdns2935267:0crwdne2935267:0Tweezers$4.99
-
Using tweezers, peel the start/select button off the back case.
-


To reassemble your device, follow these instructions in reverse order.
To reassemble your device, follow these instructions in reverse order.
crwdns2935221:0crwdne2935221:0
crwdns2935229:03crwdne2935229:0


crwdns2947410:01crwdne2947410:0
So I hit a roadblock at step 11, it seems some of these devices have security screws with no specific bit (or at least not one I could find) on the network card, so if you plan on attempting this repair please check your network card before doing so as you may need to perform some extra steps (such as cutting at the thing with a dremel if you're comfortable with that...) before moving forward. Here's what I'm referring to