crwdns2915892:0crwdne2915892:0
Use this guide to replace a cracked or broken screen on your OnePlus Nord.
If the frame is deformed, it's important to replace it to make sure the new screen will mount correctly and won’t suffer damage from uneven pressure.
Before disassembling your phone, discharge the battery below 25%. The battery can catch fire and/or explode if accidentally punctured, but the chances of that happening are much lower if discharged.
Note: This guide instructs you to replace only the screen while leaving the original frame and motherboard in place. However, some replacement screens for this phone come pre-installed in a new frame (a.k.a. chassis), which requires a very different procedure. Make sure you have the correct part before starting this guide.
You’ll need replacement adhesive to reattach components when reassembling the device.
crwdns2942213:0crwdne2942213:0
-
-
Switch off your phone.
-
Heat an iOpener to loosen the adhesive beneath the rear glass. Apply the iOpener for at least two minutes. If you have a heatbed with precise temperature control (like any FDM 3D printer with heatbed) 45°C is enough. You might want to repeat this step several times during the rear glass removal.
-
-
-
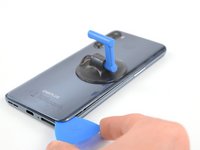
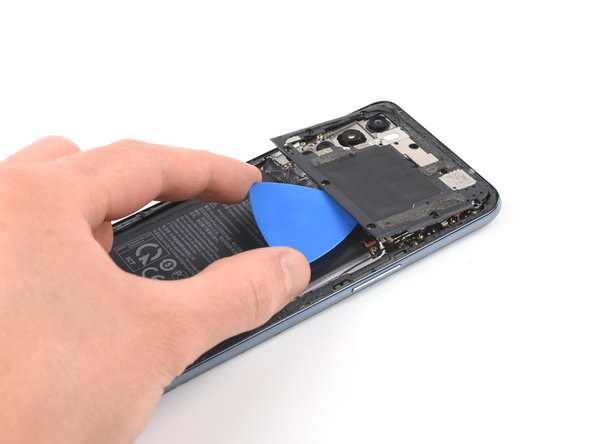
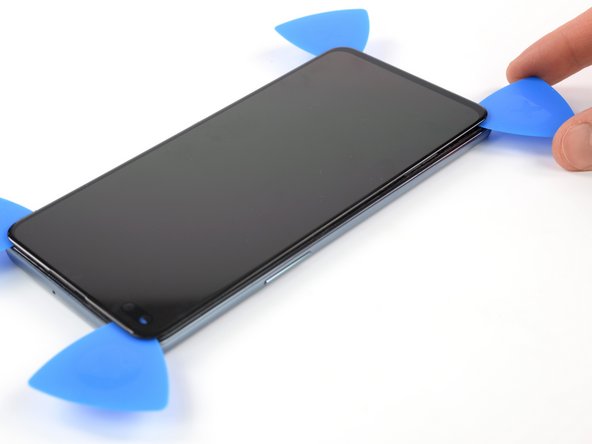
Apply a suction cup to the back of the phone, as close as possible to the center of the right edge.
-
Pull on the suction cup to create a gap between the rear glass and the frame.
-
Insert an opening pick into the gap.
-
-
-
Slide the opening pick along the edge to the bottom right corner.
-
Leave the opening pick in its place to prevent the adhesive from resealing.
-
-
-
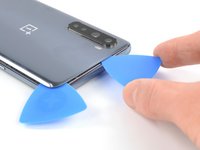
Insert a second opening pick under the bottom right corner.
-
Slide the opening pick along the edge to the top right corner.
-
Leave the opening pick in its place to prevent the adhesive from resealing.
-
-
-
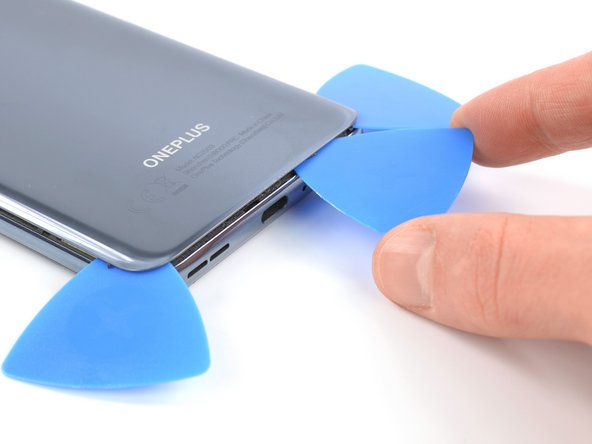
Insert a third opening pick under the top right corner of the back cover.
-
Slide the tip of the opening pick along the edge of the phone to the top left corner to cut the adhesive.
-
Leave the opening pick in the top left corner to prevent the adhesive from resealing.
-
-
-
Insert a fourth opening pick under the top left corner.
-
Slide the opening pick along the edge to the bottom left corner to cut the adhesive.
-
Leave the opening pick in its place to prevent the adhesive from resealing.
-
-
-
Insert a fifth opening pick under the bottom left corner.
-
Slide it along the the edge to the bottom right corner to cut the remaining adhesive.
-
-
-
-
Remove the back cover.
-
-
-
Use a Phillips #00 screwdriver to remove the ten 3.6 mm-long screws from the motherboard cover.
One of the screws has a thin white, flush surface on top that you need to break with your screwdriver.
There is also an 11th screw, already removed in the picture, left of the third camera from the top. Making it 10 normal screws and the 11th white one. bottom right
-
-
-
Insert the tip of an opening pick under the motherboard cover.
-
Use the opening pick to lift the motherboard cover up and release the plastic clips that holds the cover in its place.
-
Remove the motherboard cover.
-
-
-
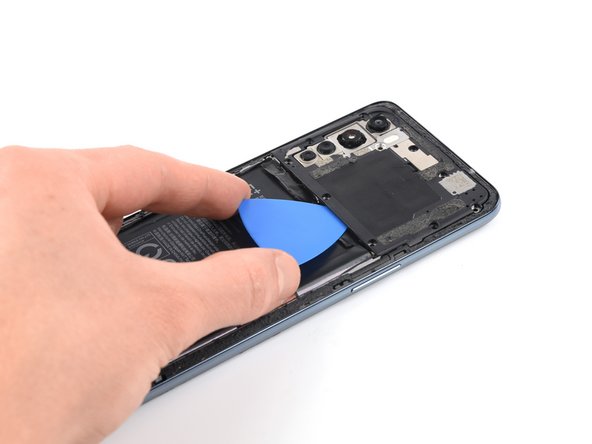
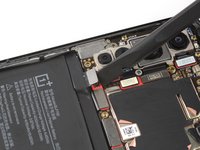
Use a spudger to disconnect the battery by prying the connector straight up from its socket.
-
-
-
Use a Phillips #00 screwdriver to remove the seven 3.6 mm-long screws.
-
-
-
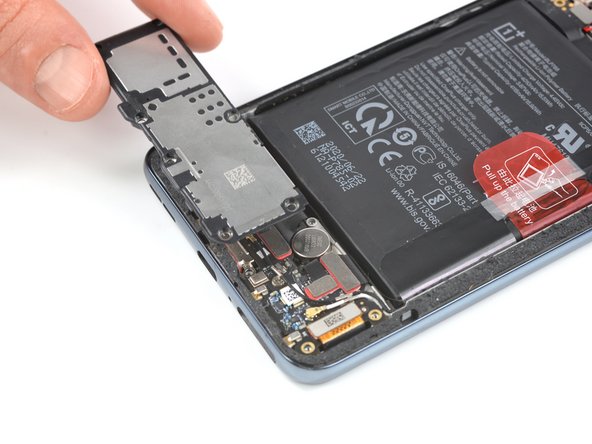
Insert the tip of an opening pick under the daughterboard cover.
-
Pry up to release the clips holding the daughterboard cover in place.
-
Remove the daughterboard cover.
-
-
-
Use the flat edge of a spudger to pry up and disconnect the display connector from its daughterboard socket.
-
-
-
Apply a Heat an iOpener to the screen for two minutes.
On my two phones I didn't need to apply heat to remove the screen. No glue that I could see.
-
-
-
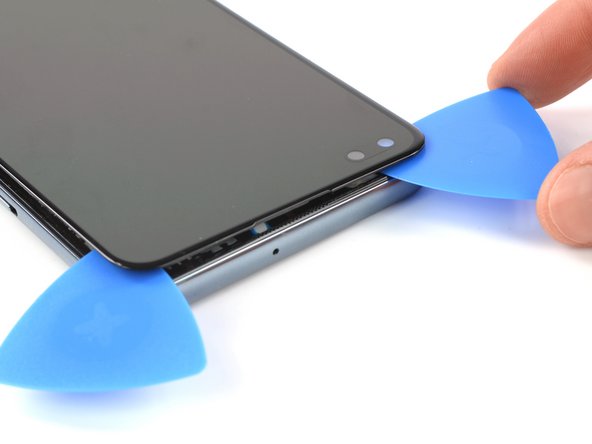
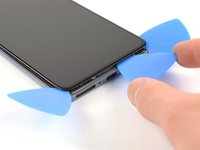
Apply a suction cup to the right edge of the display.
-
Pull up the suction cup with strong, steady force to create a gap.
-
Insert the point of an opening pick into the gap and slide it to the bottom right corner.
-
Leave the opening pick in its place to prevent the adhesive from resealing.
-
-
-
Insert a second opening pick at the bottom right corner.
-
Slide the opening pick along the edge to the top right corner of your phone.
-
Leave both opening picks in their place to prevent the adhesive from resealing.
-
-
-
Insert a third opening pick under the top right corner.
-
Slide the opening pick along the edge to slice the adhesive.
-
Leave the opening pick in the top left corner to prevent the adhesive from resealing.
-
-
-
Insert a fourth opening pick under the top left corner.
-
Slide the opening pick along the edge to cut the adhesive.
-
Leave the opening pick in the bottom left corner so prevent the adhesive from resealing.
-
-
-
Insert a fifth opening pick under the bottom left corner.
-
Slide it along the bottom edge to cut the remaining adhesive.
-
-
-
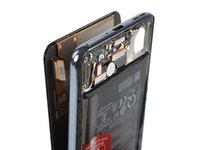
Carefully thread the display cable through the frame.
-
Remove the display.
-


If possible, turn on your device and test your repair before installing new adhesive and resealing.
Compare your new replacement part to the original part—you may need to transfer remaining components or remove adhesive backings from the new part before installing.
To reassemble your device, follow these instructions in reverse order. Apply new adhesive where necessary after cleaning the relevant areas with isopropyl alcohol (>90%).
The best way to secure the new screen is to apply a sheet of custom-cut double-sided tape to the back of the screen.
Take your e-waste to an R2 or e-Stewards certified recycler.
Repair didn’t go as planned? Try some basic troubleshooting, or ask our Answers community for help.
crwdns2935221:0crwdne2935221:0
crwdns2935229:029crwdne2935229:0


crwdns2947412:015crwdne2947412:0
So essentially the greater part of the guide is only necessary because OnePlus decided to have the display connector at the back of the phone rather than at the front under the display? What a poor choice repairability-wise on their side, very disappointing! Otherwise great guide.
Hi Nikola, yes, this is troublesome! Indeed, you have to make a few moves until it is possible to remove the display. Unfortunately, there is no easier way.
Yes!, I had the same problem, I spent all day trying different ways to get out like three pesky screws. :( Any tips from anybody? I scoured the internet for a few hours, tried a few different things already but any help would be much appreciated!
Why do guides only show you how to take apart screens and not how to apply a new one?
Hi @Tee Jay, to reassemble your OnePlus Nord and install the new screen, follow the steps in this guide in reverse order.
But how do I apply the screen again? What kind of glue should I use and where do I put it?
GREAT guide ... congratulations !!!
Hi Nico, thank you!
Hi what if I don't need to replace the display at all and just the glass I'm having a tough time finding a proper way to do that
Is this guide relevant to the Nord N10 5G?
Where can I buy the screen? I can't find it on the site.
Bonjour, Merci pour ce tutoriel. Vous parlez d'adhésif pour le remontage. Quel est le type de l'adhésif nécessaire et pour quelles pièces est-il nécessaire?
Merci.
Pierre S.
Bonjour @pierresancho, excellente question ! Soit votre écran de rechange est muni de bandes adhésives préinstallées, auquel cas il suffit de bien nettoyer les zones d'adhérence sur le téléphone avant de monter le nouvel écran. Soit vous prenez des morceaux d'adhésif correspondant à ces zones d'adhérence pour fixer votre écran, par exemple en suivant ces instructions (lien vers l'adhésif nécessaire inclus) : https://fr.ifixit.com/Tutoriel/Comment+u...
Which size of adhesive tape is necessary? How broad does the tape need to be (in mm) and how much of it (in cm) will I need?
Welche Breite (in mm) und insgesamte Länge (in cm) ist notwendig?
Be very careful when removing the back-glass and use plenty of heat all over the surface and not just along the edge. There is some adhesive above the battery, next to the camera, that will be holding on even though all the adhesive along the edge is gone.
I managed to crack the back glass because of this adhesive due to not being careful enough. Not that it matters for me as this was just a data recovery procedure for me.
I needed 4 hands to do this. And good light to see the gap.
Roger Bratseth - crwdns2934203:0crwdne2934203:0