crwdns2915892:0crwdne2915892:0
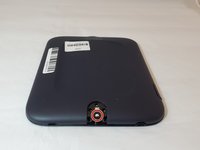
To replace any of your Nook’s other components, you must first remove the back cover. This guide demonstrates the steps you will need in order to remove the Nook BNRV300 back cover. This device is also called the “Nook Simple Touch.”
Before working on your device, remove the microSD card (if there is one). This will protect the memory of your card. The microSD card is located in a slot on the upper right side of the device.
This guide will enable access to the battery, motherboard, and display.
crwdns2942213:0crwdne2942213:0
-
-
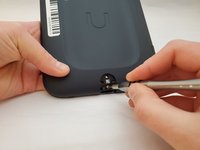
Turn the Nook over to find the power button along the back upper edge.
-
Wedge the spudger between the top of the power button and the upper edge of the device.
-
Push the tool down to pry the button up and off.
-
-
-
Using your fingers, take off the power button.
-
-
-
-
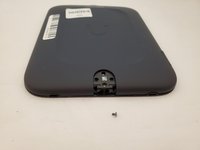
Peel off the white sticker that is covering the screw head.
-
Remove the one 2mm-long screw using a size T5 Torx screwdriver.
-
-
-
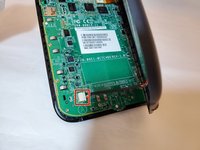
Slide the back cover down towards the USB port to release it. The pictures show the case being pried open but this should not be necessary.
There is no need to pry the cover off. Just slide the back cover down toward the USB port.
This right here! It requires little to no force to do this. You are more likely to break the clips if you force it open.
dl200010 -
Oh man, this is absolutely right! Sliding it down away from the power button is so easy. I'm sad I didn't see this comment until after I had pried it off. I couldn't figure out how to put it back on after changing the battery, but sliding it back up is easy. iFixit should definitely update the instructions to clarify this.
Looks like they updated the instructions! Although they said “prised” instead of pried. :(
-
-
-
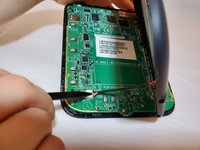
Use a spudger or your fingers to gently pry the connector out of the white socket.
-
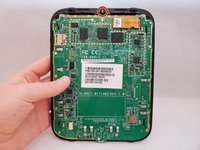
The back cover is now fully detached.
-
-
crwdns2935267:0crwdne2935267:0Tweezers$4.99
-
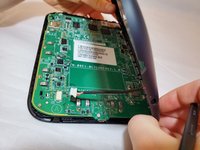
Use tweezers to remove the brass-colored threaded fastener from the Nook plastic casing.
There’s absolutely no reason to do this. This part of the device is never touched again for the rest of the guide.
-


To reassemble your device, follow these instructions in reverse order.
To reassemble your device, follow these instructions in reverse order.
crwdns2935221:0crwdne2935221:0
crwdns2935229:02crwdne2935229:0

crwdns2915084:0crwdne2915084:0

Eastern Washington University, Team S1-G1, Al-Hmeyrat Fall 2019 crwdns2935289:0Eastern Washington University, Team S1-G1, Al-Hmeyrat Fall 2019crwdne2935289:0
EWU-AL-HMEYRAT-F19S1G1
crwdns2931471:03crwdne2931471:0
crwdns2935297:05crwdne2935297:0
crwdns2947410:01crwdne2947410:0
Check the comments on each step. There are some adjustments to the process to properly and safely take this apart.
You should pull up from the bottom of the button. It will hing up and pop off easier and less chance of breaking the button. There is a hing on the top side of the button to pivot down to the bottom where the button is. The clips are near the bottom of the button. You are more likely to break the pivot pins doing it from the top.
dl200010 - crwdns2934203:0crwdne2934203:0
Thanks for your input!
Emily Tracy - crwdns2934203:0crwdne2934203:0