crwdns2915892:0crwdne2915892:0
Use this guide to remove the motherboard in the Nexus 5X.
Some guide images will show the battery already removed from the phone. You do not need to remove the battery for this procedure
You’ll need replacement adhesive to reattach components when reassembling the device.
crwdns2942213:0crwdne2942213:0
-
-
Insert a SIM card ejection tool into the hole on the SIM card tray, located on the left edge of the phone.
-
Press in to eject the SIM card tray.
-
Remove the SIM card tray.
-
-
-
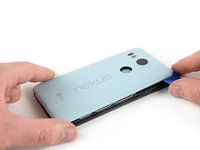
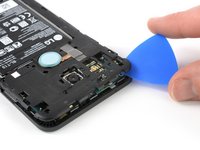
Place an opening pick in the opening of the SIM card tray slot and twist it sideways to release the first plastic clip that holds the rear panel in its place.
-
Slide the opening pick around the top edge of the phone to release the plastic clips that secure the rear panel.
-
-
-
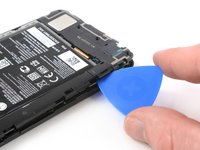
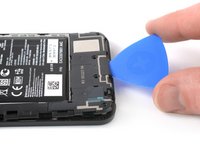
Continue to slide the opening pick around all sides of the phone to release all clips that secure the rear panel.
-
-
-
Tilt the opening pick to lift the rear panel a little bit.
-
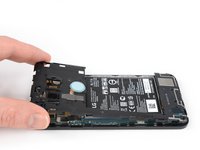
There are two more plastic clips next to the fingerprint sensor. Release them by gently pulling the rear panel.
-
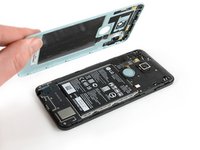
Remove the rear panel.
-
-
-
Remove the ten 3.6 mm Phillips screws that secure the midframe.
-
-
-
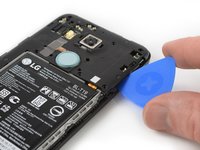
Insert an opening pick into the SIM card tray slot and twist the opening pick sideways to release the plastic clips.
-
-
-
-
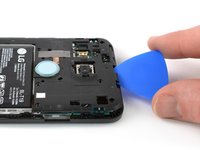
Continue sliding the opening pick around the upper part of the midframe to release the plastic clips.
-
-
-
Use the plastic pick to pry open the plastic clips on the long edge of the midframe and on the bottom edge.
-
-
-
Make sure all the clips are free.
-
Carefully remove the midframe.
-
-
-
Use the edge of a spudger to pry up and disconnect the battery flex cable located at the bottom right of the motherboard.
-
-
crwdns2931653:011crwdne2931653:0 Motherboard Assembly
crwdns2944590:011crwdnd2944590:014crwdnd2944590:0crwdnd2944590:0crwdne2944590:0
-
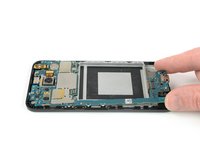
Use an iOpener to loosen the adhesive beneath the rear facing camera. Place the iOpener across the top part of the phone for about 30 seconds.
-
-
-
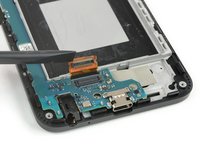
Apply the flat end of a spudger to the left side of the rear facing camera and carefully lever it up. Make sure all of the adhesive underneath is loosened.
-
-
-
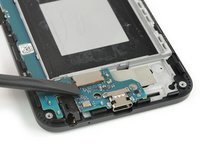
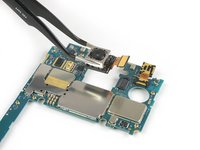
Use the flat end of a spudger to pry up the display flex connector.
-
-
-
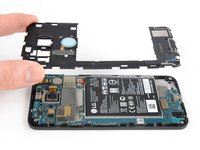
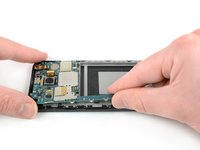
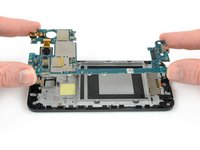
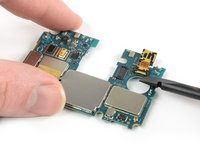
Grip the lower part of the motherboard with your fingers and carefully lift it upwards.
-
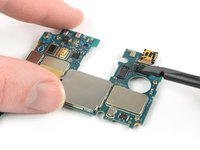
Gently pull the motherboard towards the bottom edge to free it from the plastic clip next to the rear-facing camera.
-
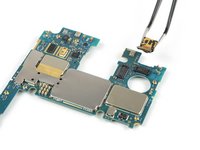
Carefully lift the motherboard out of the frame.
-
-
-
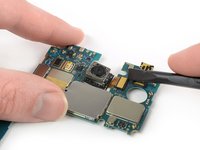
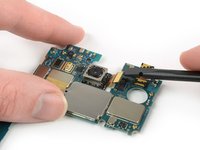
Use the flat end of a spudger to pry up the rear-facing camera connector from the motherboard.
-
Carefully remove the rear facing camera.
-
-
-
Use the flat end of a spudger to pry up the front-facing camera connector from the motherboard.
-
Carefully remove the front-facing camera.
-


If possible, turn on your phone and test your repair before installing new adhesive and resealing the phone.
To reassemble your device, follow these instructions in reverse order. During reassembly apply new adhesive where it’s necessary.
Repair didn’t go as planned? Check out our Nexus 5X Answers community for troubleshooting help.
crwdns2935221:0crwdne2935221:0
crwdns2935229:061crwdne2935229:0

crwdns2947412:040crwdne2947412:0
Anyone with the bootloop problem has been successful on returning the 5X to life by replacing the motherboard?
that's a stupid question. new motherboard means new operating system. maybe you should just use fastboot and flash stock firmware on your phone easy
where can I get a new motherboard at?????
in most 'google image boot' issues, it is a hardware issue, not software. besides, the phone will not allow a bootloader option.
yes …….and its the only way after bootloop