crwdns2915892:0crwdne2915892:0
This guide demonstrates how to remove the black plastic cover inside the Moto G6 in order to replace it or for further disassembly.
Before you begin, download the Rescue and Smart Assistant app to backup your device and diagnose whether your problem is software or hardware related.
crwdns2942213:0crwdne2942213:0
-
-
If possible, drain the battery before disassembly. When the battery is charged, there's an increased risk of a dangerous thermal event if the battery is overheated or damaged during repairs.
-
Prepare an iOpener and heat the back of the phone along its bottom edge for about two minutes, or until it's slightly too hot to touch. This will help soften the adhesive securing the rear glass.
-
-
-
Apply a suction cup to the bottom edge of the rear glass.
-
Pull up on the suction cup with firm, constant pressure to create a slight gap between the rear glass and the frame.
-
If you have trouble, apply more heat to further soften the adhesive, and try again. The adhesive cools quickly, so you may need to heat it repeatedly.
-
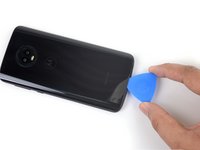
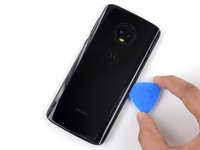
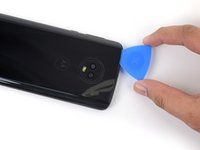
Insert an opening pick into the gap you created under the rear glass.
I'm stuck on this step (literally and figuratively). I've heated it pretty hot and pulled pretty hard on the suction cup, but I can't see a gap…
I used a piece of laminating plastic instead of the pick and managed to slide it in!
My back delaminated at this point. That is, the clear plastic started to come away leaving the paint layer behind. Mine is (was) the indigo blue one.
-
-
-
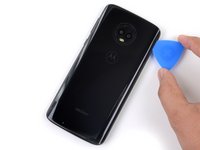
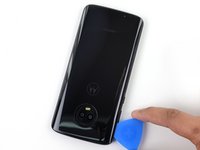
Slide the pick all along the bottom edge of the phone to slice through the adhesive securing the rear glass.
-
-
-
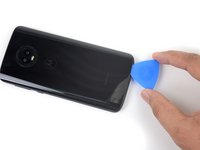
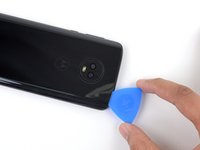
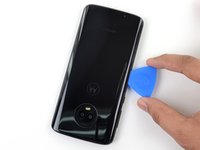
Heat the right edge of the back of the phone to soften the adhesive underneath.
-
-
-
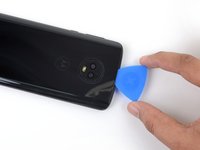
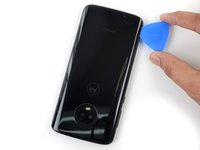
Slide the pick along the right edge of the rear glass to separate the adhesive underneath.
-
-
-
-
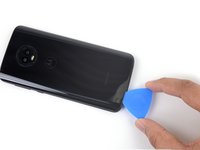
Heat the top edge of the back of the phone to soften the rear glass adhesive.
-
-
-
Slide the pick all along the top edge of the phone to slice through the adhesive securing the rear glass.
-
-
-
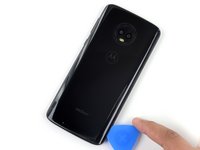
Heat the left edge of the back of the phone to soften the adhesive underneath.
-
-
-
Slide a pick along the left edge of the phone to slice through the rear glass adhesive.
-
-
crwdns2935267:0crwdne2935267:0Tesa 61395 Tape$5.99
-
If the glass remains stuck, re-heat and slice the adhesive repeatedly as needed.
-
Lift the rear glass carefully, making sure it's fully separated from any adhesive.
-
Remove the rear glass.
When cleaning old adhesive off the back glass, be careful not to scratch the inner coating of the glass. If you scratch this coating with tweezers, it will leave visible “nicks” on the back glass.
-
-
crwdns2935267:0crwdne2935267:0Tweezers$4.99
-
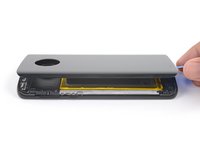
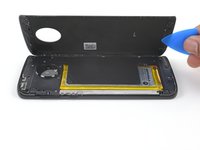
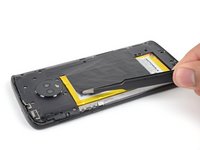
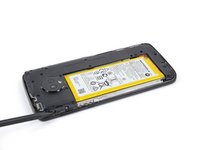
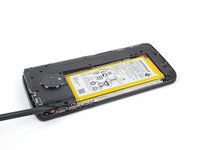
Use a pair of tweezers to carefully peel up the black tape covering the battery.
-
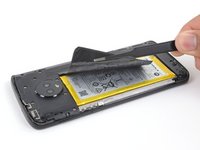
Remove the tape.
On my phone the sticker was covered by another NFC tag that was attached to the board under the cover. I yanked it out, breaking it in the process, but if you peel that sticker off the batter sticker first and leave it attached at the end, you should have more success.
Yes, there's the NFC tag that isn't mentioned, with its connection to the left. Thanks for the tip, Stuart; I gently lifted mine to the left and it seems to be intact. I guess I won't know until I try to pay for something.
-
-
-
Use a Phillips driver to remove seventeen screws securing the plastic cover:
-
Eleven grey 3 mm-long screws
-
Five black 2.5 mm-long screws
-
One silver 3.5 mm-long screw
The holes for the black screws are marked with a small triangle to differentiate them from the holes for the gray ones. I found this super helpful when reassembling!
-
-
-
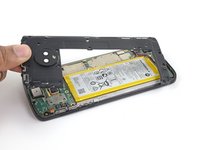
Insert the pointed end of a spudger into the notch at the top left edge of the plastic cover.
-
Pry up with the spudger to lift the upper edge of the cover and release the clips holding the cover down.
-
Remove the plastic cover.
When reinstalling plastic cover, alignment is critical for underlying contacts to line up. Test all functions before sealing up the phone. If camera or speaker don’t work, recheck plastic cover installation and correct until all phone functions operate.
-


Compare your new replacement part to the original part—you may need to transfer remaining components or remove adhesive backings from the new part before installing.
To reassemble your device, follow the above steps in reverse order.
Take your e-waste to an R2 or e-Stewards certified recycler.
Repair didn’t go as planned? Try some basic troubleshooting, or ask our Motorola Moto G6 Answers Community for help.
crwdns2935221:0crwdne2935221:0
crwdns2935229:02crwdne2935229:0

crwdns2947410:01crwdne2947410:0
Danke für diese Anleitung. Bei mir war im schwarzen Klebeband ein Art Antenne. In Schritt 11 also nicht unbedingt das ganze Klebeband entfernen - der dünne schwarze Streifen, der um den Akku geht ist mit dem Mainboard verbunden und darf nicht abreißen.
At what temperature shold the glass be heated to? My heat gun goes from 250 up to 1350.
Miles Raymond - crwdns2934203:0crwdne2934203:0
START LOW.
These plastics can be almost endlessly remelted, held at temp, etc., if done gently.
With a heat gun, I'd hesitate to go too far past 250°F/115°C too quickly until I was comfortable with the material.
Plastic WILL begin to burn and permanently deteriorate at 350-400°F or so.
Silicone can handle up to 400-500°F.
(Get a cast iron pot or pan to roughly 250°F/110°C, then invert and put a silicone cookie sheet on it to make a work surface that will make life waaaaaay easier. Preheat the device along with the pan for a few minutes, too.)
Filthy Pazuzu - crwdns2934203:0crwdne2934203:0