crwdns2915892:0crwdne2915892:0
Use this guide to remove and replace the loudspeaker assembly in your 2022 Motorola Moto G Stylus 5G.
Before you begin, download the Software Fix app to backup your device and diagnose whether your problem is software or hardware related.
crwdns2942213:0crwdne2942213:0
-
-
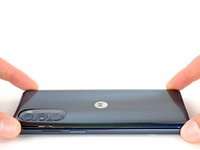
Heat an iOpener and apply it to the edge of the back cover with the SIM card slot for two minutes.
-
-
-
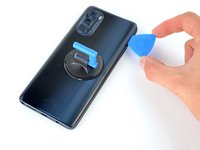
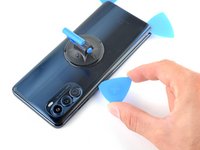
Apply a suction cup to the back cover, as close to the center of the right edge as possible.
-
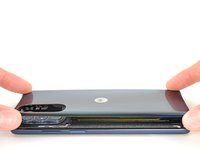
Pull up on the suction cup with strong, steady force to create a gap between the cover and the frame.
-
Insert an opening pick into the gap.
-
-
-
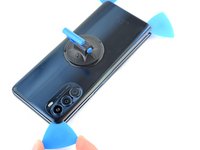
Slide your opening pick back and forth along the right edge to slice through the adhesive.
-
Leave the pick in at the bottom right corner to prevent the adhesive from resealing.
-
-
-
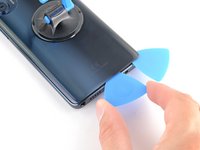
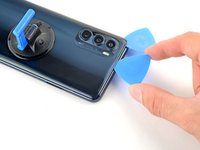
Insert a second opening pick into the bottom right corner.
-
Slide this opening pick along the bottom edge to the bottom left corner to slice through the adhesive.
-
Leave the pick inserted to prevent the bottom edge from resealing.
-
-
-
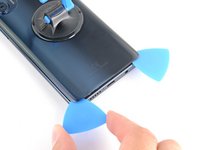
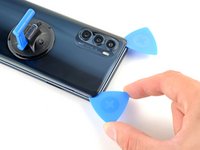
Insert a third opening pick into the bottom right corner.
-
Slide this opening pick along the left edge to slice the adhesive.
-
Leave the pick inserted in the top left corner to prevent the left edge from resealing.
-
-
-
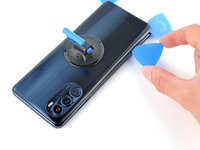
Insert a fourth pick into the top left corner.
-
Slide the pick to the top right corner to slice the top adhesive.
-
-
-
-
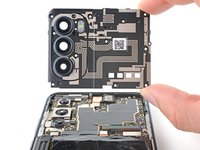
Slide an opening pick between the camera bezel and the back cover.
-
Slide the opening pick around the camera bezel to separate the back cover from the frame.
-
-
-
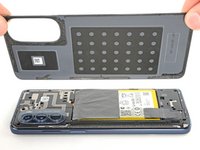
Grab and remove the back cover by lifting it away from the phone.
-
To adhere the back cover with custom-cut adhesives, follow this guide.
-
To adhere the back cover with tape, follow this guide.
Could this kit POSSIBLY be used with the Motorola Moto G Stylus (2022) NON-5G model? They seem to have the same battery even though there are some slight differences in the internal hardware.
-
-
-
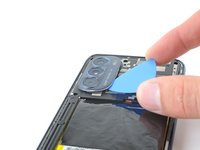
Heat an iOpener and apply it to the camera bezel for two minutes.
-
-
-
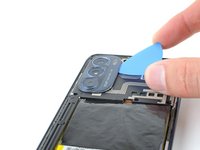
Insert an opening pick under the camera bezel.
-
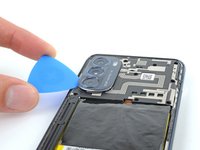
Slide the pick around the perimeter of the bezel to slice the adhesive.
-
-
-
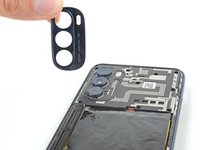
Grab and remove the camera bezel.
-
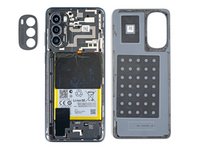
This is a good point to test your phone before sealing it up. Follow this guide to perform a hardware test. Be sure to power your phone back down completely before you continue working.
-
To adhere the camera bezel with custom-cut adhesives, follow this guide.
-
To adhere the camera bezel with tape, follow this guide.
-
-
-
Use a Phillips screwdriver to remove the eleven 4.1 mm-long screws securing the motherboard cover.
-
-
-
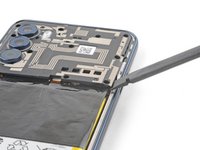
Insert a spudger between the bottom right corner of the cover and the frame.
-
Pry up to release the clips securing the cover.
-
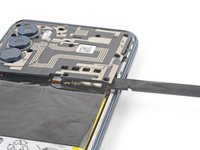
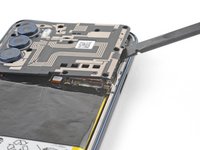
Slide the spudger toward the top of the cover and pry to release the right edge.
-
-
-
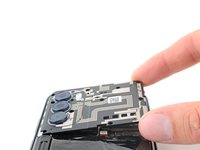
Grip the right edge of the cover and pull it off the motherboard.
-
-
-
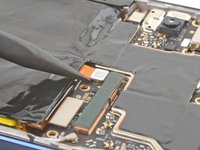
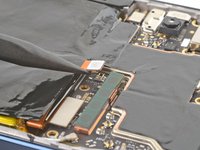
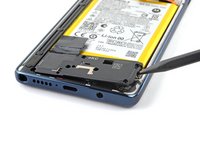
Use the point of a spudger to pry up the battery's press connector.
-
-
-
Use your Phillips screwdriver to remove the six 4.1 mm-long screws from the loudspeaker.
-
-
-
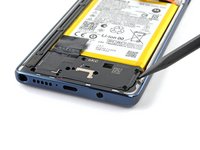
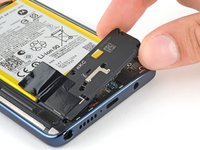
Insert the point of a spudger between the frame and the right edge of the loudspeaker.
-
Pry and release the right edge of the loudspeaker.
-
-
-
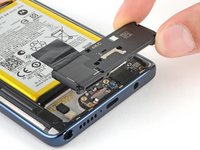
Grab the loudspeaker by its right edge and remove it.
-


Compare your new replacement part to the original part—be sure to transfer remaining components and remove adhesive backings from the new part before installing.
To reassemble your device, follow these instructions in reverse order.
Take your e-waste to an R2 or e-Stewards certified recycler.
Repair didn’t go as planned? Try some basic troubleshooting, or ask our Answers community for help.

crwdns2947412:02crwdne2947412:0
Hi Clay. I really like your posts and articles! Great stuff! I am replacing the speaker in my Moto G Stylus 5G 2022 Model xt2215-4 . Do you absolutely have to remove the Mother board and disconnect the battery when doing this? Even if you turn the phone off or run down the battery? The speaker as know is at the bottom of the phone below the battery and is not technically hooked up to the motherboard, so why go to all the hastle of removing it and disconnecting the battery? It looks like an easy repair just to open her up and remove the speaker compartment and pop an new one in. Why take out the motherboard? Thanks, Steve
Hey Steve! We recommend this to protect the phone as a whole when replacing a critical part such as a speaker. You're right that it does come out very easily and would be a very quick repair without first disconnecting the battery. We just don't advocate for this because of the risk of short-circuiting something on the board, or subjecting a live board to a replacement part with a lot of built-up static. If, for some reason, you can't remove the motherboard cover to access the battery connector, you can give it a shot without doing so. Just keep in mind the risks and use lots of safety practices surrounding ESD. Electrostatic Discharge
How long do I needed heated
Kamikazebob_76 - crwdns2934203:0crwdne2934203:0
If you're using an iOpener, apply it for two minutes. If you're using a hair dryer or heat gun, only heat it until the cover is warm to the touch.
Clay Eickemeyer -