crwdns2933423:0crwdne2933423:0

Motorola Moto E4 (XT1762) Loudspeaker Replacement

crwdns2942213:0crwdne2942213:0

  1. Motorola Moto E4 (XT1762) Loudspeaker Replacement, Back Cover: crwdns2935265:01crwdnd2935265:01crwdnd2935265:03crwdne2935265:0 Motorola Moto E4 (XT1762) Loudspeaker Replacement, Back Cover: crwdns2935265:01crwdnd2935265:02crwdnd2935265:03crwdne2935265:0 Motorola Moto E4 (XT1762) Loudspeaker Replacement, Back Cover: crwdns2935265:01crwdnd2935265:03crwdnd2935265:03crwdne2935265:0
    • Power off your phone before beginning disassembly.

    • Insert a fingernail, or spudger, into the notch on the bottom right corner to start separating the phone unit from the back cover.

    • Move to the bottom left corner to pry the phone out of the back cover.

  2. Motorola Moto E4 (XT1762) Loudspeaker Replacement: crwdns2935265:02crwdnd2935265:01crwdnd2935265:02crwdne2935265:0 Motorola Moto E4 (XT1762) Loudspeaker Replacement: crwdns2935265:02crwdnd2935265:02crwdnd2935265:02crwdne2935265:0
    • Lift the phone out of the back cover.

  3. Motorola Moto E4 (XT1762) Loudspeaker Replacement, Battery: crwdns2935265:03crwdnd2935265:01crwdnd2935265:03crwdne2935265:0 Motorola Moto E4 (XT1762) Loudspeaker Replacement, Battery: crwdns2935265:03crwdnd2935265:02crwdnd2935265:03crwdne2935265:0 Motorola Moto E4 (XT1762) Loudspeaker Replacement, Battery: crwdns2935265:03crwdnd2935265:03crwdnd2935265:03crwdne2935265:0
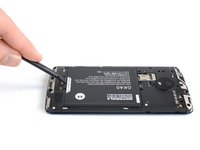
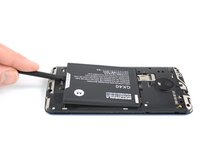
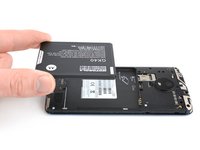
    • Use a fingernail or spudger to pry at the notch at the bottom end of the battery.

    • Lever the battery out of its recess and remove it.

  4. Motorola Moto E4 (XT1762) Loudspeaker Replacement, Loudspeaker: crwdns2935265:04crwdnd2935265:01crwdnd2935265:01crwdne2935265:0
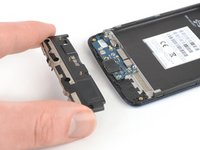
    • Remove the six 3.3 mm long Phillips #00 screws.

  5. Motorola Moto E4 (XT1762) Loudspeaker Replacement: crwdns2935265:05crwdnd2935265:01crwdnd2935265:02crwdne2935265:0 Motorola Moto E4 (XT1762) Loudspeaker Replacement: crwdns2935265:05crwdnd2935265:02crwdnd2935265:02crwdne2935265:0
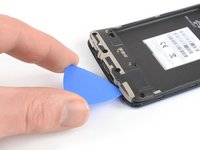
    • Insert an opening pick between the loudspeaker and the frame to pry it up by twisting the opening pick.

    • Remove the loudspeaker unit.

crwdns2915888:0crwdne2915888:0

To reassemble your device, follow these instructions in reverse order.

Take your e-waste to an R2 or e-Stewards certified recycler.

Repair didn’t go as planned? Check out our Answers community for troubleshooting help.

Tobias Isakeit

crwdns2935283:003/31/14crwdne2935283:0

125,025 crwdns2915208:0crwdne2915208:0

crwdns2935297:0189crwdne2935297:0

crwdns2915084:0crwdne2915084:0

Tobias Isakeit - Repairability Engineer crwdns2935289:0Tobias Isakeit - Repairability Engineercrwdne2935289:0

Business

crwdns2934841:01crwdne2934841:0

crwdns2935297:01,132crwdne2935297:0

crwdns2947412:00crwdne2947412:0

crwdns2917038:0crwdne2917038:0

crwdns2936625:0crwdne2936625:0:

crwdns2936751:024crwdne2936751:0 1

crwdns2936753:07crwdne2936753:0 2

crwdns2936753:030crwdne2936753:0 6

crwdns2942667:0crwdne2942667:0 640