crwdns2933423:0crwdne2933423:0

MNT Pocket Reform Display Replacement

crwdns2942213:0crwdne2942213:0

  1. MNT Pocket Reform Display Replacement, Shut down the laptop: crwdns2935265:01crwdnd2935265:01crwdnd2935265:03crwdne2935265:0 MNT Pocket Reform Display Replacement, Shut down the laptop: crwdns2935265:01crwdnd2935265:02crwdnd2935265:03crwdne2935265:0 MNT Pocket Reform Display Replacement, Shut down the laptop: crwdns2935265:01crwdnd2935265:03crwdnd2935265:03crwdne2935265:0
    • If you've installed an operating system, follow the appropriate steps to safely shut down the laptop.

    • If you've not yet installed an operating system, or the laptop is not responsive, you can shut it down with these steps:

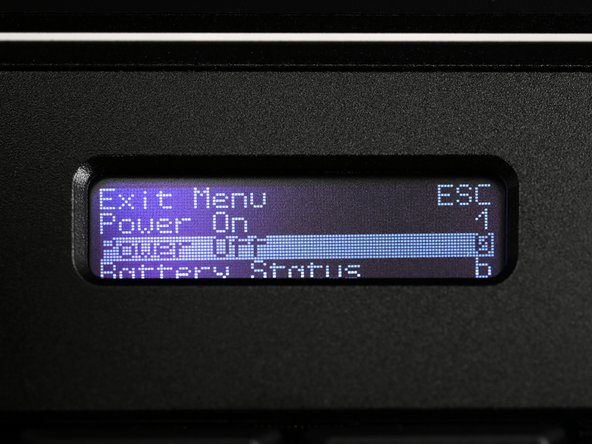
    • Turn on the OLED screen by pressing the Hyper key (diagonal arrow) and Enter at the same time.

    • Use the arrow keys to select Power Off on the OLED screen.

    • Press Enter to shut down the laptop.

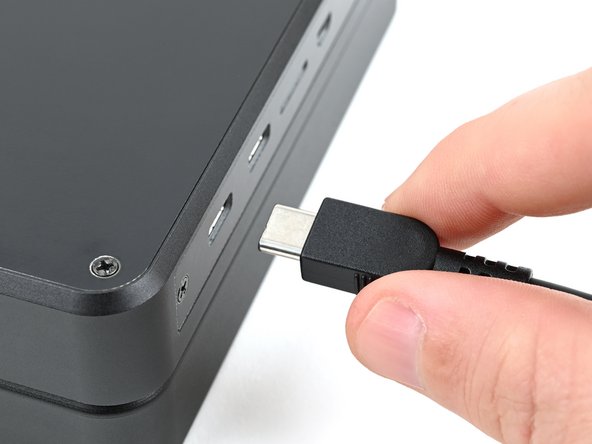
    • Disconnect all cables from the laptop.

  2. MNT Pocket Reform Display Replacement, Turn off the standby power: crwdns2935265:02crwdnd2935265:01crwdnd2935265:02crwdne2935265:0 MNT Pocket Reform Display Replacement, Turn off the standby power: crwdns2935265:02crwdnd2935265:02crwdnd2935265:02crwdne2935265:0
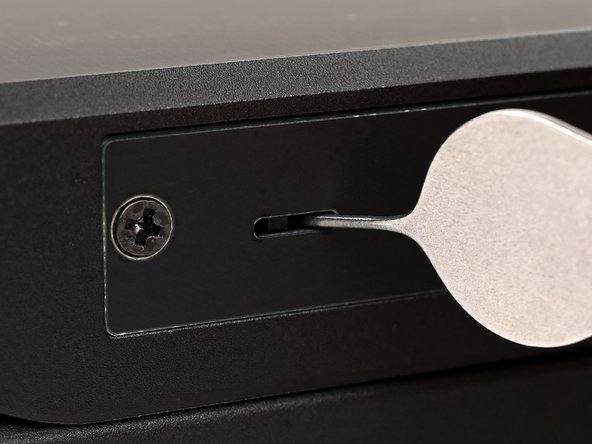
    • Use a small tool, like a SIM eject tool or a bent paperclip, to turn off the standby power switch by sliding the switch away from the headset jack.

    • The standby power switch is located in a small recess on the same side as the headset jack.

  3. MNT Pocket Reform Display Replacement, Remove the bottom cover screws: crwdns2935265:03crwdnd2935265:01crwdnd2935265:02crwdne2935265:0 MNT Pocket Reform Display Replacement, Remove the bottom cover screws: crwdns2935265:03crwdnd2935265:02crwdnd2935265:02crwdne2935265:0
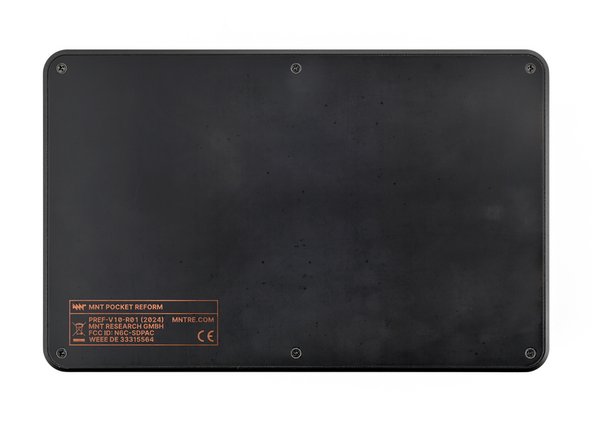
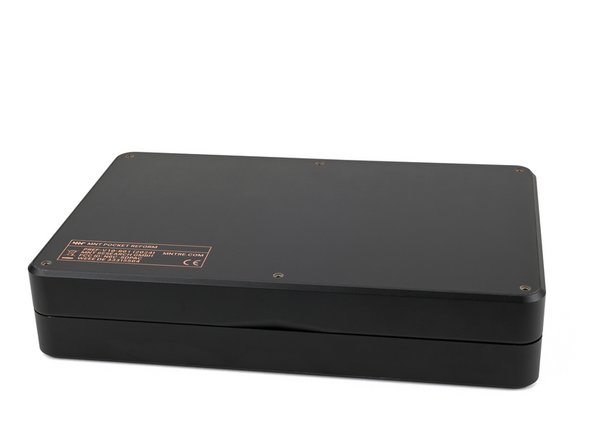
    • Place the laptop on your work surface so the bottom cover, with the regulatory info box, is facing up.

    • Use a Phillips screwdriver to remove the six 4.8 mm‑long screws securing the bottom cover.

  4. MNT Pocket Reform Display Replacement, Remove the bottom cover: crwdns2935265:04crwdnd2935265:01crwdnd2935265:03crwdne2935265:0 MNT Pocket Reform Display Replacement, Remove the bottom cover: crwdns2935265:04crwdnd2935265:02crwdnd2935265:03crwdne2935265:0 MNT Pocket Reform Display Replacement, Remove the bottom cover: crwdns2935265:04crwdnd2935265:03crwdnd2935265:03crwdne2935265:0
    • The bottom cover is made of printed circuit board (PCB) material. Press gently but firmly near an edge when applying the suction handle to avoid breaking the cover.

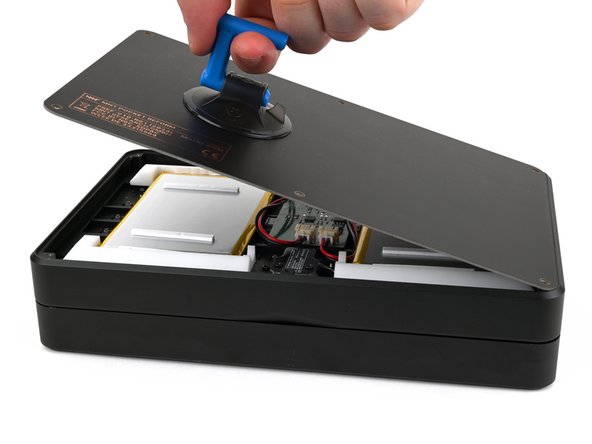
    • Apply a suction handle to the bottom cover.

    • Use the suction handle to lift the bottom cover off of the laptop.

    • Alternatively, you can use a thin prying tool to lift the cover, or tilt the laptop until the cover falls out.

    • During reassembly, place the bottom cover on the laptop so the info box is opposite the hinges.

  5. MNT Pocket Reform Display Replacement, Disconnect the batteries: crwdns2935265:05crwdnd2935265:01crwdnd2935265:03crwdne2935265:0 MNT Pocket Reform Display Replacement, Disconnect the batteries: crwdns2935265:05crwdnd2935265:02crwdnd2935265:03crwdne2935265:0 MNT Pocket Reform Display Replacement, Disconnect the batteries: crwdns2935265:05crwdnd2935265:03crwdnd2935265:03crwdne2935265:0
    • Be careful not to damage the lithium-polymer batteries when working around them with metal tools. If the batteries are damaged or deformed in any way, take appropriate precautions.

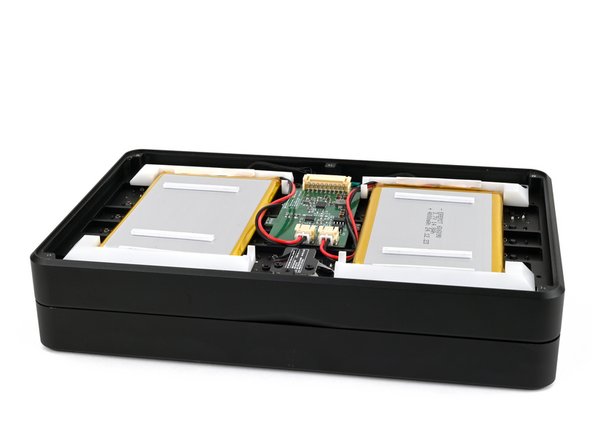
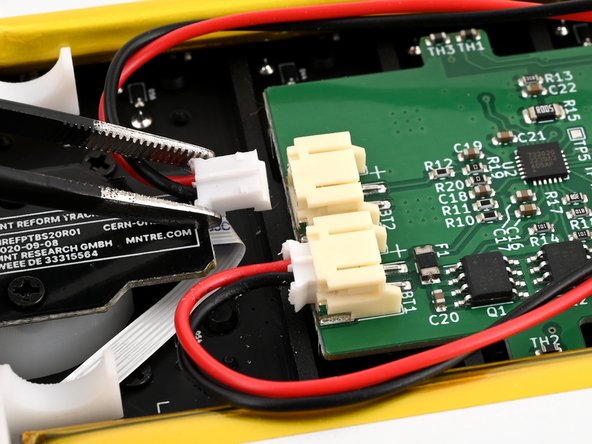
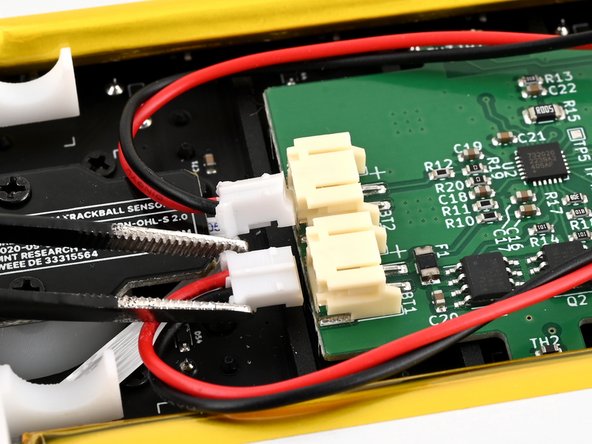
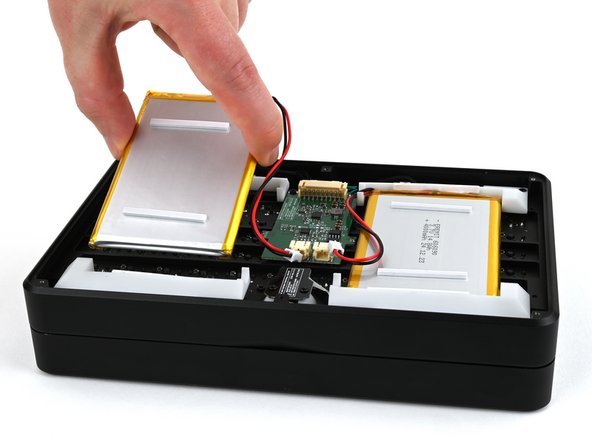
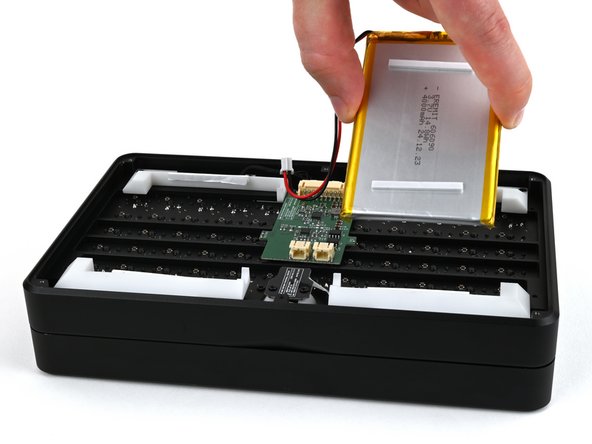
    • Use a pair of tweezers or your fingers to disconnect the batteries' sliding connectors from the charger board.

  6. MNT Pocket Reform Display Replacement, Remove the batteries: crwdns2935265:06crwdnd2935265:01crwdnd2935265:03crwdne2935265:0 MNT Pocket Reform Display Replacement, Remove the batteries: crwdns2935265:06crwdnd2935265:02crwdnd2935265:03crwdne2935265:0 MNT Pocket Reform Display Replacement, Remove the batteries: crwdns2935265:06crwdnd2935265:03crwdnd2935265:03crwdne2935265:0
    • Lift the batteries out of the frame.

    • During reassembly, install the batteries so the foam stickers face up, the sides of the batteries with wires are towards the hinges, and the wires run towards the middle of the laptop.

  7. MNT Pocket Reform Display Replacement, Secure the bottom cover: crwdns2935265:07crwdnd2935265:01crwdnd2935265:03crwdne2935265:0 MNT Pocket Reform Display Replacement, Secure the bottom cover: crwdns2935265:07crwdnd2935265:02crwdnd2935265:03crwdne2935265:0 MNT Pocket Reform Display Replacement, Secure the bottom cover: crwdns2935265:07crwdnd2935265:03crwdnd2935265:03crwdne2935265:0
    • Place the bottom cover on the laptop.

    • Use a Phillips screwdriver to secure the bottom cover with the six 4.8 mm‑long screws.

  8. MNT Pocket Reform Display Replacement, Remove the top cover: crwdns2935265:08crwdnd2935265:01crwdnd2935265:02crwdne2935265:0 MNT Pocket Reform Display Replacement, Remove the top cover: crwdns2935265:08crwdnd2935265:02crwdnd2935265:02crwdne2935265:0
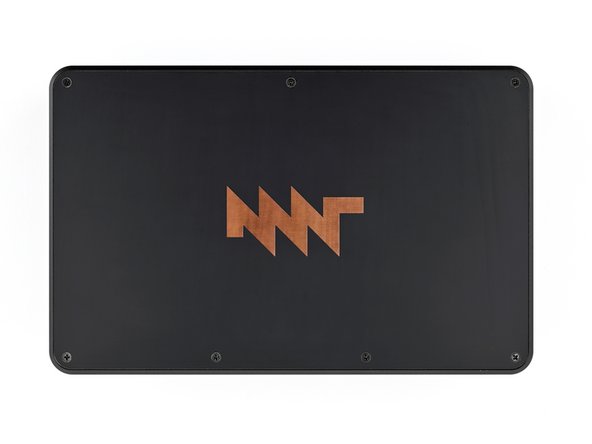
    • Place the laptop on your work surface so the top cover with the MNT logo is facing up.

    • Use a Phillips screwdriver to remove the seven 4.8 mm‑long screws securing the top cover.

  9. MNT Pocket Reform Display Replacement: crwdns2935265:09crwdnd2935265:01crwdnd2935265:03crwdne2935265:0 MNT Pocket Reform Display Replacement: crwdns2935265:09crwdnd2935265:02crwdnd2935265:03crwdne2935265:0 MNT Pocket Reform Display Replacement: crwdns2935265:09crwdnd2935265:03crwdnd2935265:03crwdne2935265:0
    • The top cover is made of printed circuit board (PCB) material. Press gently but firmly near an edge when applying the suction handle to avoid breaking the cover.

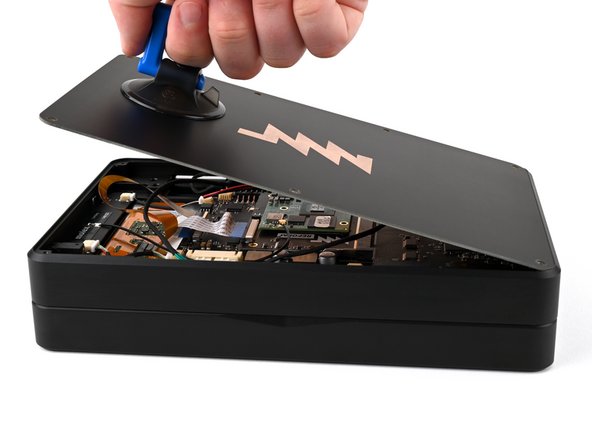
    • Apply a suction handle to the top cover.

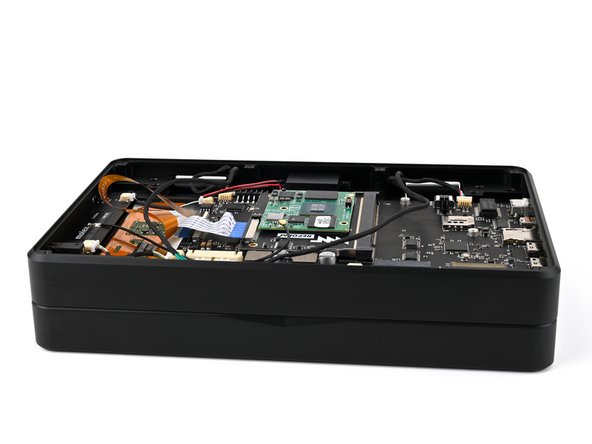
    • Use the suction handle to lift the top cover off of the laptop.

    • Alternatively, you can use a thin prying tool to lift the cover, or tilt the laptop until the cover falls out.

    • There's a thermal pad between the top cover and the processor that may stick to the top cover during removal.

  10. MNT Pocket Reform Display Replacement, Thermal pad info: crwdns2935265:010crwdnd2935265:01crwdnd2935265:01crwdne2935265:0
    • During reassembly:

    • If the thermal pad is damaged in any way, follow the thermal pad replacement guide to install a new thermal pad.

    • The thermal pad may be stuck to the top cover or the processor.

    • If the thermal pad is in good condition, you can proceed with reassembly.

    • Make sure the thermal pad makes good contact with the processor and the top cover.

  11. MNT Pocket Reform Display Replacement, Disconnect the display: crwdns2935265:011crwdnd2935265:01crwdnd2935265:02crwdne2935265:0 MNT Pocket Reform Display Replacement, Disconnect the display: crwdns2935265:011crwdnd2935265:02crwdnd2935265:02crwdne2935265:0
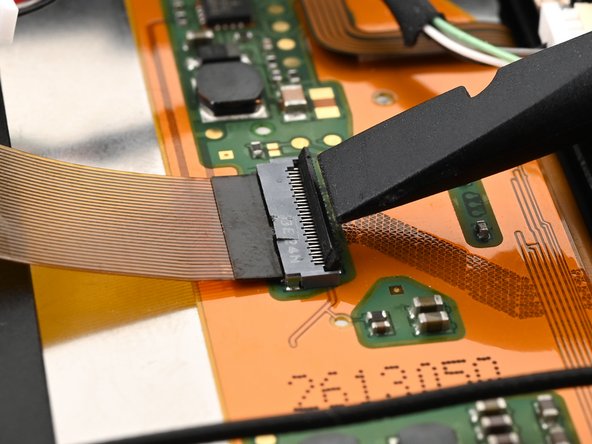
    • Use a spudger or your fingernail to flip up the locking flap of the display cable ZIF connector on the back of the display.

  12. MNT Pocket Reform Display Replacement: crwdns2935265:012crwdnd2935265:01crwdnd2935265:02crwdne2935265:0 MNT Pocket Reform Display Replacement: crwdns2935265:012crwdnd2935265:02crwdnd2935265:02crwdne2935265:0
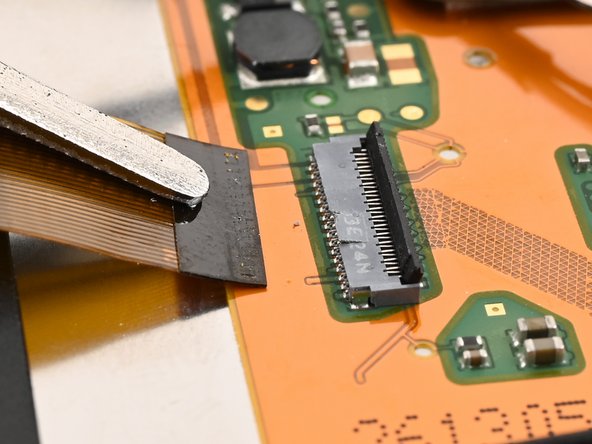
    • Use a pair of tweezers or your fingers to grip the pull tab on the display cable and pull it out of the connector.

  13. MNT Pocket Reform Display Replacement, Dissolve the display adhesive: crwdns2935265:013crwdnd2935265:01crwdnd2935265:02crwdne2935265:0 MNT Pocket Reform Display Replacement, Dissolve the display adhesive: crwdns2935265:013crwdnd2935265:02crwdnd2935265:02crwdne2935265:0
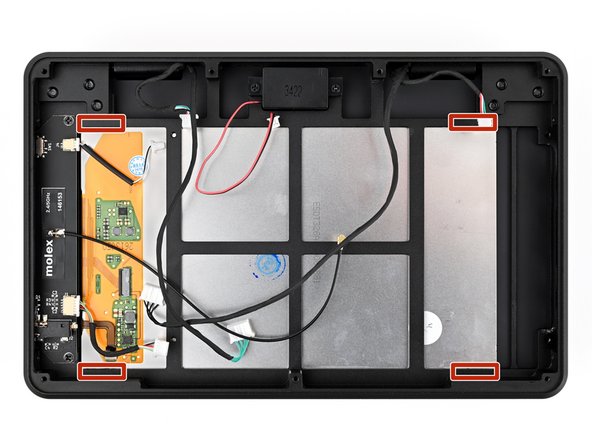
    • Apply 1-2 drops of high concentration (greater than 90%) isopropyl alcohol to each corner of the back of the display to release the adhesive securing the display to the frame.

    • Wait thirty seconds before moving to the next step to allow the alcohol to dissolve the adhesive.

  14. MNT Pocket Reform Display Replacement: crwdns2935265:014crwdnd2935265:01crwdnd2935265:03crwdne2935265:0 MNT Pocket Reform Display Replacement: crwdns2935265:014crwdnd2935265:02crwdnd2935265:03crwdne2935265:0 MNT Pocket Reform Display Replacement: crwdns2935265:014crwdnd2935265:03crwdnd2935265:03crwdne2935265:0
    • Open the laptop so it lays flat on your work surface with the display and keyboard both facing up.

  15. MNT Pocket Reform Display Replacement, Remove the display bezel screws: crwdns2935265:015crwdnd2935265:01crwdnd2935265:02crwdne2935265:0 MNT Pocket Reform Display Replacement, Remove the display bezel screws: crwdns2935265:015crwdnd2935265:02crwdnd2935265:02crwdne2935265:0
    • Use a Phillips screwdriver to remove the six 4.8 mm‑long screws securing the display bezel.

  16. MNT Pocket Reform Display Replacement, Remove the display bezel: crwdns2935265:016crwdnd2935265:01crwdnd2935265:03crwdne2935265:0 MNT Pocket Reform Display Replacement, Remove the display bezel: crwdns2935265:016crwdnd2935265:02crwdnd2935265:03crwdne2935265:0 MNT Pocket Reform Display Replacement, Remove the display bezel: crwdns2935265:016crwdnd2935265:03crwdnd2935265:03crwdne2935265:0
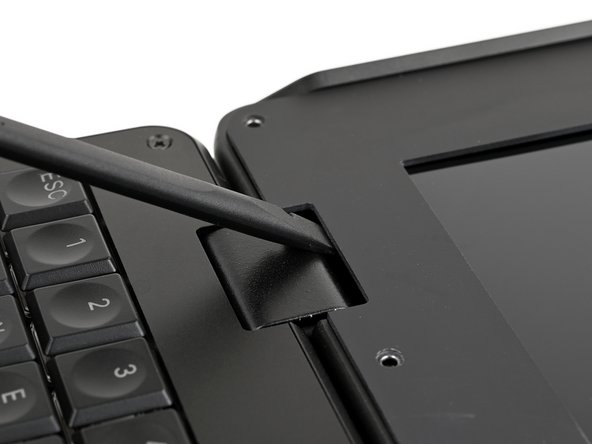
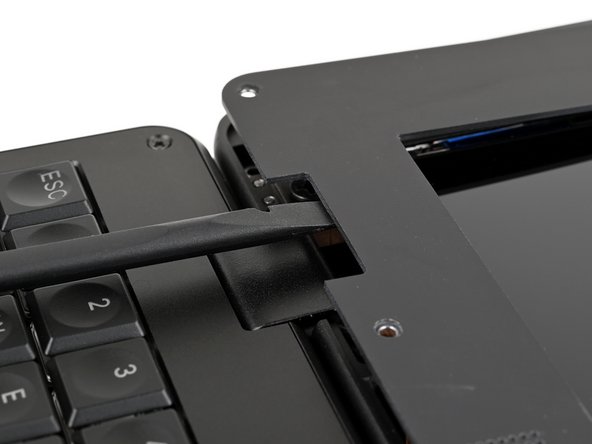
    • Insert a spudger or your finger into the gap between a hinge and the display bezel.

    • Pry up the display bezel until you can grab it with your fingers.

  17. MNT Pocket Reform Display Replacement: crwdns2935265:017crwdnd2935265:01crwdnd2935265:03crwdne2935265:0 MNT Pocket Reform Display Replacement: crwdns2935265:017crwdnd2935265:02crwdnd2935265:03crwdne2935265:0 MNT Pocket Reform Display Replacement: crwdns2935265:017crwdnd2935265:03crwdnd2935265:03crwdne2935265:0
    • There are four strong magnets under the display bezel at the top of the frame. These can stay in place during the repair, but you can remove them to avoid losing them.

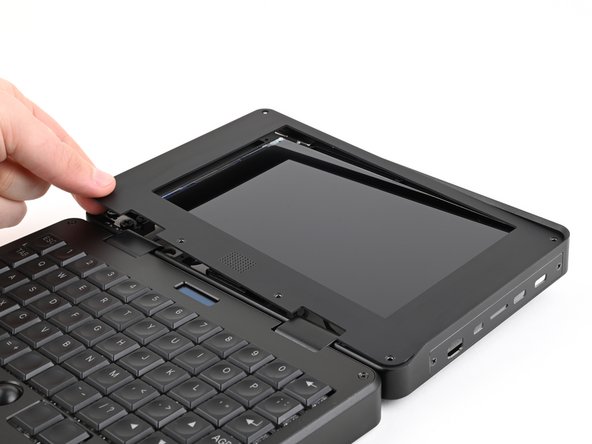
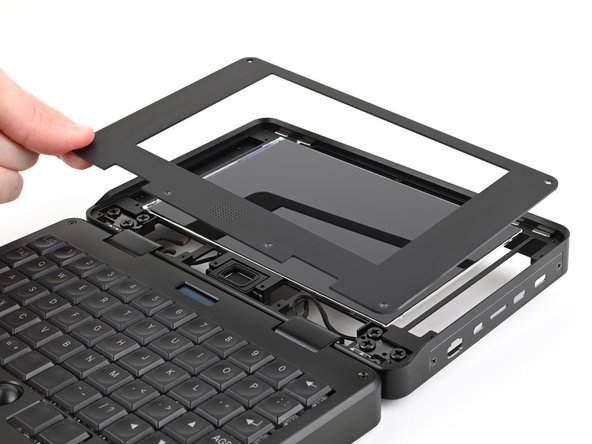
    • Lift and remove the display bezel.

    • During reassembly:

    • If you removed the magnets, make sure they are installed so they attract the magnets under the keyboard bezel.

    • Make sure the side of the display bezel with countersunk (conically shaped) screw wells is facing up.

  18. MNT Pocket Reform Display Replacement: crwdns2935265:018crwdnd2935265:01crwdnd2935265:02crwdne2935265:0 MNT Pocket Reform Display Replacement: crwdns2935265:018crwdnd2935265:02crwdnd2935265:02crwdne2935265:0
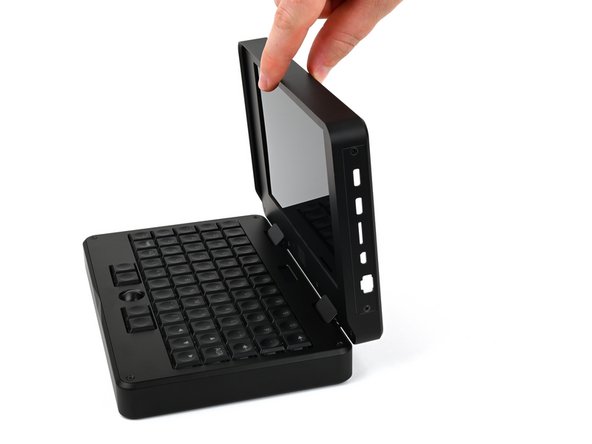
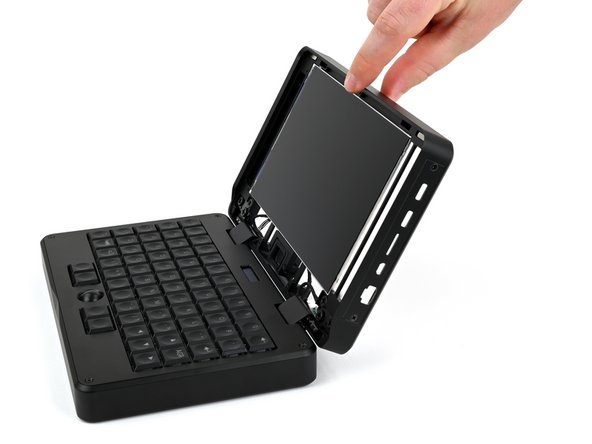
    • Lift the top of the laptop at an angle so you can access the back of the display but the display doesn't fall out.

  19. MNT Pocket Reform Display Replacement: crwdns2935265:019crwdnd2935265:01crwdnd2935265:02crwdne2935265:0 MNT Pocket Reform Display Replacement: crwdns2935265:019crwdnd2935265:02crwdnd2935265:02crwdne2935265:0
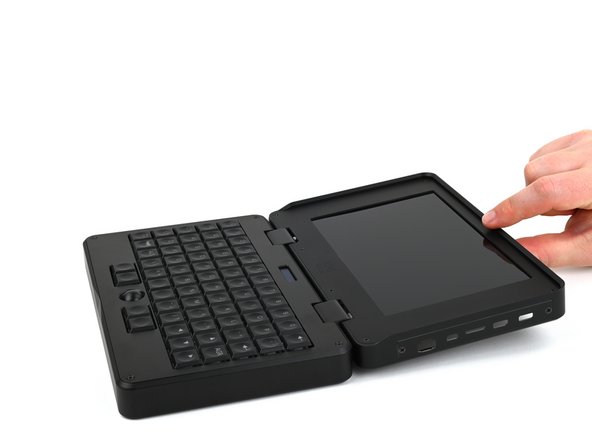
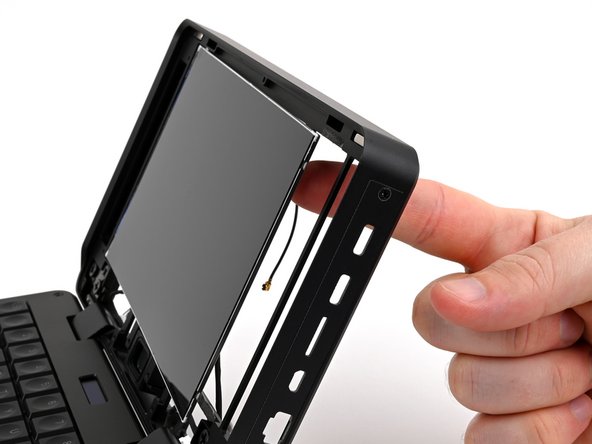
    • Use your finger to push on the back of the display until it comes off of the adhesive.

  20. MNT Pocket Reform Display Replacement: crwdns2935265:020crwdnd2935265:01crwdnd2935265:02crwdne2935265:0 MNT Pocket Reform Display Replacement: crwdns2935265:020crwdnd2935265:02crwdnd2935265:02crwdne2935265:0
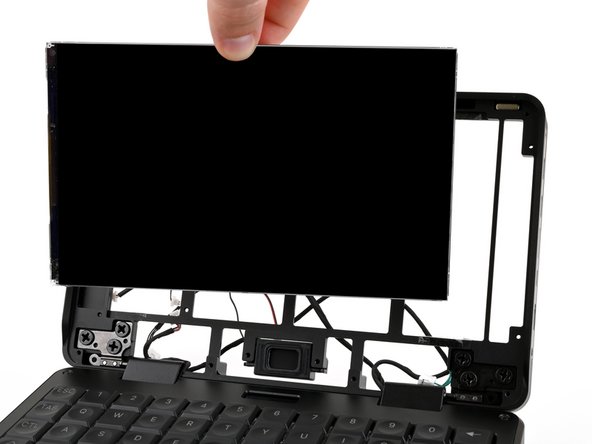
    • Once the display is free of the adhesive, remove it from the frame.

    • During reassembly, after cleaning off the old adhesive and applying new adhesive, firmly press each corner of the new display to the adhesive to ensure it's secured.

  21. MNT Pocket Reform Display Replacement, Clean off the old adhesive: crwdns2935265:021crwdnd2935265:01crwdnd2935265:03crwdne2935265:0 MNT Pocket Reform Display Replacement, Clean off the old adhesive: crwdns2935265:021crwdnd2935265:02crwdnd2935265:03crwdne2935265:0 MNT Pocket Reform Display Replacement, Clean off the old adhesive: crwdns2935265:021crwdnd2935265:03crwdnd2935265:03crwdne2935265:0
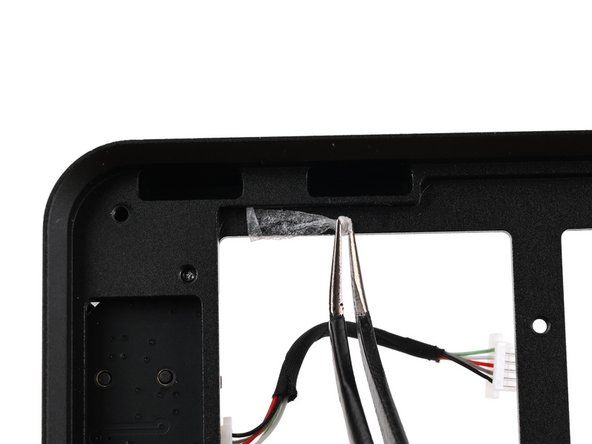
    • Use a pair of tweezers to peel the old adhesive off of the frame.

    • Use high concentration (greater than 90%) isopropyl alcohol and a coffee filter or lint free cloth to clean any remaining residue off of the frame.

  22. MNT Pocket Reform Display Replacement, Apply new adhesive: crwdns2935265:022crwdnd2935265:01crwdnd2935265:03crwdne2935265:0 MNT Pocket Reform Display Replacement, Apply new adhesive: crwdns2935265:022crwdnd2935265:02crwdnd2935265:03crwdne2935265:0 MNT Pocket Reform Display Replacement, Apply new adhesive: crwdns2935265:022crwdnd2935265:03crwdnd2935265:03crwdne2935265:0
    crwdns2935267:0crwdne2935267:0
    Tesa 61395 Tape
    $2.99
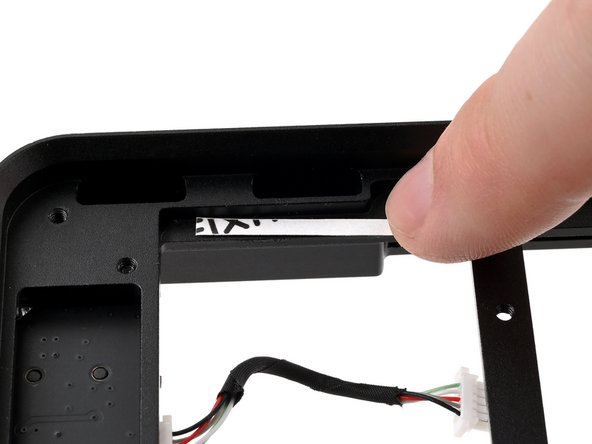
    • Cut a section of double-sided adhesive, like Tesa Tape, to a strip that's about 2 mm wide and 3 cm long.

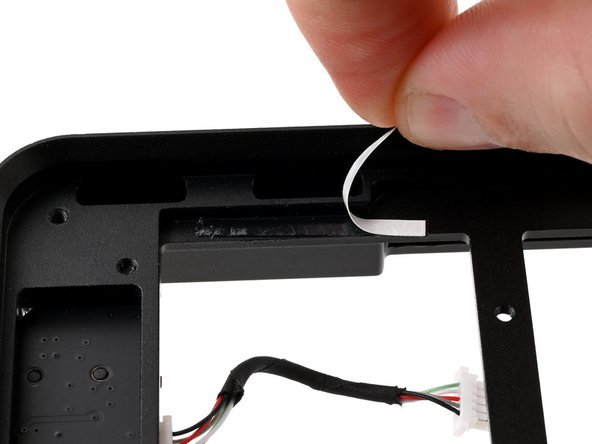
    • Peel the backing off of one side of the adhesive and apply it to the frame, pressing firmly to ensure it sticks.

    • Peel off the other backing, then proceed with installing the new display and reassembling the laptop.

crwdns2915888:0crwdne2915888:0

To reassemble your device, follow these instructions in reverse order.

Repair didn’t go as planned? Try some basic troubleshooting, or ask our Answers community for help.

Take your e-waste to an R2 or e-Stewards certified recycler.

Spencer Pennington

crwdns2935283:009/09/23crwdne2935283:0

18,870 crwdns2915208:0crwdne2915208:0

crwdns2935297:0114crwdne2935297:0

crwdns2915084:0crwdne2915084:0

iFixit crwdns2935289:0iFixitcrwdne2935289:0

Staff

crwdns2931471:0120crwdne2931471:0

crwdns2935297:020,038crwdne2935297:0

crwdns2947412:00crwdne2947412:0

crwdns2917038:0crwdne2917038:0

crwdns2936625:0crwdne2936625:0:

crwdns2936751:024crwdne2936751:0 0

crwdns2936753:07crwdne2936753:0 3

crwdns2936753:030crwdne2936753:0 4

crwdns2942667:0crwdne2942667:0 139