crwdns2915892:0crwdne2915892:0
A hard drive is a data storage device using magnetic storage to recover digital data that appears in most laptops. The average lifespan of a hard drive ranges from 3 to 5 years. It may be replaced under the condition of a hardware failure or for upgrade of speed and capacity. This guide will show how will show you how to successfully replace the hard drive in the Lenovo IdeaPad Flex 5-1570.
crwdns2942213:0crwdne2942213:0
-
-
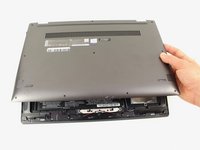
Remove the ten 5 mm Phillips #00 screws that are holding the back panel on.
-
-
-
Use a spudger to pry open the back case at the two hinge cutouts.
-
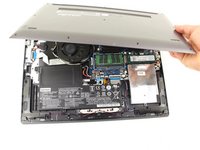
Gently use the plastic opening tool around the edges of the laptop to pry up the clips holding the rest of the back panel.
-
-
-
-
Once all the clips have been disengaged, lift off the back cover.
You should probably disconnect the battery immediately after opening the laptop. Don’t want to risk damaging your nice hardware.
-
-
-
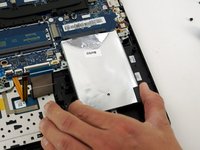
Remove the three 5 mm Phillips #00 screws that secure the hard drive.
-
-
-
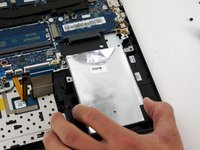
Using your hands, gently pull the hard drive back, sliding it out from the port.
There is an adhesive pad under the hard drive that had become "glued" to the hard drive, probably due to material breakdown. This made removing the drive quite difficult. I eventually was able to pry the drive loose, but not without some superficial damage to the hard drive case.
-


To reassemble your device, follow these instructions in reverse order.
Take your e-waste to an R2 or e-Stewards certified recycler.
To reassemble your device, follow these instructions in reverse order.
Take your e-waste to an R2 or e-Stewards certified recycler.
crwdns2935221:0crwdne2935221:0
crwdns2935227:0crwdne2935227:0
crwdns2915084:0crwdne2915084:0

Cal Poly, Team S2-G6, White Winter 2020 crwdns2935289:0Cal Poly, Team S2-G6, White Winter 2020crwdne2935289:0
CPSU-WHITE-W20S2G6
crwdns2931471:04crwdne2931471:0
crwdns2935297:013crwdne2935297:0
crwdns2947410:01crwdne2947410:0
How do I get whats on my hard drive to the new ssd?