crwdns2915892:0crwdne2915892:0
The screen/display is one of the most common repairs in all electronic devices. Screens and displays can easily crack or break when dropped from elevated surfaces and heights. Cracking the screen can result in cosmetic damages to the device, and any damage to the display may impact the overall functionality of a device. If your device is not displaying images properly or if there are dead pixels on the display, it may be time to replace it. Follow this guide to remove and replace the display of your device.
Removing the display from the Lenovo IdeaPad Flex 5-1570 can be difficult and tricky. In step 27 of this guide, you’ll notice the adhesive strips holding the screen to the rest of the display assembly. These adhesive strips are very strong, and you can easily break the screen if there is excessive force in removing the screen. The adhesive strips are approximately 1 cm wide and are located* 2 cm from the edges of the screen and 3 cm from the top. We recommend you to use a heat gun, hair dryer, or an iOpener to heat and loosen the adhesive strips. If you plan on using the iOpener, make sure to read the iOpener instructions before proceeding with this guide.
*This video does a good job of explaining and showing the location of the adhesive strips used to hold the screen together.
crwdns2942213:0crwdne2942213:0
-
-
Remove the ten 5 mm Phillips #00 screws that are holding the back panel on.
-
-
-
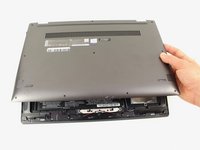
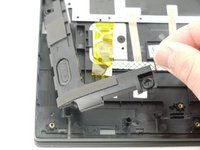
Use a spudger to pry open the back case at the two hinge cutouts.
-
Gently use the plastic opening tool around the edges of the laptop to pry up the clips holding the rest of the back panel.
-
-
-
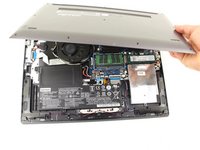
Once all the clips have been disengaged, lift off the back cover.
You should probably disconnect the battery immediately after opening the laptop. Don’t want to risk damaging your nice hardware.
-
-
-
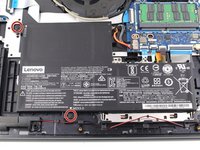
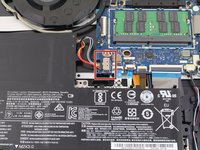
Remove the two 5 mm Phillips #00 screws that secure the battery in place.
-
-
-
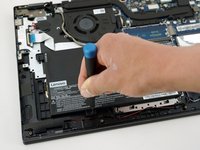
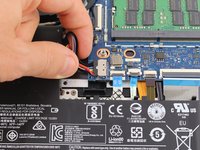
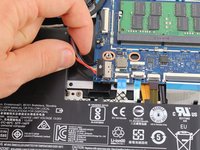
Using your fingers, grasp the entire bundle of wires to pull the battery cable from its connector. This will cut off power to the motherboard.
-
Remove the battery from the device.
My battery completely discharged and even plugging it in won’t power up my computer. I tried removing and replacing the battery, didn’t work, so I completely removed the battery and plugged it in, thinking that would isolate the battery as the issue, but still it will not power up, so I’m thinking it might not be the battery. Shouldn’t it work plugged in without a battery?
Any advice?
-
-
-
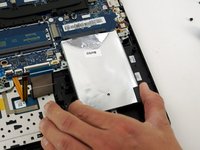
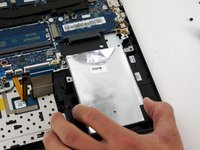
Remove the three 5 mm Phillips #00 screws that secure the hard drive.
-
-
-
Using your hands, gently pull the hard drive back, sliding it out from the port.
There is an adhesive pad under the hard drive that had become "glued" to the hard drive, probably due to material breakdown. This made removing the drive quite difficult. I eventually was able to pry the drive loose, but not without some superficial damage to the hard drive case.
-
-
-
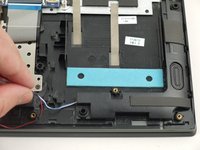
Remove the two 5 mm Phillips #00 screws that secure the fan in place.
-
-
-
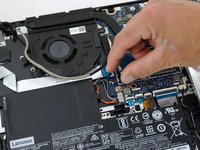
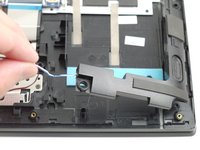
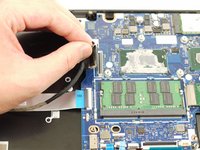
Using your hands, remove the wire that is wrapped around the base of the fan.
-
-
-
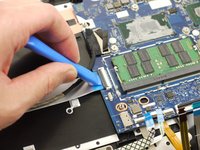
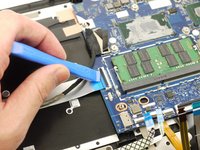
Disconnect the wire holding the fan and the motherboard together.
-
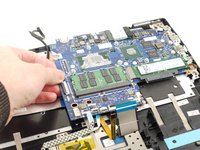
Remove the fan from the device.
-
-
-
-
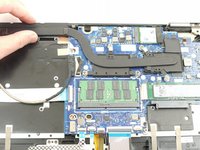
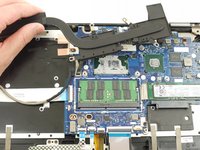
Using the Phillips #00 screwdriver, remove five 5 mm screws.
-
-
-
Carefully remove the heatsink from the device.
-
-
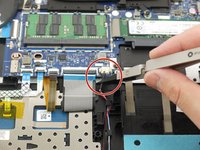
crwdns2935267:0crwdne2935267:0Tweezers$4.99
-
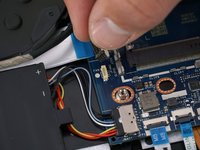
Using the iFixit nylon tipped tweezers, disconnect the wire that connects the speakers to the motherboard.
-
-
-
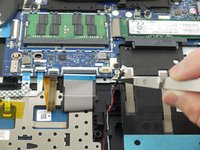
Using your hands, gently pull the left speaker up and out of the device.
-
-
-
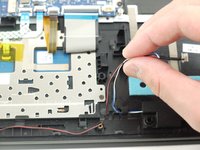
Repeat the previous step for the other speaker and remove the speakers from the device.
-
-
-
Using the Phillips #00 screwdriver, remove the three 5 mm Phillips #00 screws securing the motherboard.
-
-
-
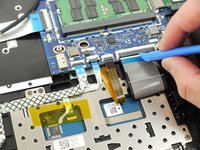
Disconnect the auxiliary port cable from the motherboard.
-
-
-
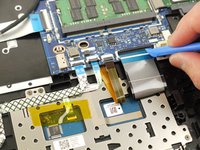
Using a plastic opening tool, unlock the four ZIF connectors of the flat cables.
-
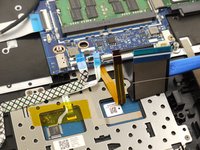
Lift up the connector locking tab and disconnect the cables from the motherboard.
-
-
-
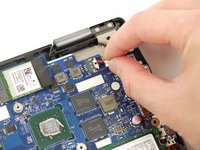
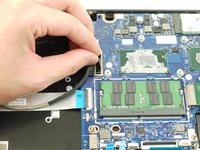
Disconnect the display cable from the motherboard.
-
-
-
Using the plastic opening tool, unlock the connector for the side ports panel and disconnect the cable from the motherboard.
-
-
-
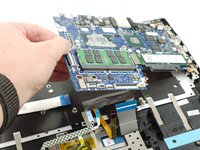
Carefully lift and remove the motherboard from the device.
-
-
-
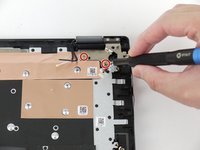
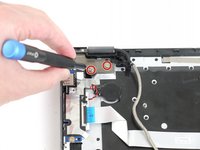
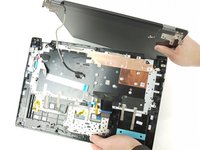
Using the Phillips #00 screwdriver, remove the four total 5 mm screws from the left and right hinges (two screws on each hinge).
-
-
-
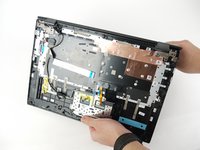
Disconnect the display assembly from the rest of the device.
-
-
-
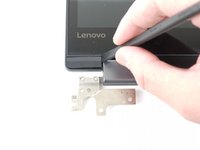
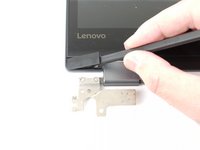
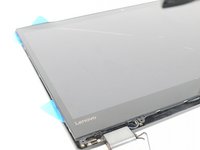
Flip the display assembly so that the screen is facing you.
-
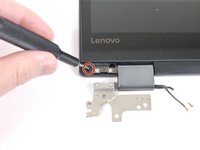
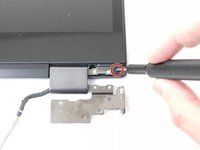
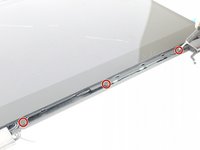
Using a spudger, remove the screw cover to expose two screws. Repeat this step for the cover on the right side of the screen.
-
-
-
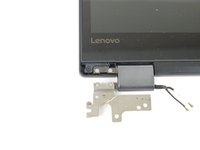
Using the Phillips #00 screwdriver, remove the two 3 mm screws from the display (one screw on each side).
-
-
-
Using the opening picks and a plastic opening tool, remove the middle screw cover at the bottom of the display assembly to expose three screws.
-
Use the Phillips #00 screwdriver to remove three 3mm screws from the display assembly.
I can confirm that removing this without dealing some sort of cosmetic damage is near impossible. Quite a snug fit!
-
-
-
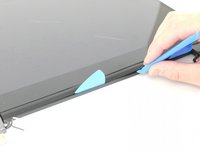
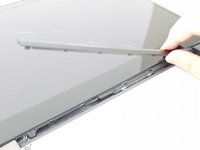
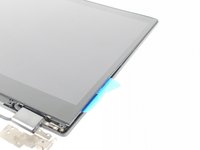
Carefully insert the opening picks into the edge of the display and display cover.
-
Work your way around the screen to remove it from the assembly.
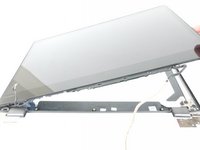
As stated on page 53 of the official Hardware Maintenance Manual, in order to remove the display, you’re better off using the pull tabs in order to remove the pull-to-release double-sided adhesive. Sure, the adhesive will be ruined once pulled away and you’ll need to provide your own double-sided tape when putting it all back together.
- Link to the manual: https://download.lenovo.com/consumer/mob...
- Screenshot of the relevant illustration: https://pixelware.com.bo/uploads/lenovo_...
I wouldn’t risk breaking an expensive display panel just to be able to reuse a couple of (potentially single-use) adhesive strips.
-
-
-
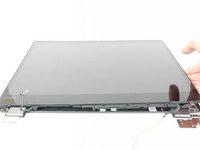
Lift the screen up and away from the rest of the display assembly.
-


To reassemble your device, follow these instructions in reverse order.
Take your e-waste to an R2 or e-Stewards certified recycler.
To reassemble your device, follow these instructions in reverse order.
Take your e-waste to an R2 or e-Stewards certified recycler.
crwdns2935221:0crwdne2935221:0
crwdns2935229:02crwdne2935229:0

crwdns2947410:01crwdne2947410:0
The amount of work required to replace the display assembly is crazy, considering how often these glass screens break. I’d even go as far as to say this model was designed to be tossed into the trash when broken.