crwdns2915892:0crwdne2915892:0
The motherboard is the most important part of the computer. It handles all of the tasks of the other components, and the computer would not work without it. This Flex 2-15 repair guide will show you how to replace it safely.
Signs your motherboard is faulty are that:
- Your PC will not turn on.
- The PC short cycles (keeps turning off)
The motherboard must be replaced so the PC can run and work processes. Without the motherboard, the PC cannot function, so it is important to keep your motherboard free of dust and clean every couple of months.
crwdns2942213:0crwdne2942213:0
-
-
Begin by taking the back plate off of your device. Using a Phillips head screw driver, take out the highlighted screws for your device.
-
-
-
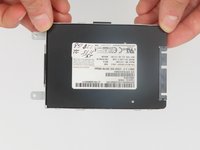
Remove battery from the motherboard by unplugging the cord and removing the screws.
-
-
-
Once you have the battery removed, locate the cable for your new battery and connect it on the same port from your old battery. Secure it onto the laptop by using the screws. After this step is complete, complete step 1 in reverse order to secure the plate cover over your motherboard.
-
-
-
Apply gentle pressure with the Philips #00 screwdriver through the hole to pop out the keyboard.
-
-
-
Lift up the keyboard with your fingers.
-
-
-
Flip up the black ZIF locking flap that secures the keyboard ribbon cable.
-
Disconnect the ribbon cable.
-
Remove the keyboard.
-
-
-
Use a Phillips #00 screwdriver to remove the one 4 mm screw on the left speaker.
-
-
-
Use a Phillips #00 screwdriver to disconnect the one 4 mm screw on the right speaker.
-
-
-
Disconnect the speaker the connector on the right speaker from the motherboard by pulling the connector out with your fingernail.
-
-
-
-
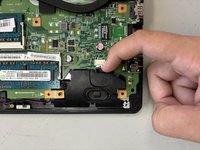
Gently lift the two speakers out with your hands.
-
-
-
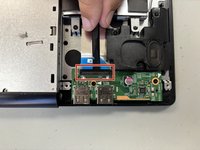
Flip up the black ZIF locking flap. Disconnect the ribbon cable.
-
-
-
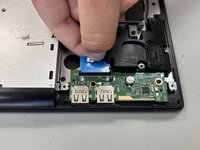
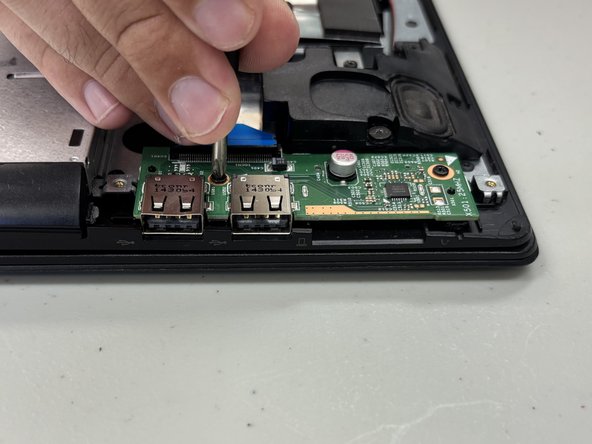
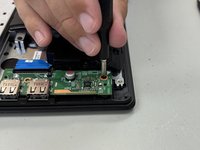
Remove the two 4 mm Phillips #00 screws that secure the daughterboard.
-
-
-
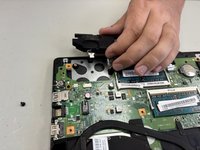
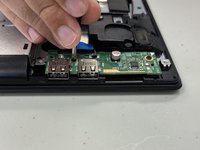
Grab the daughterboard with your fingers and lift it straight up and out of the chassis.
-
-
-
Begin by taking the back plate off of your device.
-
Using a Phillips head screw driver, take out the highlighted screws for your device.
-
-
-
Locate the SSD bay for your device via the highlighted portion.
-
-
-
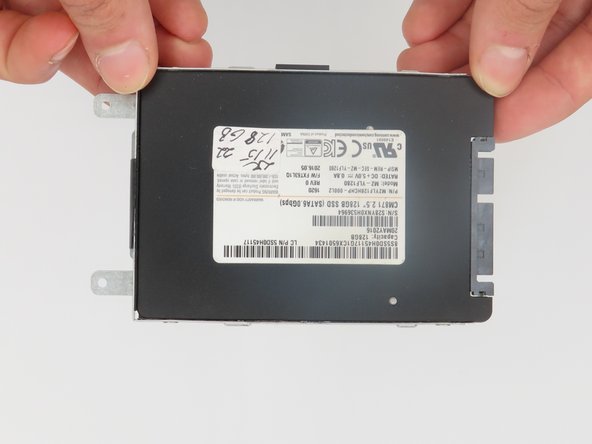
Using the pull tab shown here, gently take the SSD out of its highlighted slot.
-
-
-
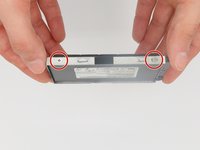
We will need to use a Phillips screwdriver to take the SSD out of its bay.
-
-
-
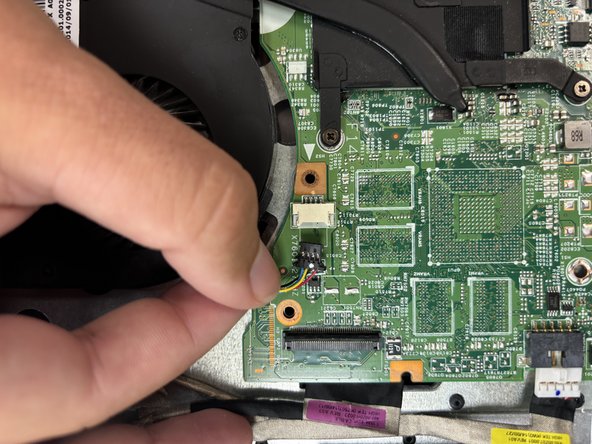
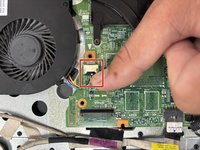
Disconnect the fan connector from the motherboard.
-
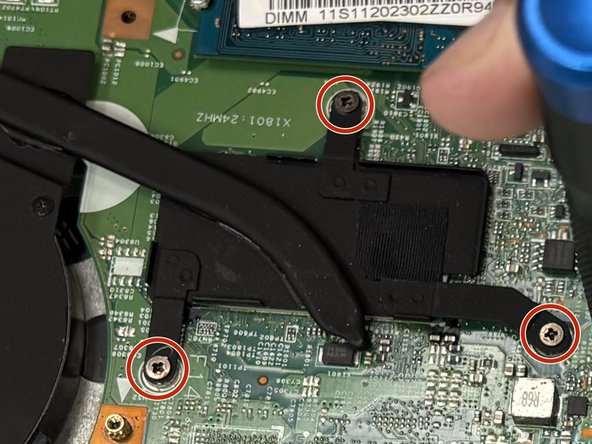
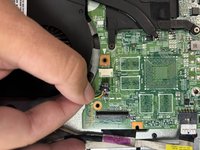
Remove the three 4 mm screws that secure the heatsink with a Phillips #00 screwdriver.
-
Remove the heatsink carefully and set aside.
-
-
-
Using your fingers, pinch the release levers on the side of the ribbon cable.
-
Remove the ribbon cable near the optical drive with your fingers.
-
-
-
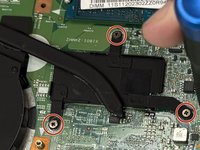
Remove the 4 mm standoff screws in the motherboard with a Phillips #00 screwdriver.
-
-
-
Flip up the black ZIF locking flap that secures the keyboard ribbon cable, then remove the cable.
-
Detach the keybribbon cable from the motherboard by prying with a spudger.
-
-
-
Remove the 4 mm Phillips screw under the keyboard with the Phillips #00 screwdriver.
-
-
-
Disconnect the two connector cables at the back of the motherboard with your fingers.
-
-
-
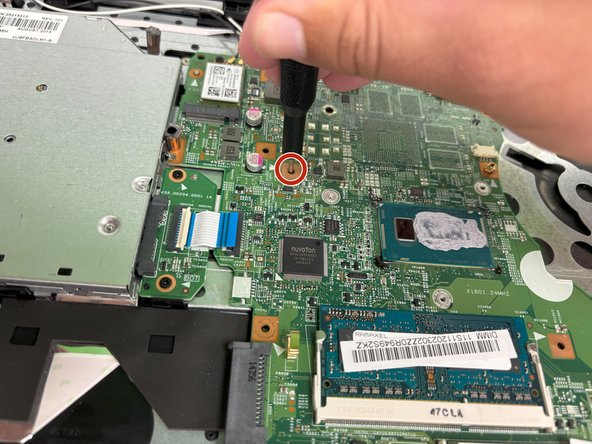
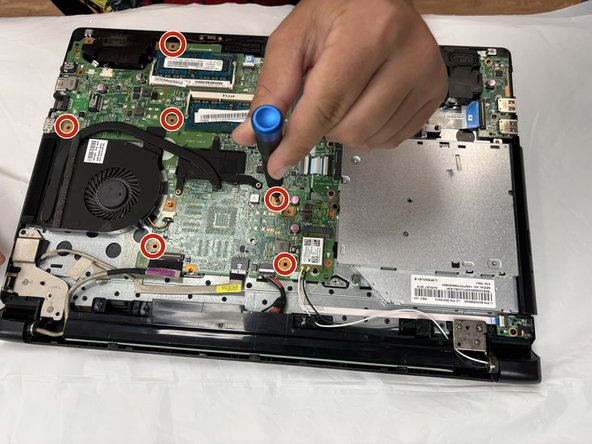
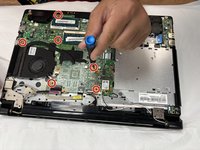
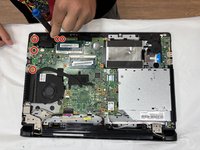
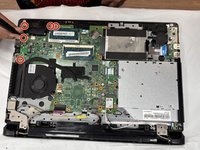
Remove the five 4 mm screws at the top of the motherboard using a Phillips #00 screwdriver.
-
-
-
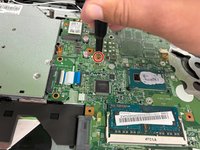
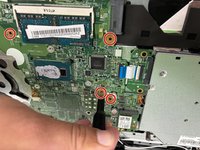
Remove the last standoff screw near the SSD drive with the Phillips #00 screwdriver.
-
-
-
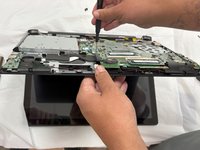
Gently lift and remove the motherboard from the laptop; there should be little resistance when removing it.
-


To reassemble your device, follow the above steps in reverse order.
Take your e-waste to an R2 or e-Stewards certified recycler.
Repair didn’t go as planned? Try some basic troubleshooting or ask our Answers community for help.

crwdns2935287:0crwdne2935287:0

University of North Texas, Team 3-6, Coppersmith Fall 2024 crwdns2935289:0University of North Texas, Team 3-6, Coppersmith Fall 2024crwdne2935289:0
UNT-COPPERSMITH-F24S3G6
crwdns2931471:04crwdne2931471:0
crwdns2935297:04crwdne2935297:0