crwdns2915892:0crwdne2915892:0
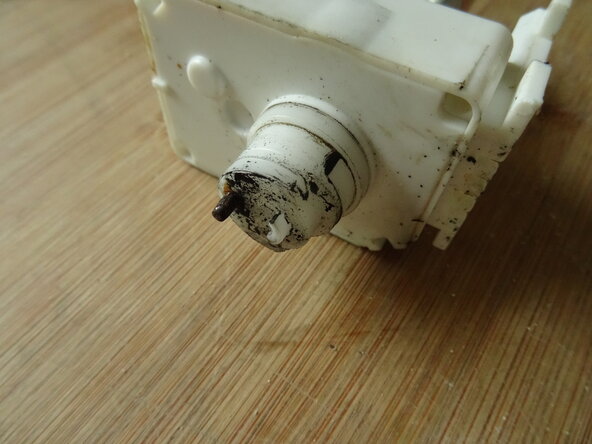
Many Jura machines have an electric ceramic valve, which Jura calls a multi-way valve. It controls the flow of water for hot water, steam, milk foam, and, of course, coffee. The ceramic valve can break, causing the machine to malfunction and often displaying error 6. Possible causes of the error include:
- (Micro-)crack in the distributor head
- Calcification, especially of the Ceramic disks/seals
- Defective microswitch
- Drive pin worn down inside
- Defective Motor
A repair doesn't always work, but because the replacement is not cheap, it's worth a try. The replacement of the microswitches is relatively easy.
The repair is shown on an Z6 (2018). The valves are very similar on other Models.
-
-
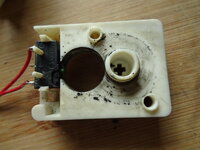
Unscrew the two Story T20 Screws from the Flange of the Motor and take it out carefully.
-
-
-
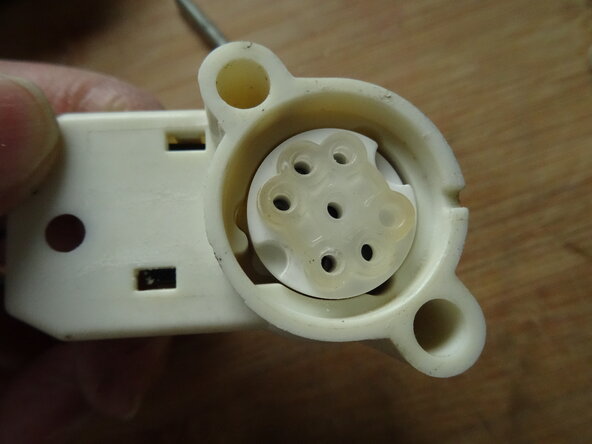
The distributor head with the ceramic discs is secured with two additional Torx screws. Once you loosen them, you can remove the head. Be sure to note the two nuts that come loose.
-
Motor
-
Flange
-
Distributor head
-
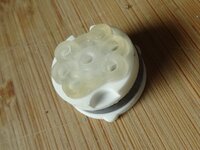
Carefully remove the black distributor head from the white part. Caution: the ceramic discs are now exposed. Blow into all connections and check that they are clear. You may need to descale the head.
-
Check the Head for Cracks. You can maybe find replacement parts here.
-
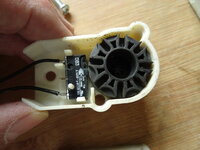
Check the driver for abrasion.
-
-
-
-
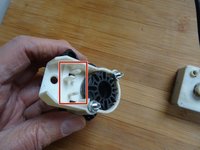
Here is the motor flange and the motor.
-
-
-
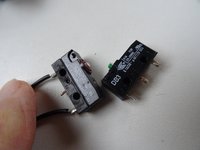
Image 1 shows the driver and one of the microswitches.
-
Images 2 and 3 show the pack of ceramic discs under the distributor head. Note the elastic seal made of transparent silicone. If the ceramic valve is not tight, replace this seal.
-
You can slide the discs apart, e.g. for descaling. However, be very careful as they can break.
-
Lightly grease the moving parts with food-safe silicone grease during assembly, but not the discs.
-
-
-
The Image shows an old and new switch. They are the most common cause of error of the Valve. It is clearly visible how the shutter button has been ground down by about 1 mm and can't activate.
-
One of the microswitches is plugged into the distributor head and one into the motor flange. It is held in place by side catches. Push them to the side and lift out the switches.
-
Desolder the Switches and resolder the new ones.
-
Good replacements are:Cherry DB3, Cherry DB3 or SAIA XCG3Z1.
-


To reassemble your device, follow the steps in reverse order.
crwdns2934873:0crwdne2934873:0
100%


crwdns2934885:0crwdne2934885:0 crwdns2934875:0crwdne2934875:0
crwdns2934877:0crwdne2934877:0 ›
crwdns2935287:0crwdne2935287:0

Repair is War on Entropy crwdns2935289:0Repair is War on Entropycrwdne2935289:0
Community
crwdns2931471:032crwdne2931471:0
crwdns2935297:01,563crwdne2935297:0