crwdns2933423:0crwdne2933423:0

Jura Ceramic Valve repair

crwdns2935425:03crwdne2935425:0

crwdns2936319:0crwdne2936319:0
crwdns2936315:0crwdne2936315:0
crwdns2931653:03crwdne2931653:0
Jura Keramikventil reparieren: crwdns2935265:00crwdnd2935265:01crwdnd2935265:02crwdne2935265:0 Jura Keramikventil reparieren: crwdns2935265:00crwdnd2935265:02crwdnd2935265:02crwdne2935265:0
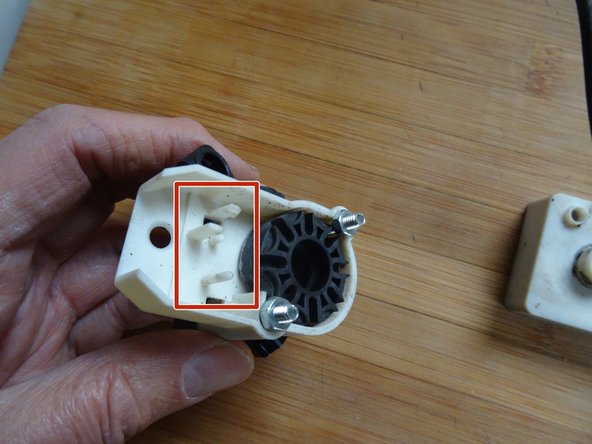
  • Das Bild zeigt einen alten und einen neuen Mikroschalter. Er ist die häufigste Fehlerquelle des Keramikventils. Es ist deutlich zu sehen, wie die Auslösetaste etwa 1 mm weit abgeschliffen ist. Der Schalter kann nicht mehr richtig auslösen.

  • Je einer der Mikroschalter ist im Verteilerkopf und im Motorflansch aufgesteckt. Er wird von seitlichen Rasten gehalten. Drücke sie zur Seite, dann kannst du die Mikroschalter herausheben.

  • Merke dir genau die Lage der Schalter und die Farbe der Anschlusskabel.

  • Entlöte die Schalter und löte die neuen Schalter an.

  • Als Ersatz eignet sich z.B. Cherry DB3, Cherry DC3 oder SAIA XCG3Z1

The Image shows an old and new switch. They are the most common cause of error of the Valve. It is clearly visible how the shutter button has been ground down by about 1 mm and can't activate.

One of the microswitches is plugged into the distributor head and one into the motor flange. It is held in place by side catches. Push them to the side and lift out the switches.

Notice the exact position of the switches and the colors of the cables they are connected to.

Desolder the Switches and resolder the new ones.

Good replacements are:Cherry DB3, Cherry DB3 or SAIA XCG3Z1.

crwdns2944171:0crwdnd2944171:0crwdnd2944171:0crwdnd2944171:0crwdne2944171:0