crwdns2915892:0crwdne2915892:0
A jeans button (also called a tack) keeps a pair of jeans securely fastened at the waist.
This guide will demonstrate how to install a new jeans button.
Read through the entire guide before starting the repair, and gather the necessary tools and materials. While Patagonia-specific materials are ideal, they are not required. Patagonia replacement parts can be obtained by calling or messaging Patagonia Customer Service.
Alternatively, Patagonia products can be taken to a local retail store for repair evaluation or sent in to Patagonia through their mail-in repair service.
Let's get fixing!
WARNING! Small Parts. Patagonia does not recommend conducting these repairs on garments intended for children age 3 or under. Instead, we recommend return of the product for professional repair services.
Related tutorial: Rivet Replacement on Work Pants
crwdns2942213:0crwdne2942213:0
-
-
Gather the replacement pieces, including a button and tack.
-
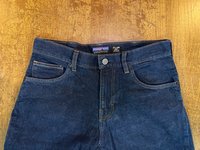
Lay the jeans front-side up on a sturdy table or workbench.
-
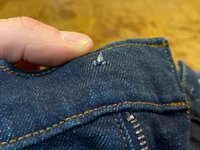
Unzip the fly and find the hole at the waistband where the previous button was located.
-
Remove all remnants of the old button before installing the new one. Discard the old pieces responsibly.
 crwdns2952109:0crwdne2952109:0
-
-
-
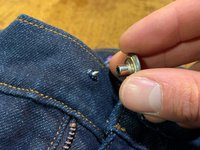
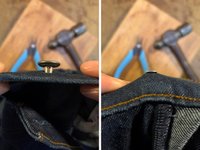
Insert the tack into the back of the hole.
-
Push the tack into the hole until it's flush with the waistband.
-
-
-
-
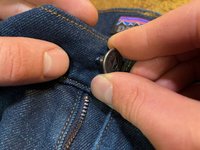
Holding the tack in place from behind, place the button on top of the tack and hold the pieces in place with your fingers.
-
-
-
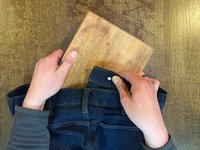
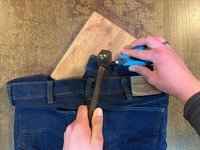
Flip the jeans over and place a soft flat work surface directly beneath the button, like a soft piece of wood or leather.
-
Use a pair of needle nose pliers to hold the tack in place, making sure the tack and button pieces are still aligned.
-
Hammer the tack with a straight downward pound.
-
-
-
Test the new button by buttoning the jeans and pulling on the waistband, to ensure it's set and secure.
-


crwdns2935221:0crwdne2935221:0
crwdns2935229:051crwdne2935229:0


crwdns2947412:010crwdne2947412:0
Nice, but let's consider how this situation occurs. The tack comes out of its hole, just simply replacing it is not realistic, unless the new tack is significantly bigger. So how do you "repair" the hole such that it will hold a tack again?
Gabe Misura - crwdns2934203:0crwdne2934203:0 crwdns2950251:0crwdne2950251:0
As noted in step 2, you can move the tack over to where the denim isn't damaged. If that will cause the jeans not to fit properly, you can sew a folded piece of denim behind the hole (sew around the edges on the inside of the jeans) and punch the tack through the new piece.
Brittany McCrigler - crwdns2934203:0crwdne2934203:0 crwdns2950251:0crwdne2950251:0
I didn´t have a new button and was in a pinch. Just ripped the old button off completely, jammed it in the tail end of a hammer and yanked it apart with som pliers. Then i followed the instructions in this fix. Worked like a charm, so far...
fredrikbendiksen - crwdns2934203:0crwdne2934203:0 crwdns2950251:0crwdne2950251:0
Thanks I’m gonna try this first!
Lynsey Truhlicka - crwdns2934203:0crwdne2934203:0 crwdns2950251:0crwdne2950251:0
The best thing to do is patch the hole. I simply use fabric glue and some pieces of blue jeans that you probably have hanging around. Trim off the extra threads and then apply fabric glue to the back of the waist band covering the hole made by the old button. Do the same on the front and then let dry. about 30 minutes or so, if you have a machine I always stitch back and for on the edges. Trim any edges or use additional glue to tack them down. Now because you have strengthened the hole carefully push the back of the button through where you can see the end, add the front to the nail end and turning the garment face down on a protected hard surface hammer about 3 times and check to see if it is sturdy, continue to hammer until you have reached the objective. Now you have got many more years with that button.
melanie1150 - crwdns2934203:0crwdne2934203:0 crwdns2950251:0crwdne2950251:0