crwdns2915892:0crwdne2915892:0
Use this guide to replace a worn-out or dead battery in your JBL Flip 6.
The model you see in this guide is the TT version. There are different models of the JBL Flip 6 that differ in their build and internal connectors.
This guide can be used as a reference when repairing other versions, but some disassembly steps may vary.
Check the first two digits of the serial number to find the model of your device. You can find the serial number printed on the packaging or on the speaker's leash bar.
For your safety, discharge the battery before disassembling your device. This reduces the risk of fire if the battery is accidentally damaged during the repair. If your battery is swollen, take appropriate precautions.
crwdns2942213:0crwdne2942213:0
-
-
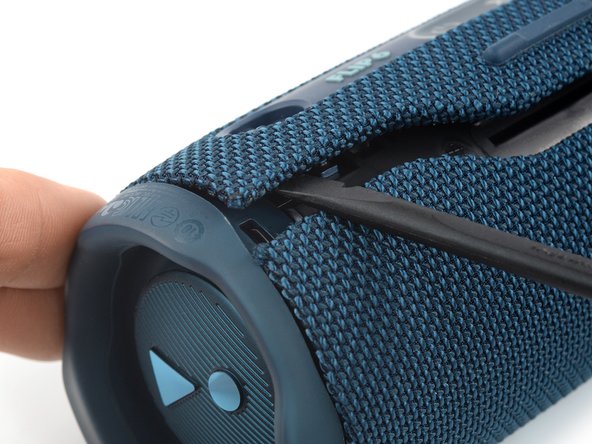
Insert the flat end of a spudger into the seam between the two halves of the fabric cover.
-
Push the spudger underneath the edge of the fabric cover without the control panel and pry upwards to release its plastic clips.
 crwdns2952109:0crwdne2952109:0
-
-
-
Repeat the previous step, using your spudger to work your way along the entire seam to release the remaining plastic clips.
-
-
-
Insert the flat end of a spudger underneath the opposite edge of the fabric cover—the side with the control panel.
-
Pry upwards to release the plastic clip.
-
-
-
Repeat the previous step to release the last plastic clip on the other end of the fabric cover.
-
-
-
Use one hand to spread the edges of the fabric cover apart and your other hand to pull the speaker assembly away from the cover.
-
Remove the fabric cover.
-
-
-
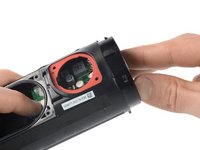
Insert the flat end of a spudger underneath the passive radiator housing near one of the plastic clips.
-
Pry upwards to release the first plastic clip holding the passive radiator housing in place.
-
-
-
Repeat the previous step to release all of the plastic clips holding the housing in place.
-
-
-
Remove the right passive radiator.
-
-
-
Use a Phillips screwdriver to remove the two 9.5 mm-long screws securing the safety bracket.
-
-
-
crwdns2935267:0crwdne2935267:0Tweezers$4.99
-
Use a pair of tweezers or your fingers to remove the safety bracket.
-
-
-
Use a Phillips screwdriver to remove the four 9.5 mm-long screws securing the woofer.
-
-
-
Lift the woofer out of its recess and place it next to the speaker assembly.
-
-
-
Use a pair of tweezers to grasp the sides of the woofer connector.
-
Slide the connector out of its socket, gently wiggling it left and right to loosen the clips securing it.
-
-
-
Use a Phillips screwdriver to remove the two 9.5 mm-long screws securing the tweeter.
-
-
-
A connector next to the woofer connector, which can be disconnected just like the woofer's.
-
A spade connector with contact springs, which can be disconnected by simply prying up the tweeter.
-
To pry up the tweeter, insert the tip of a spudger between the battery connector and the connector stem of the tweeter and gently press the tweeter upwards to push the stems out of their contact springs.
-
-
-
Use a spudger to pry up the tweeter.
-
Remove the tweeter.
-
-
-
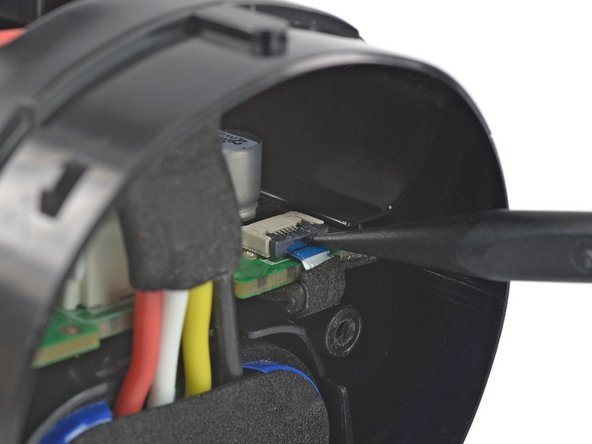
Use the tip of a spudger or your fingernail to flip up the small, hinged locking flap on the power button cable ZIF connector.
-
-
-
Use a pair of tweezers to pull the power button cable out of the ZIF connector.
-
-
-
Use the tip of a spudger or your fingernail to flip up the small, hinged locking flap on the charging cable ZIF connector.
-
-
-
Use a pair of tweezers to pull the charging cable out of the ZIF connector.
-
-
-
Use the tip of a spudger or your fingernail to flip up the small, hinged locking flap on the volume button cable ZIF connector.
-
-
-
Use a pair of tweezers to pull the volume button cable out of the ZIF connector.
-
-
-
Insert a finger into the woofer cutout and press against the left edge of the motherboard.
-
Push the motherboard out of the speaker assembly just until you get free access to the battery connector. You don't need to push it out all the way.
-
-
-
Squeeze the tab against the connector, and pull the connector straight up from its socket to disconnect the battery.
-
-
-
Pull the battery out of the speaker assembly to remove it.
-


If possible, power on your device and test your repair before reassembly. For optimal performance, calibrate your newly installed battery after completing this guide.
To reassemble your device, follow these instructions in reverse order.
Take your e-waste to an R2 or e-Stewards certified recycler.
Repair didn’t go as planned? Try some basic troubleshooting, or ask our Answers community for help.
crwdns2935221:0crwdne2935221:0
crwdns2935229:014crwdne2935229:0


crwdns2947412:02crwdne2947412:0
Donde puedo y me recomiendas comprar la bateria de mi Flip 6
Juan - crwdns2934203:0crwdne2934203:0 crwdns2950251:0crwdne2950251:0
Yowza! ABSOLUTELY Great directions. THANK YOU!
I Read thru this while trying to decide which small portable Bluetooth speaker to buy. Tired of tossing units because the battery is not replaceable. This JBL Flip 6 IS but >>> WOW - not exactly easy for someone not too experienced. Guess I will just have to learn and gain experience. Sure wish Samsung/JBL made life easier for users tho. The only thing that looks 'iffy' for this speaker is the fraying fabric. I guess nail polish might stop the fraying.
[As for getting back into 'fixing' things - reminds me that when i was 6 i took my Baby Ben Clock apart and after reconstruction there was ONE screw left over. Clock worked for the next 23 years as I moved frm place to place and then it somehow just disappeared (alas). Since then (some 50 yrs) I've always wondered WHY the clock was constructed with an 'extra' screw in the first place]
Abi Woodbridge - crwdns2934203:0crwdne2934203:0 crwdns2950251:0crwdne2950251:0